

Appearance
Your First Job, End to End
One job, every screen it touches, on a workspace that has finished the setup wizard. The example is Northside Football Club: 24 black tees, one colour front print, needed in two weeks. Do it once with your own email as the customer's and the rest of the product makes sense.
A fresh workspace already has sizes XS to 3XL, six decoration methods with starter rates, a volume break rule and the message templates, so you can quote before configuring anything. If you loaded sample data, the sample quote is this walk-through with the customer and garments already in place.
Where It Lives
| Page | What it's for |
|---|---|
| Records, then Customers | The organisation, its contacts and addresses |
| Operate, then Quotes | Priced lines, sent for acceptance |
| Operate, then Orders | The committed job: artwork, stages, printouts, invoice |
| Operate, then Production | The board every open order sits on |
/workspace/scan and /workspace/timeclock | Stage advance by barcode, and time on the job |
| Records, then Invoices | Payment, reminders, PDF |
1. Create the Customer
- Records, then Customers, then New customer.
- Fill in Name. Leave Price list empty for list price, or pick one. Payment terms defaults to Net 7 and sets the due date on every invoice for this customer. Press Create.
- On the customer page, under Contacts, press Add contact: Name, Email, Phone, and tick Primary contact. Quotes, proofs and invoices go to the primary contact when a quote names nobody. Press Create.
- Under Addresses, press Add address and tick Default billing address and Default shipping address. Orders copy these defaults when a quote is accepted, and the packing slip reads them.
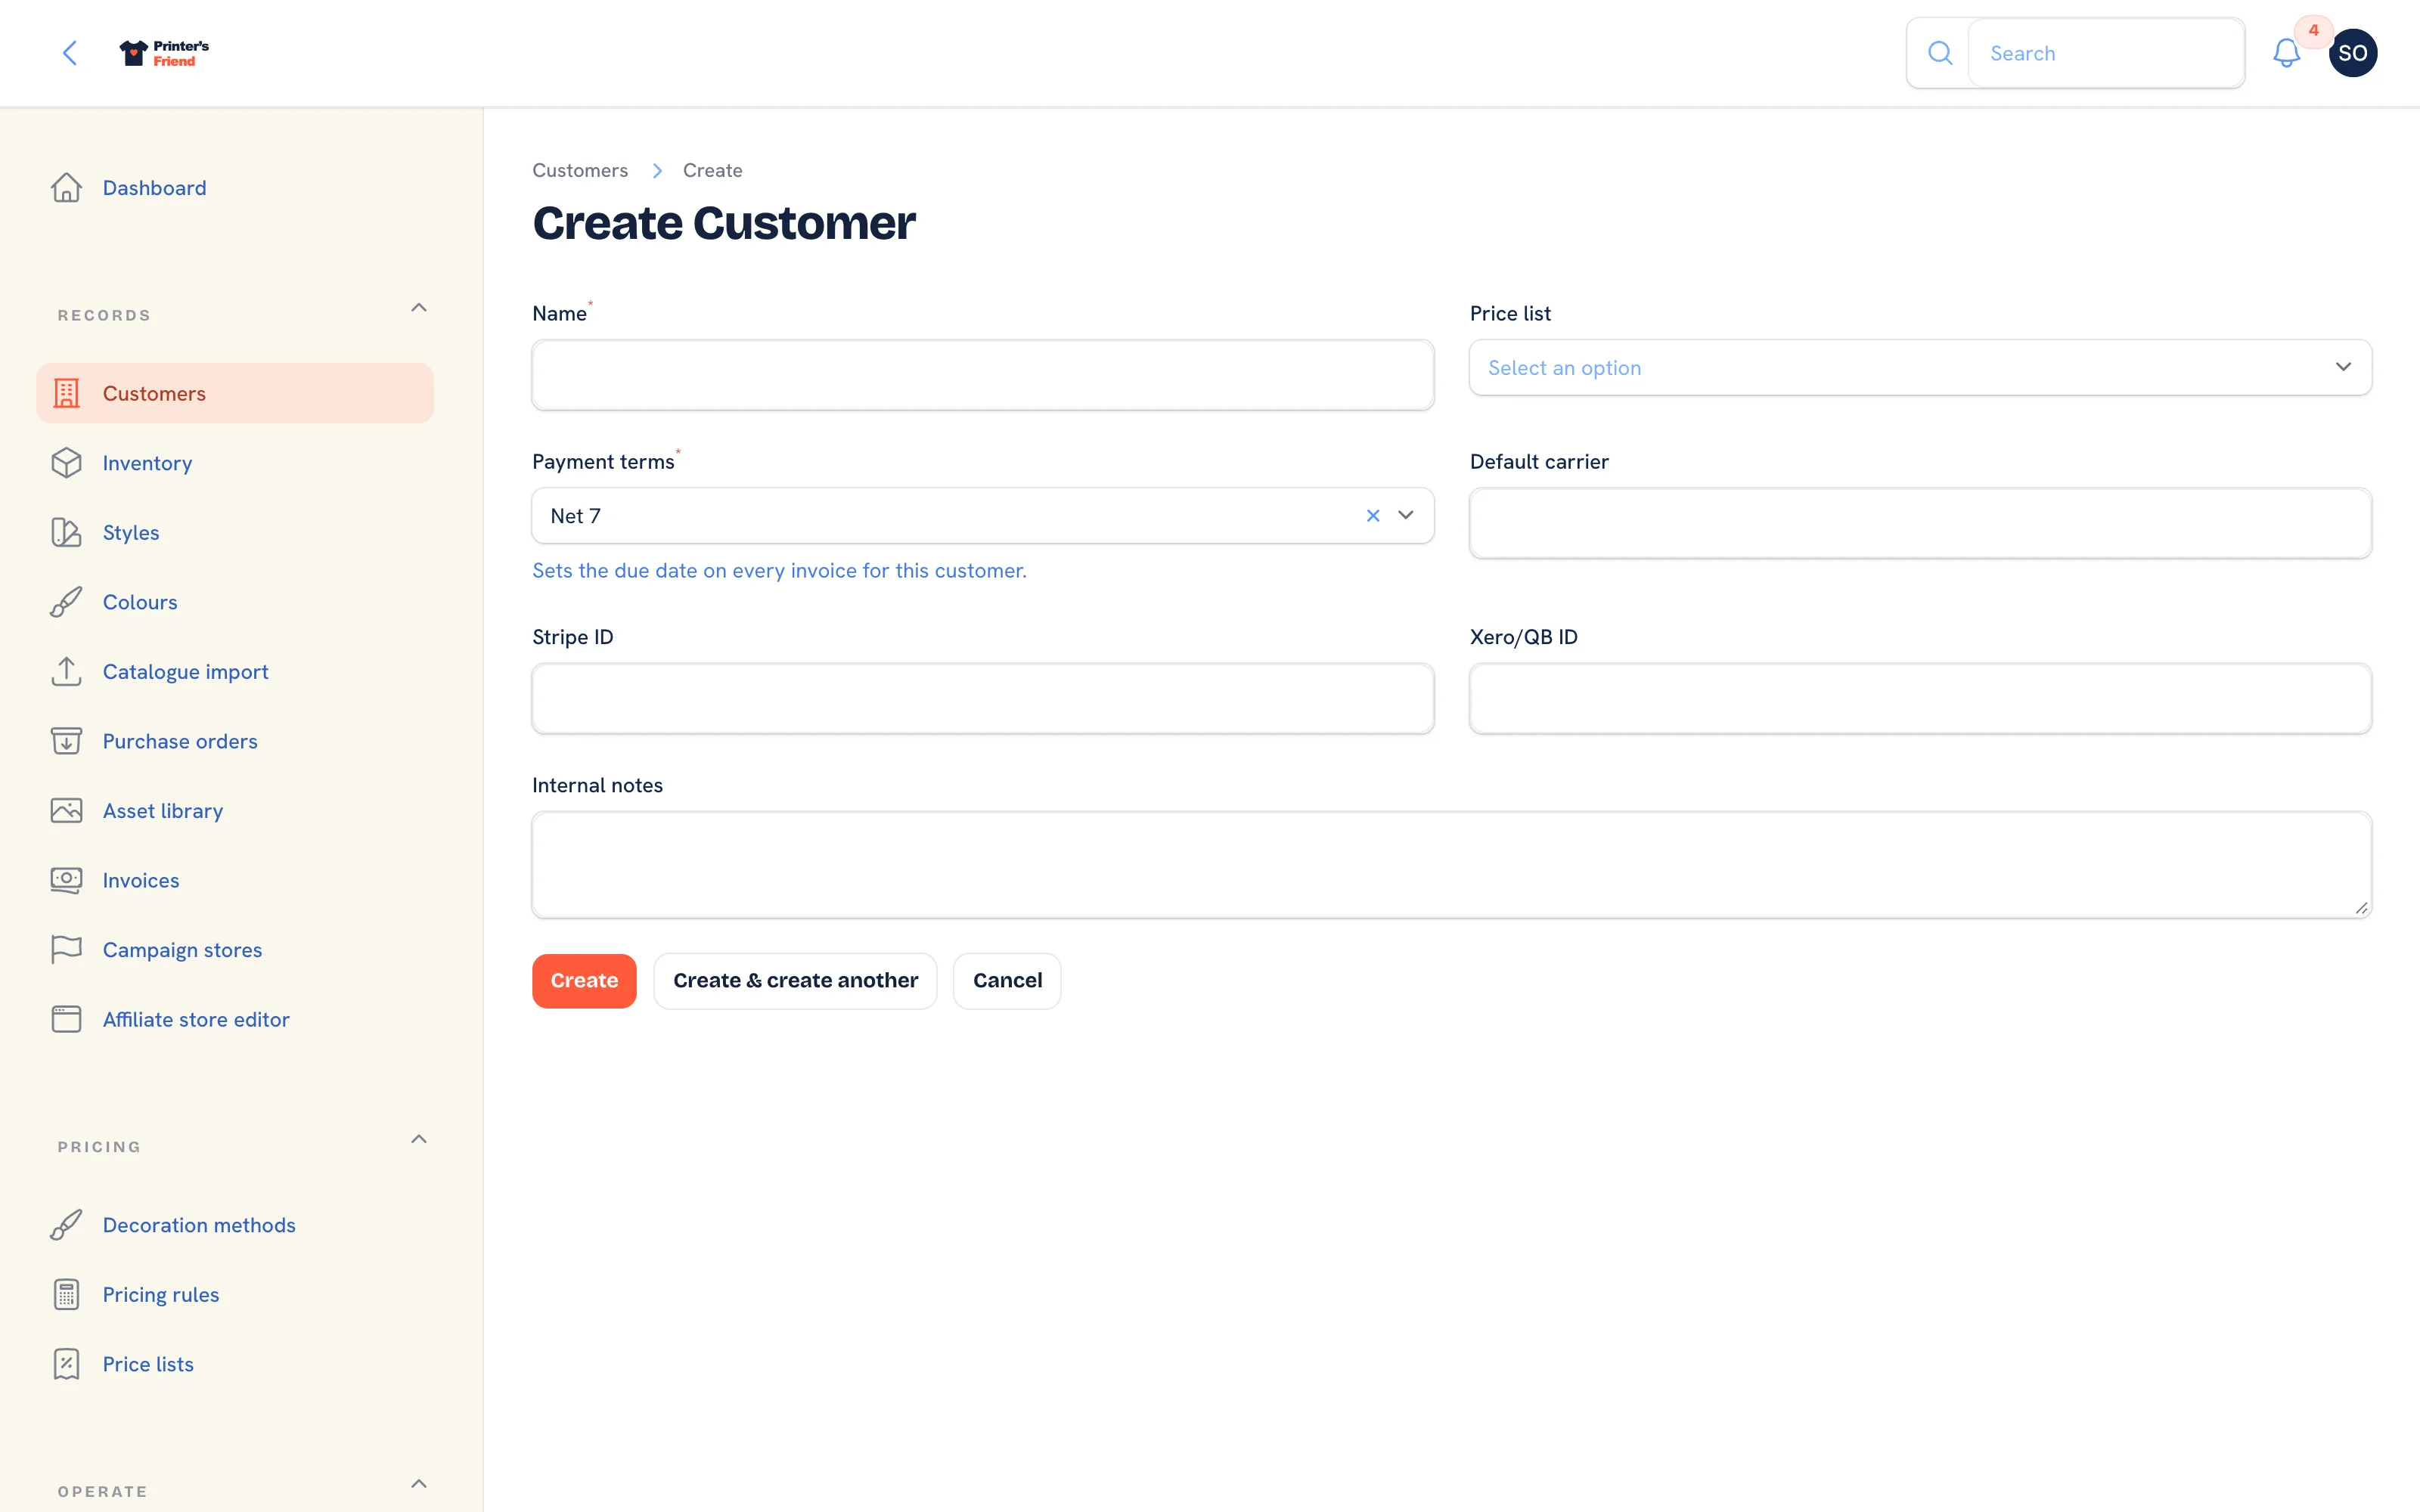 Creating a customer. Payment terms are a fixed set, so the due date is never guessed.
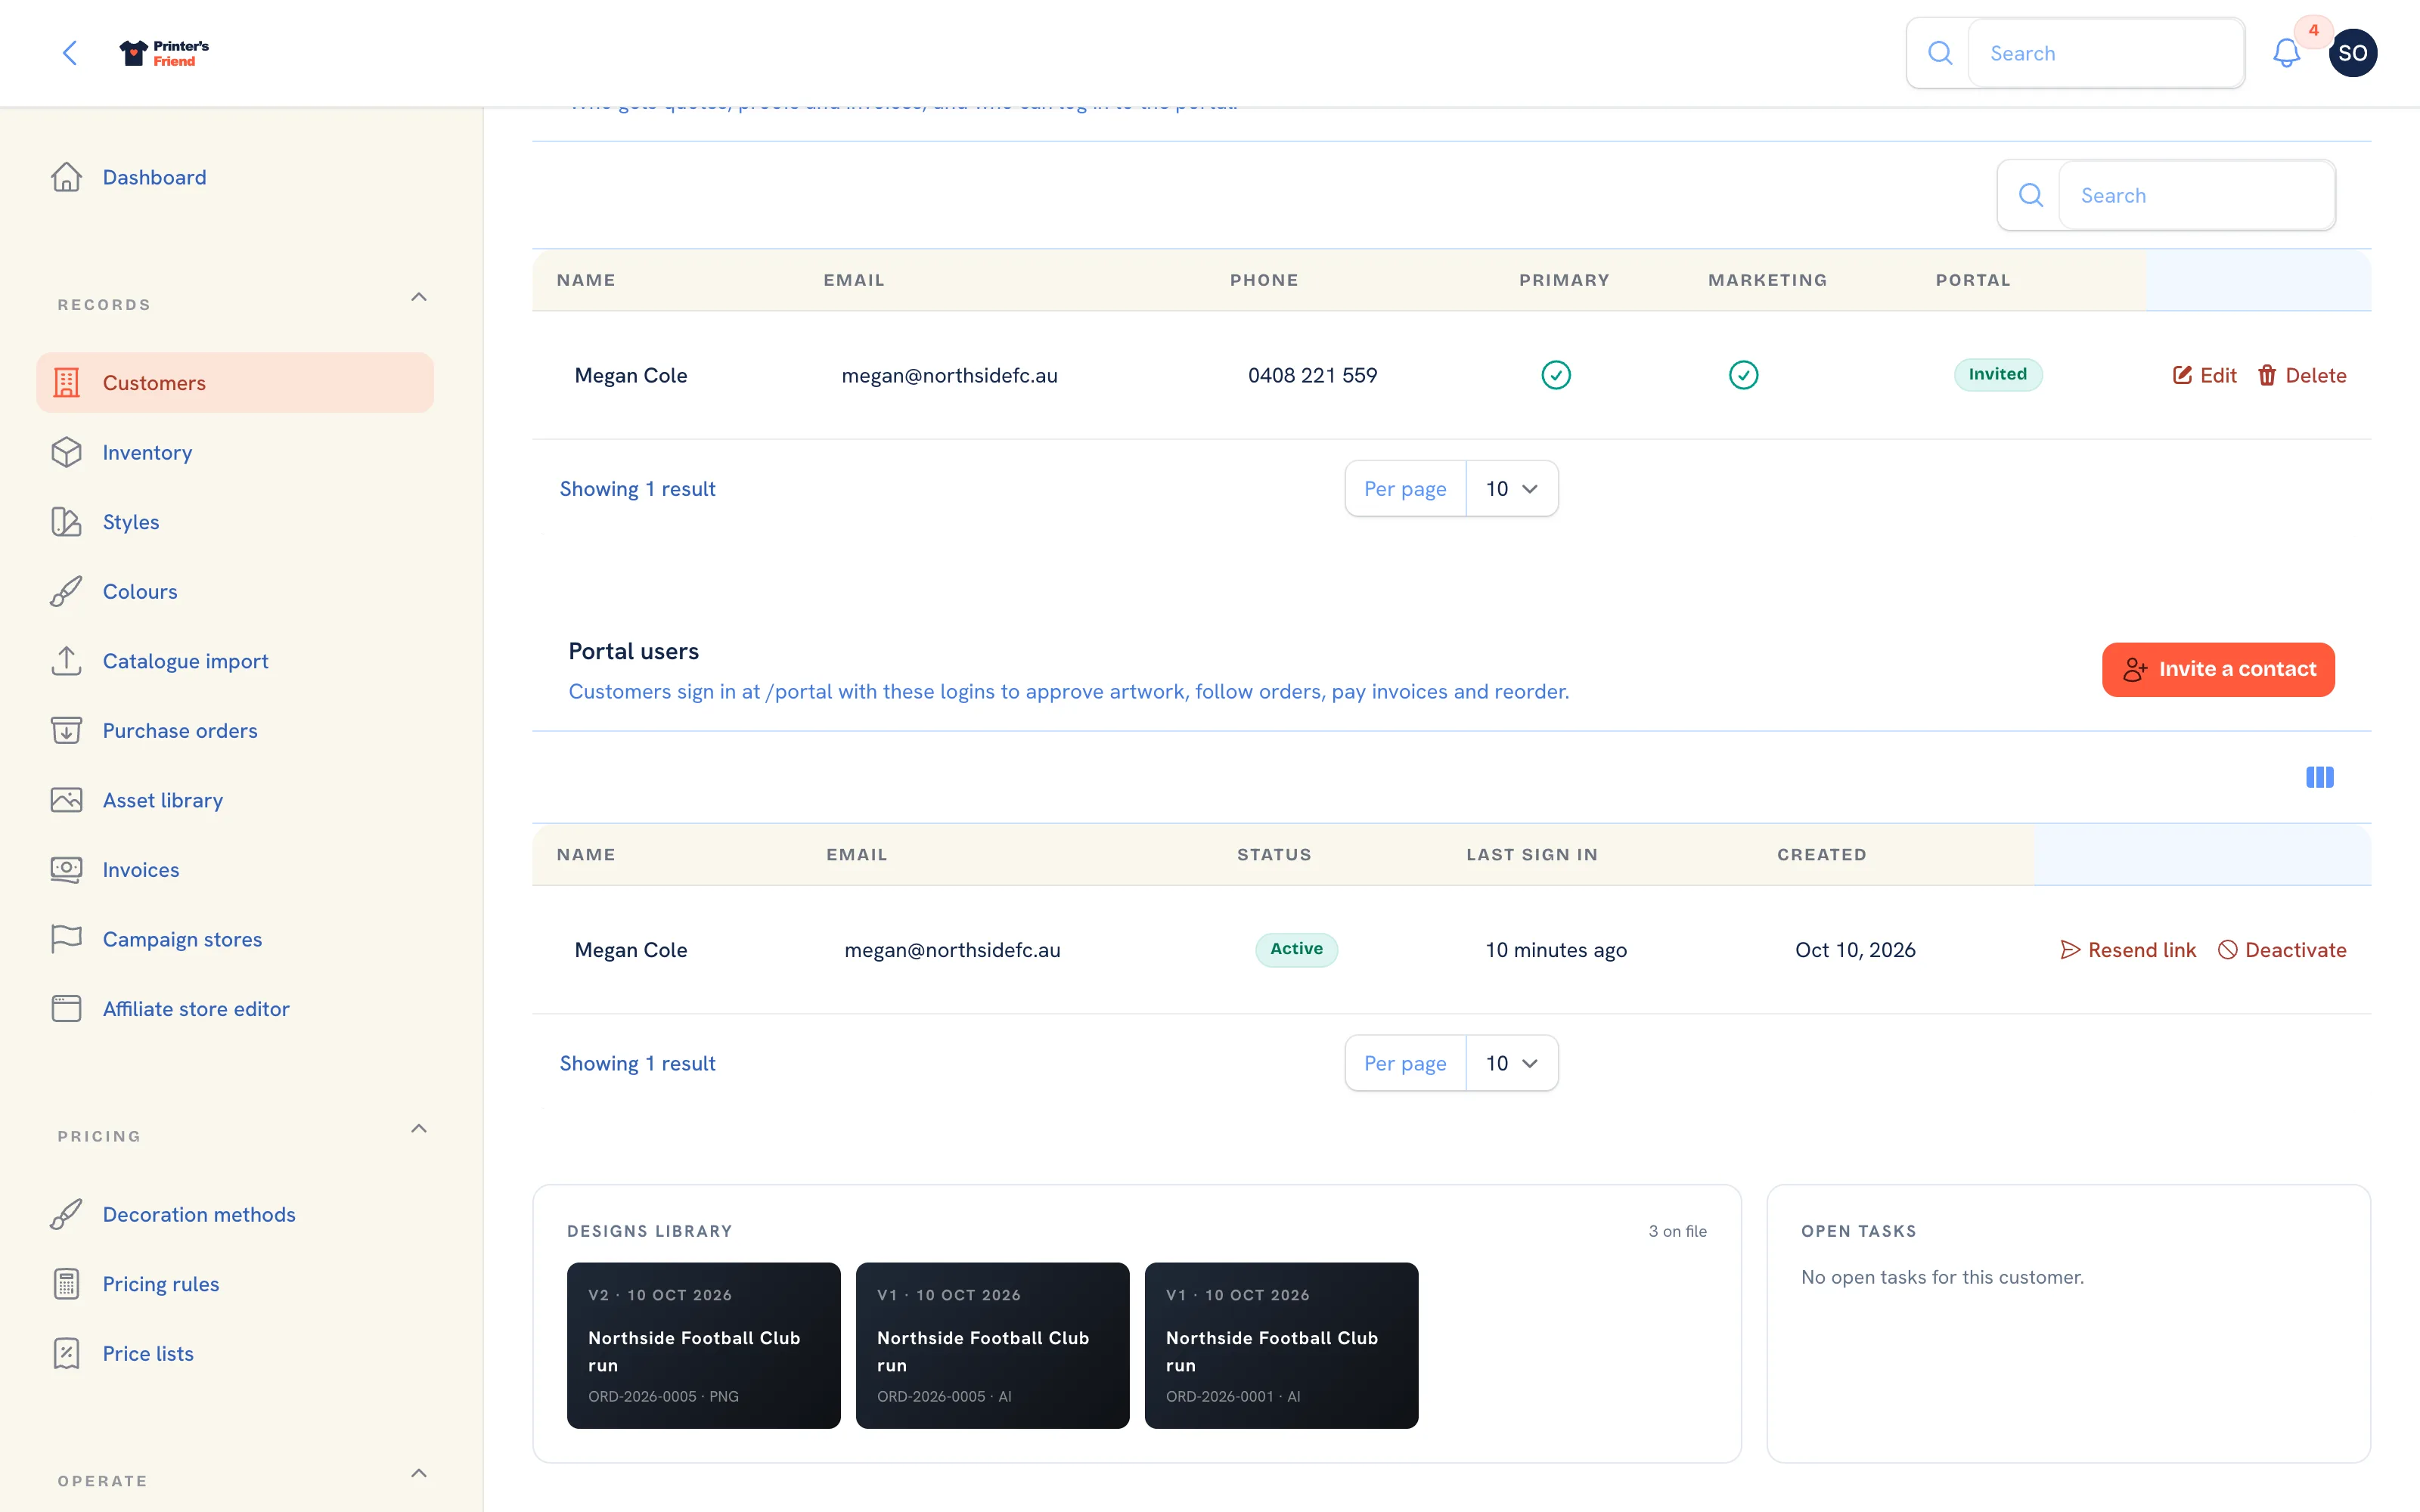 The customer page, scrolled to contacts, addresses and portal logins.
2. Quote It
- Operate, then Quotes, then New quote. Pick the Customer and the Contact, set the required by date, add notes, and press Create.
- On the quote, press Add line. Choose the Garment SKU, the Decoration method, the number of Print colours and the Quantity. Unit price is for custom lines only; a line with a SKU prices itself. Press Submit. Totals reprice on every change.
- Read the pricing rules panel on the quote. Every rule that fired is listed with its effect, and the trail stays on the quote even if you change the rule later.
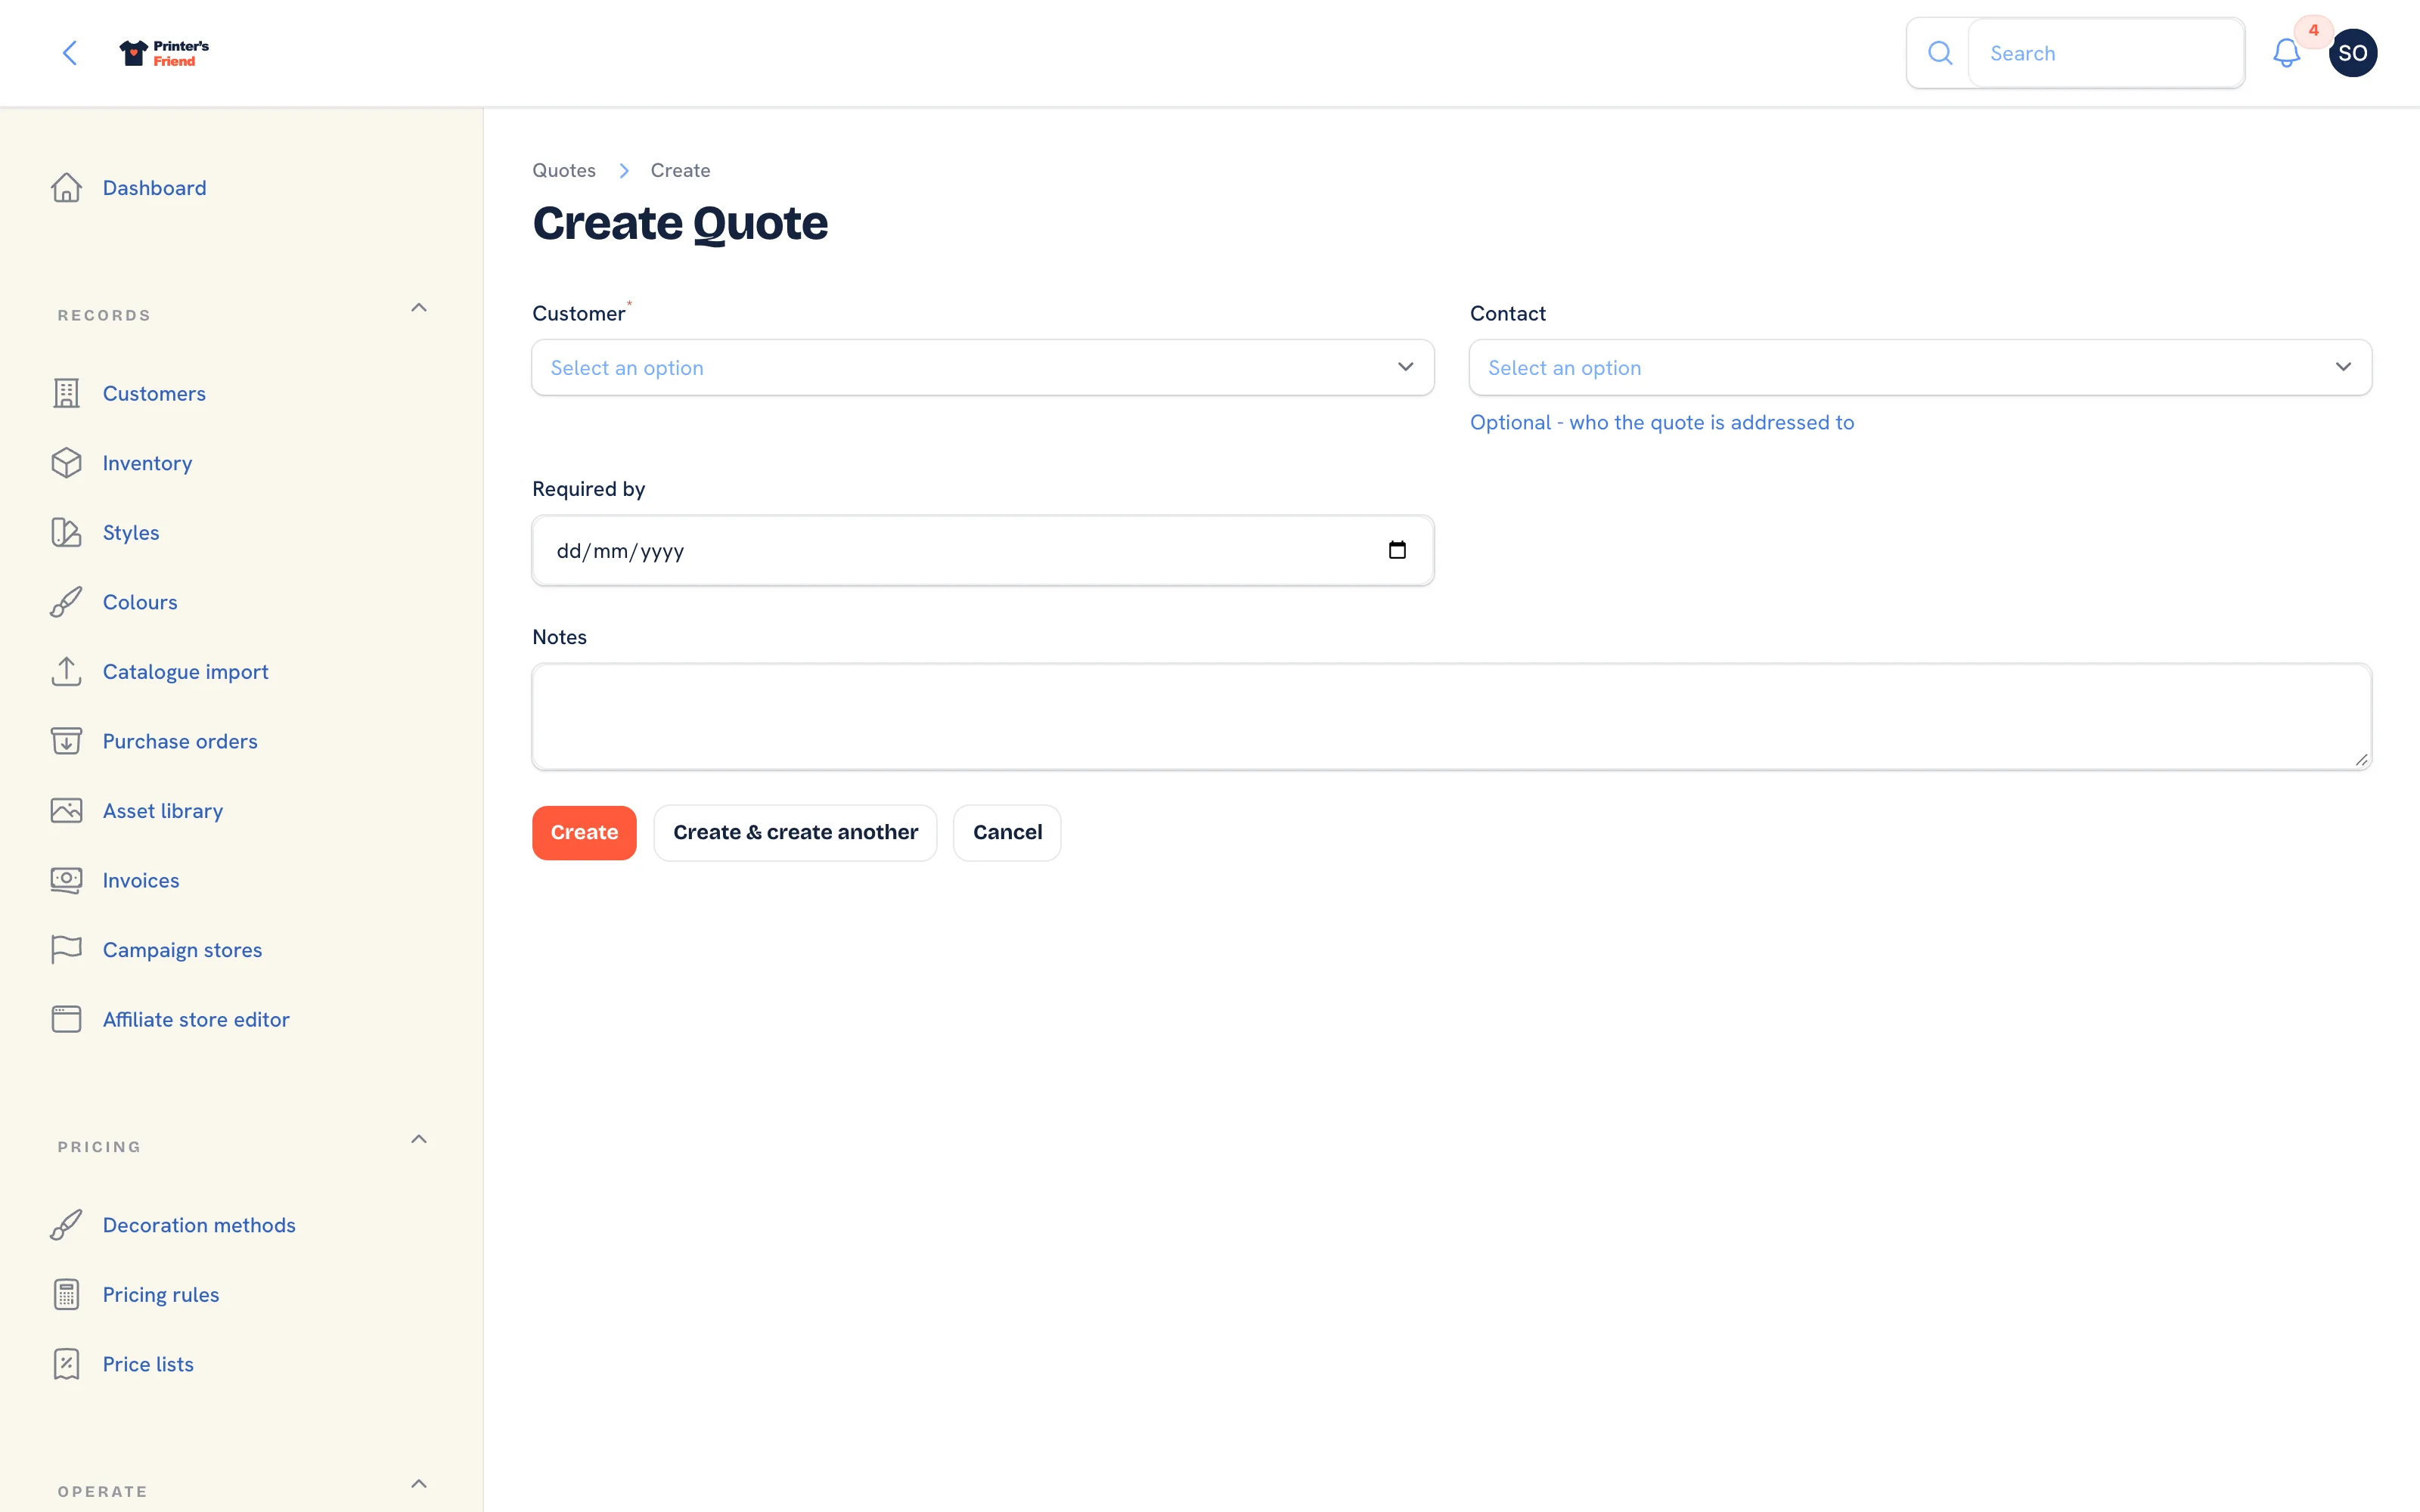 Starting a quote. The customer's price list and terms come with the customer.
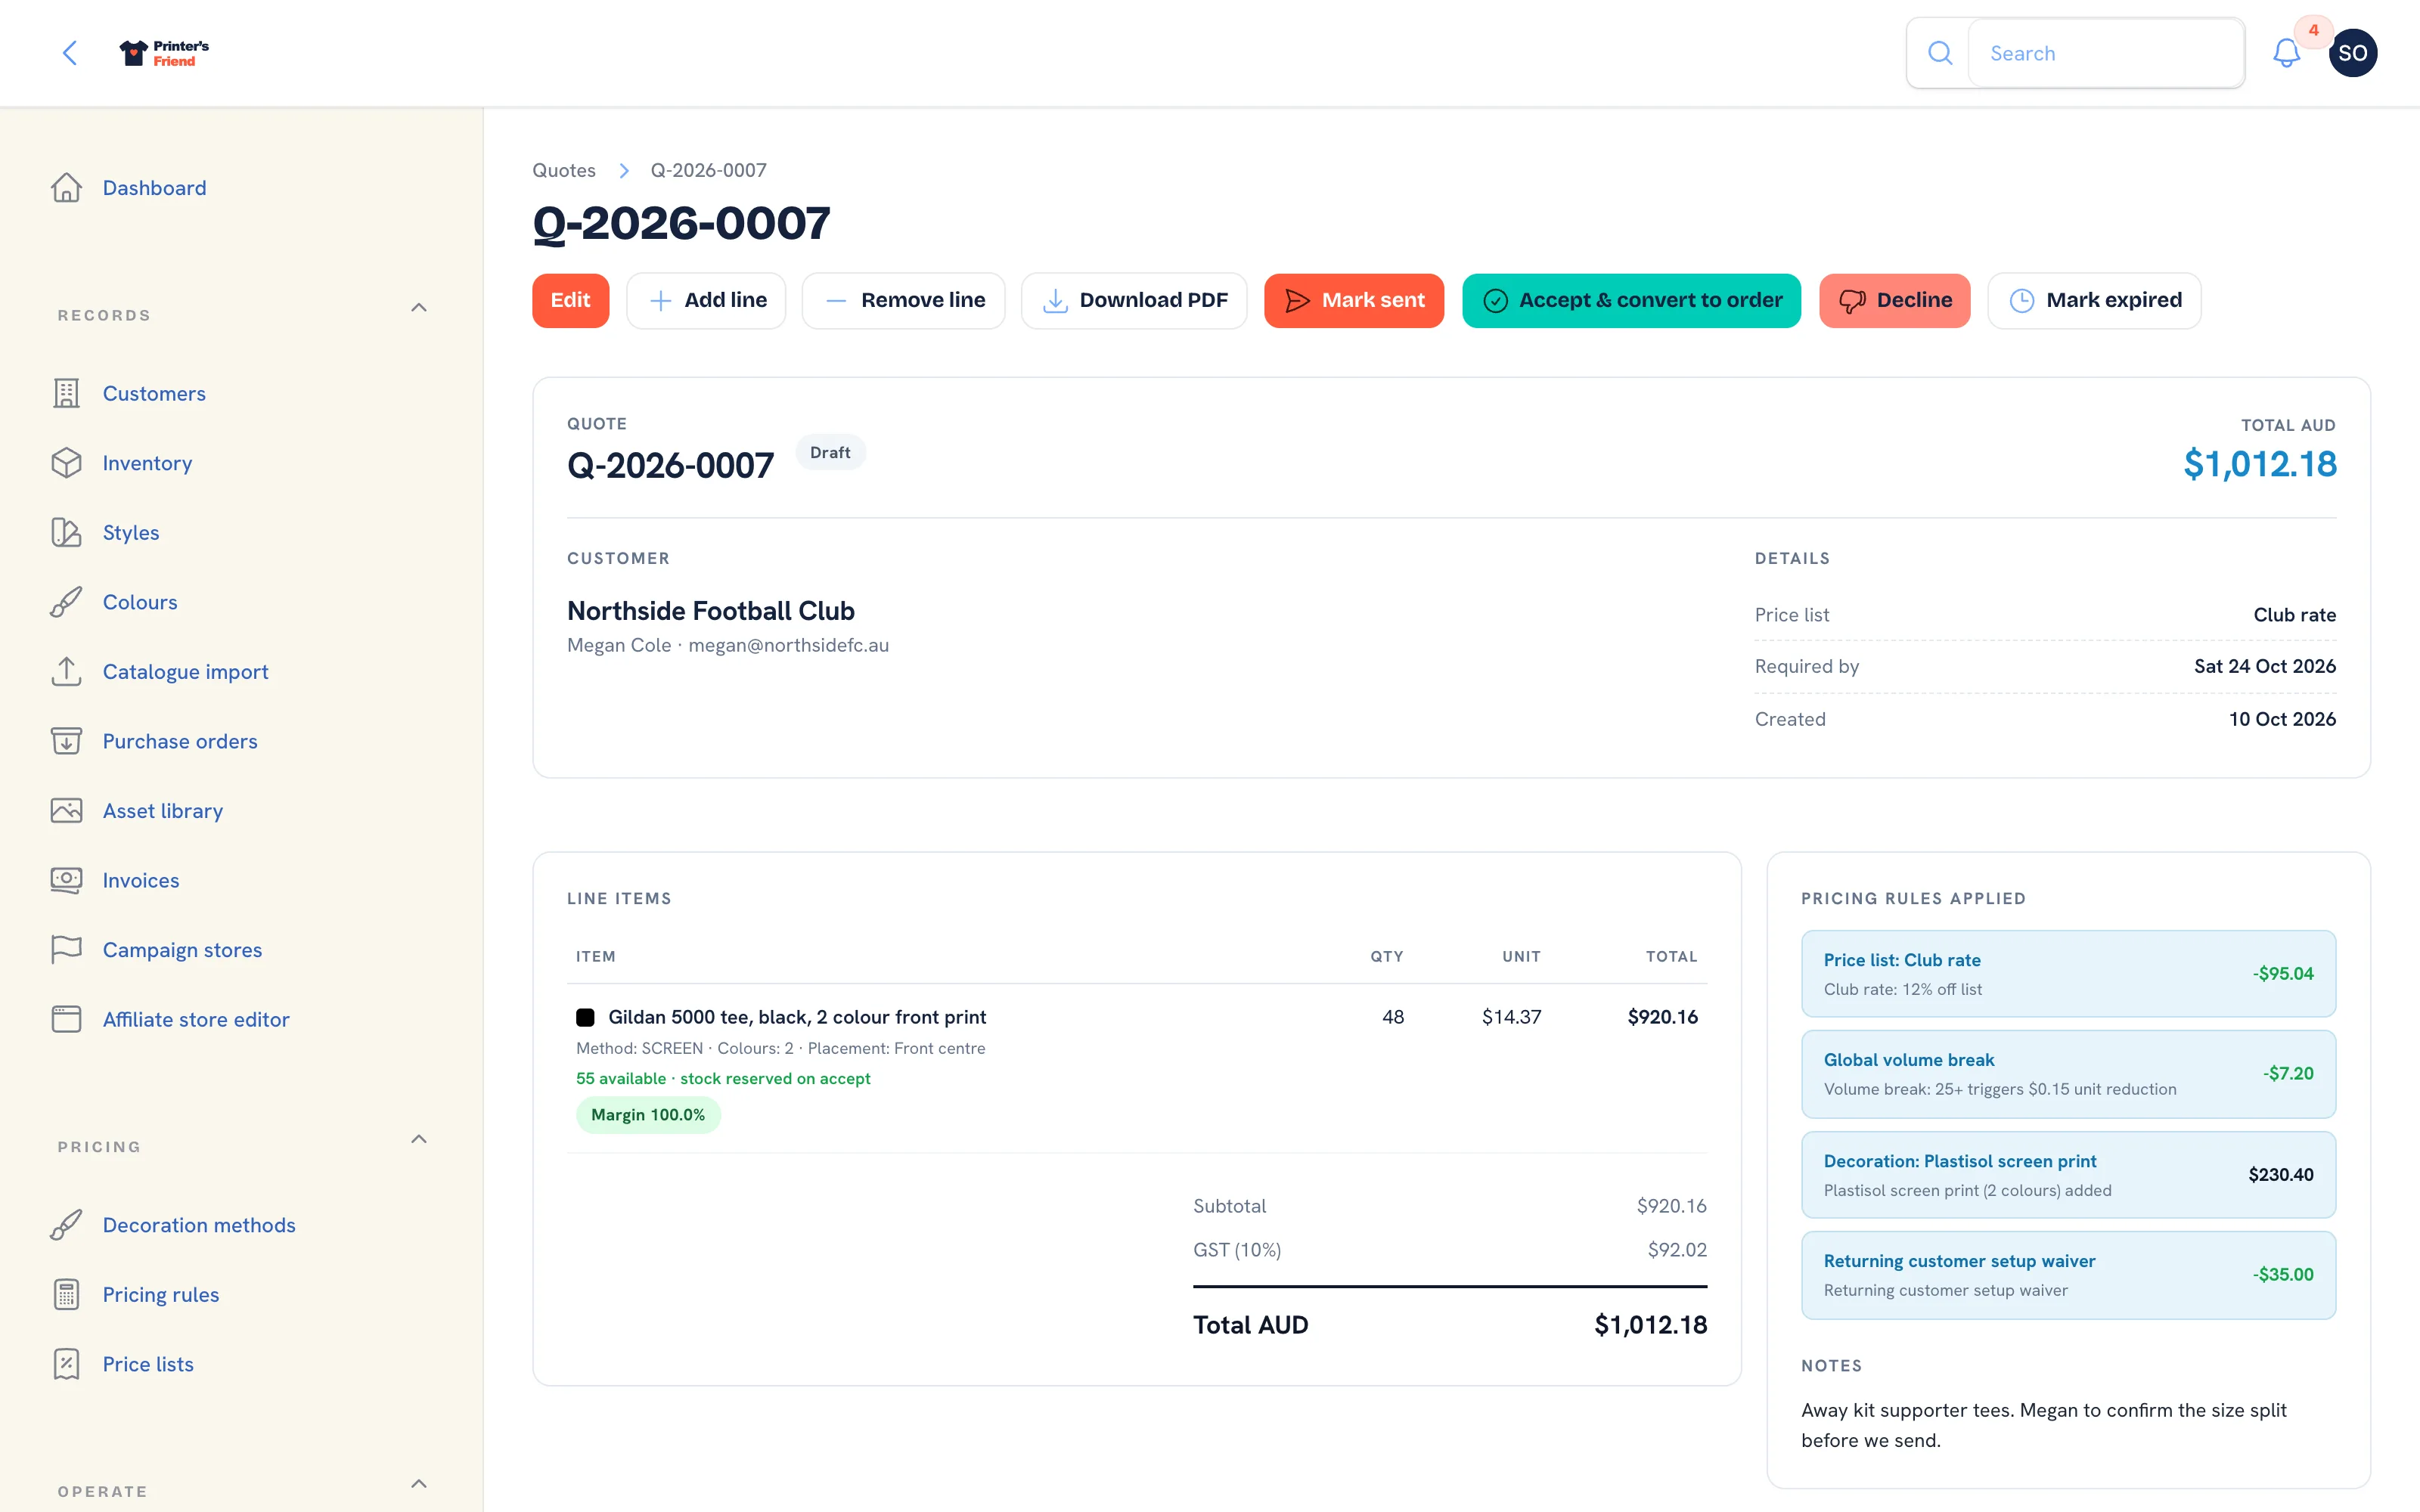 A draft quote. The rules trail explains every number.
3. Send It
Press Mark sent. The quote is emailed to the contact with the PDF, an Accept this quote link and a Request changes link. Both links work for 30 days and need no portal login. The status changes to Sent, and the quote follow-up email goes out by itself if the customer goes quiet.
If the customer has no email address the quote is not sent, and the notice offers Add a contact, which opens the customer's contacts. If the email could not be delivered the quote stays Draft with a warning on the page.
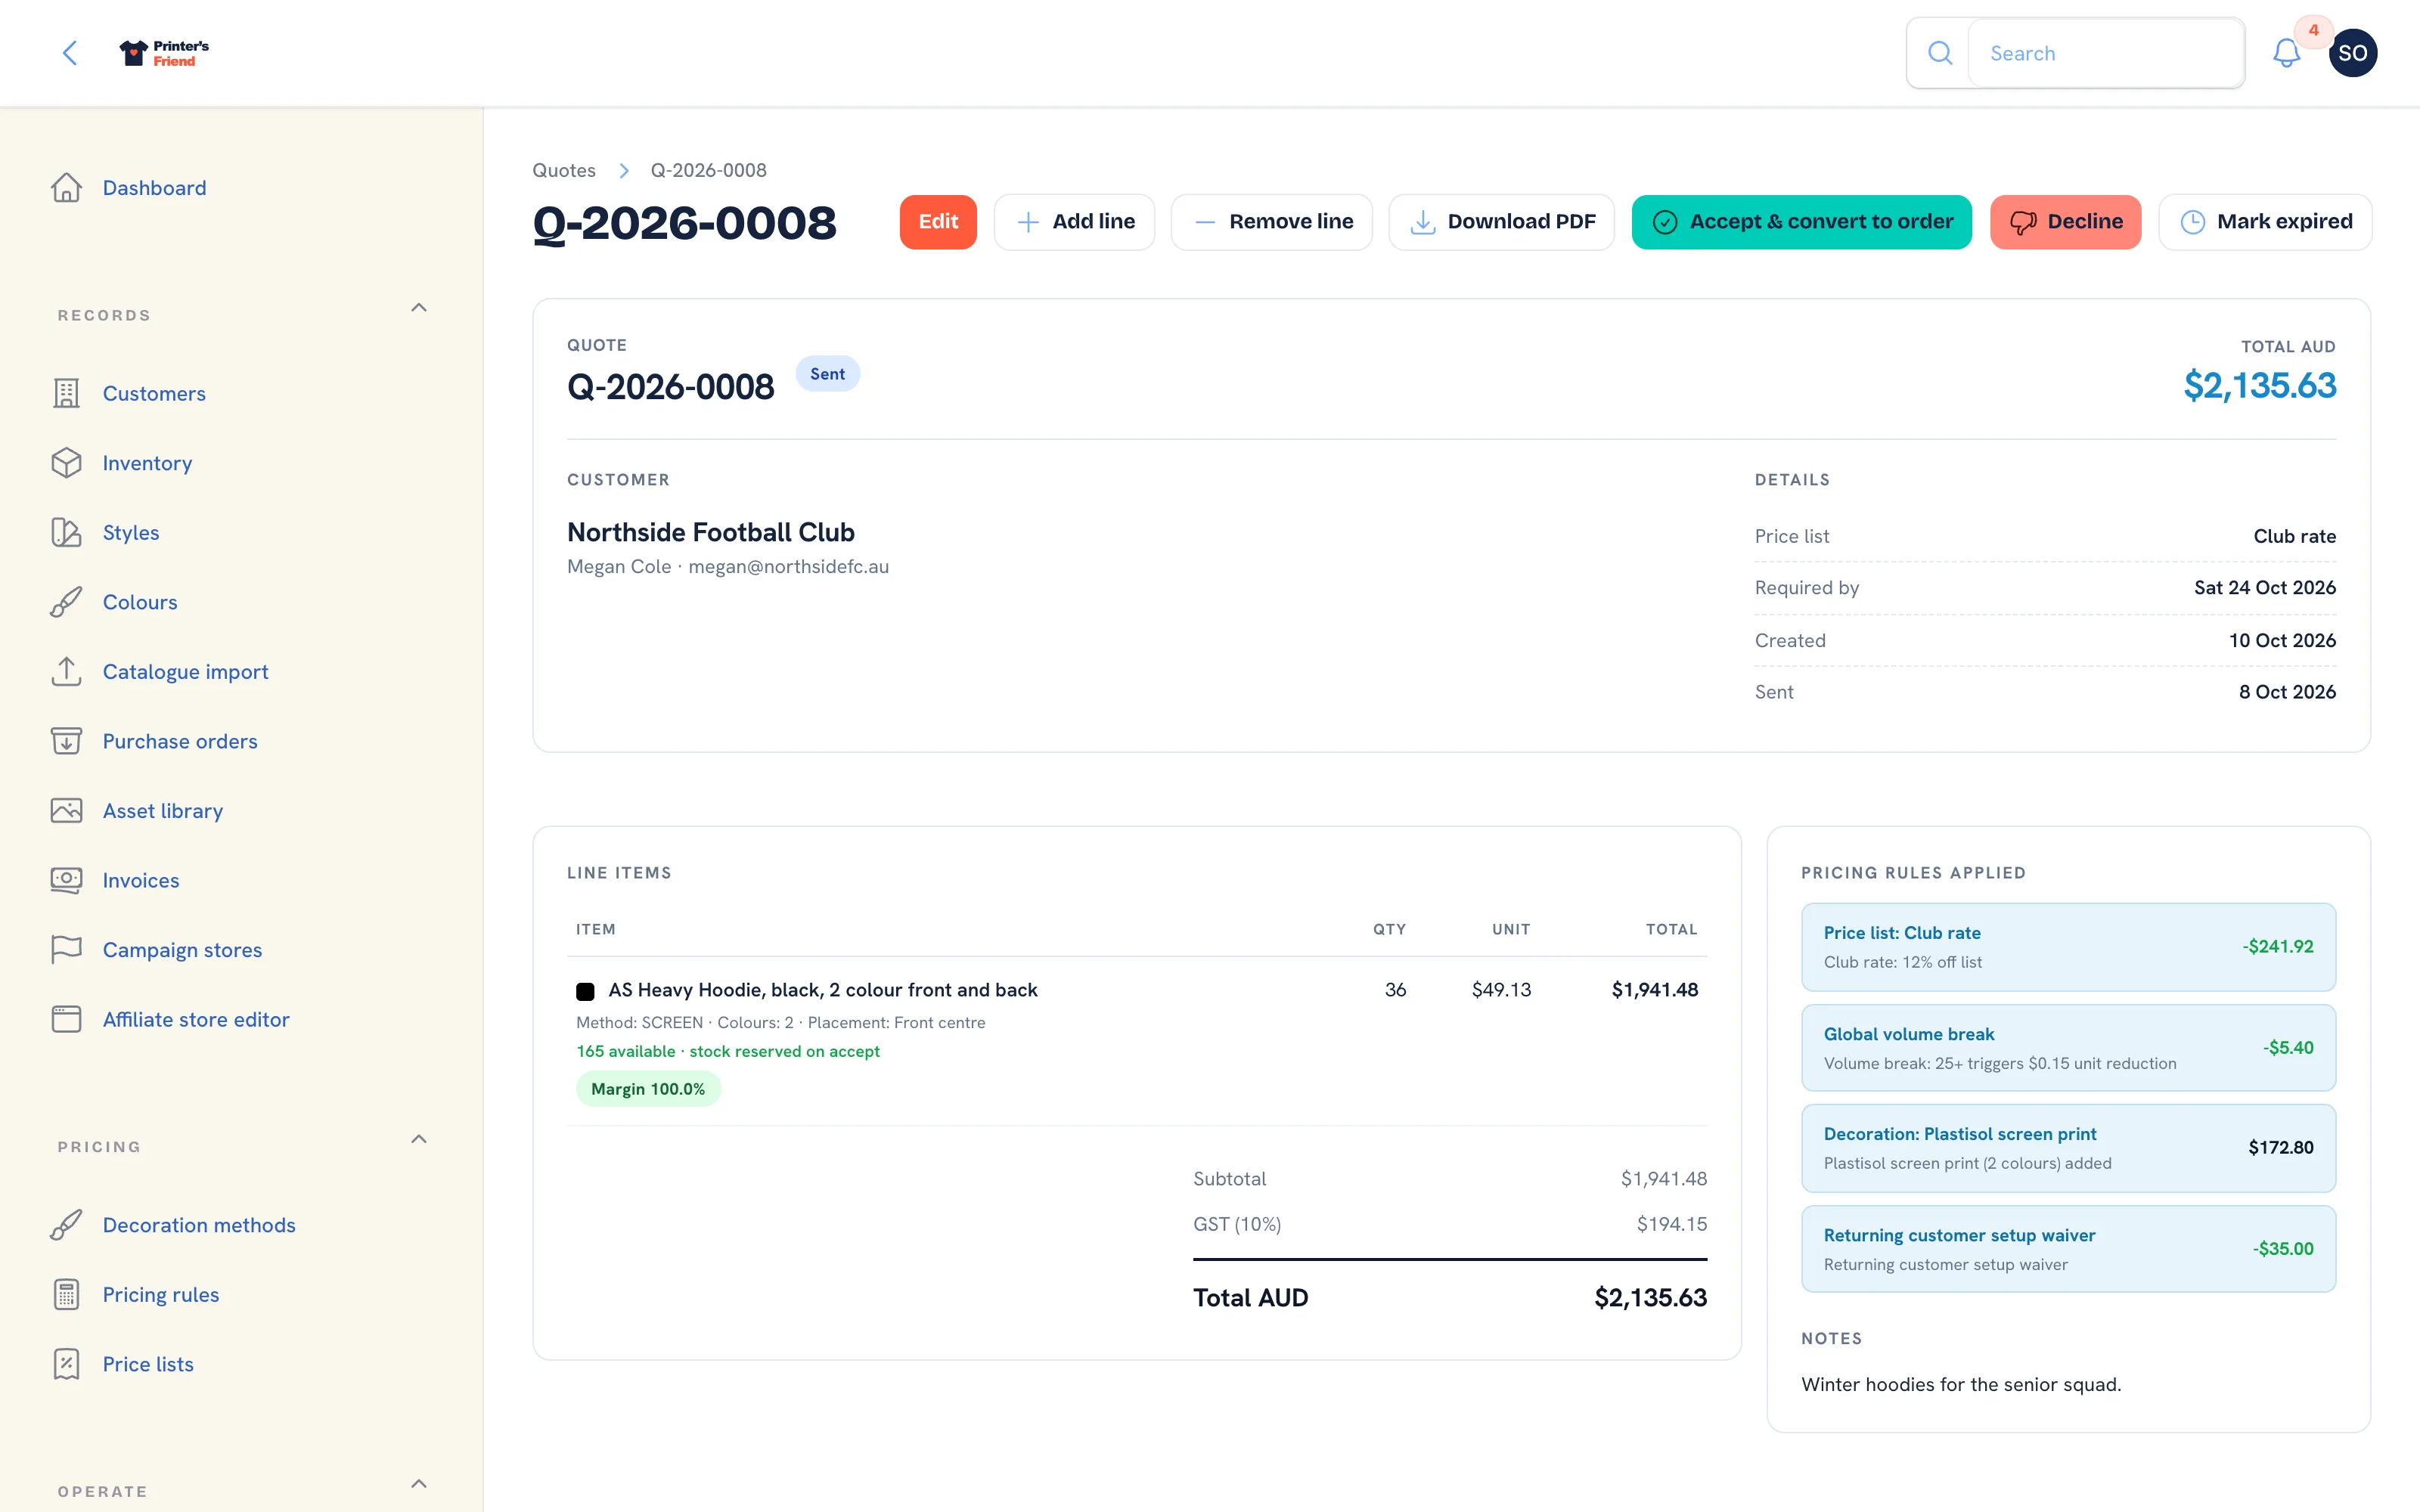 A sent quote. The send is recorded in the activity timeline.
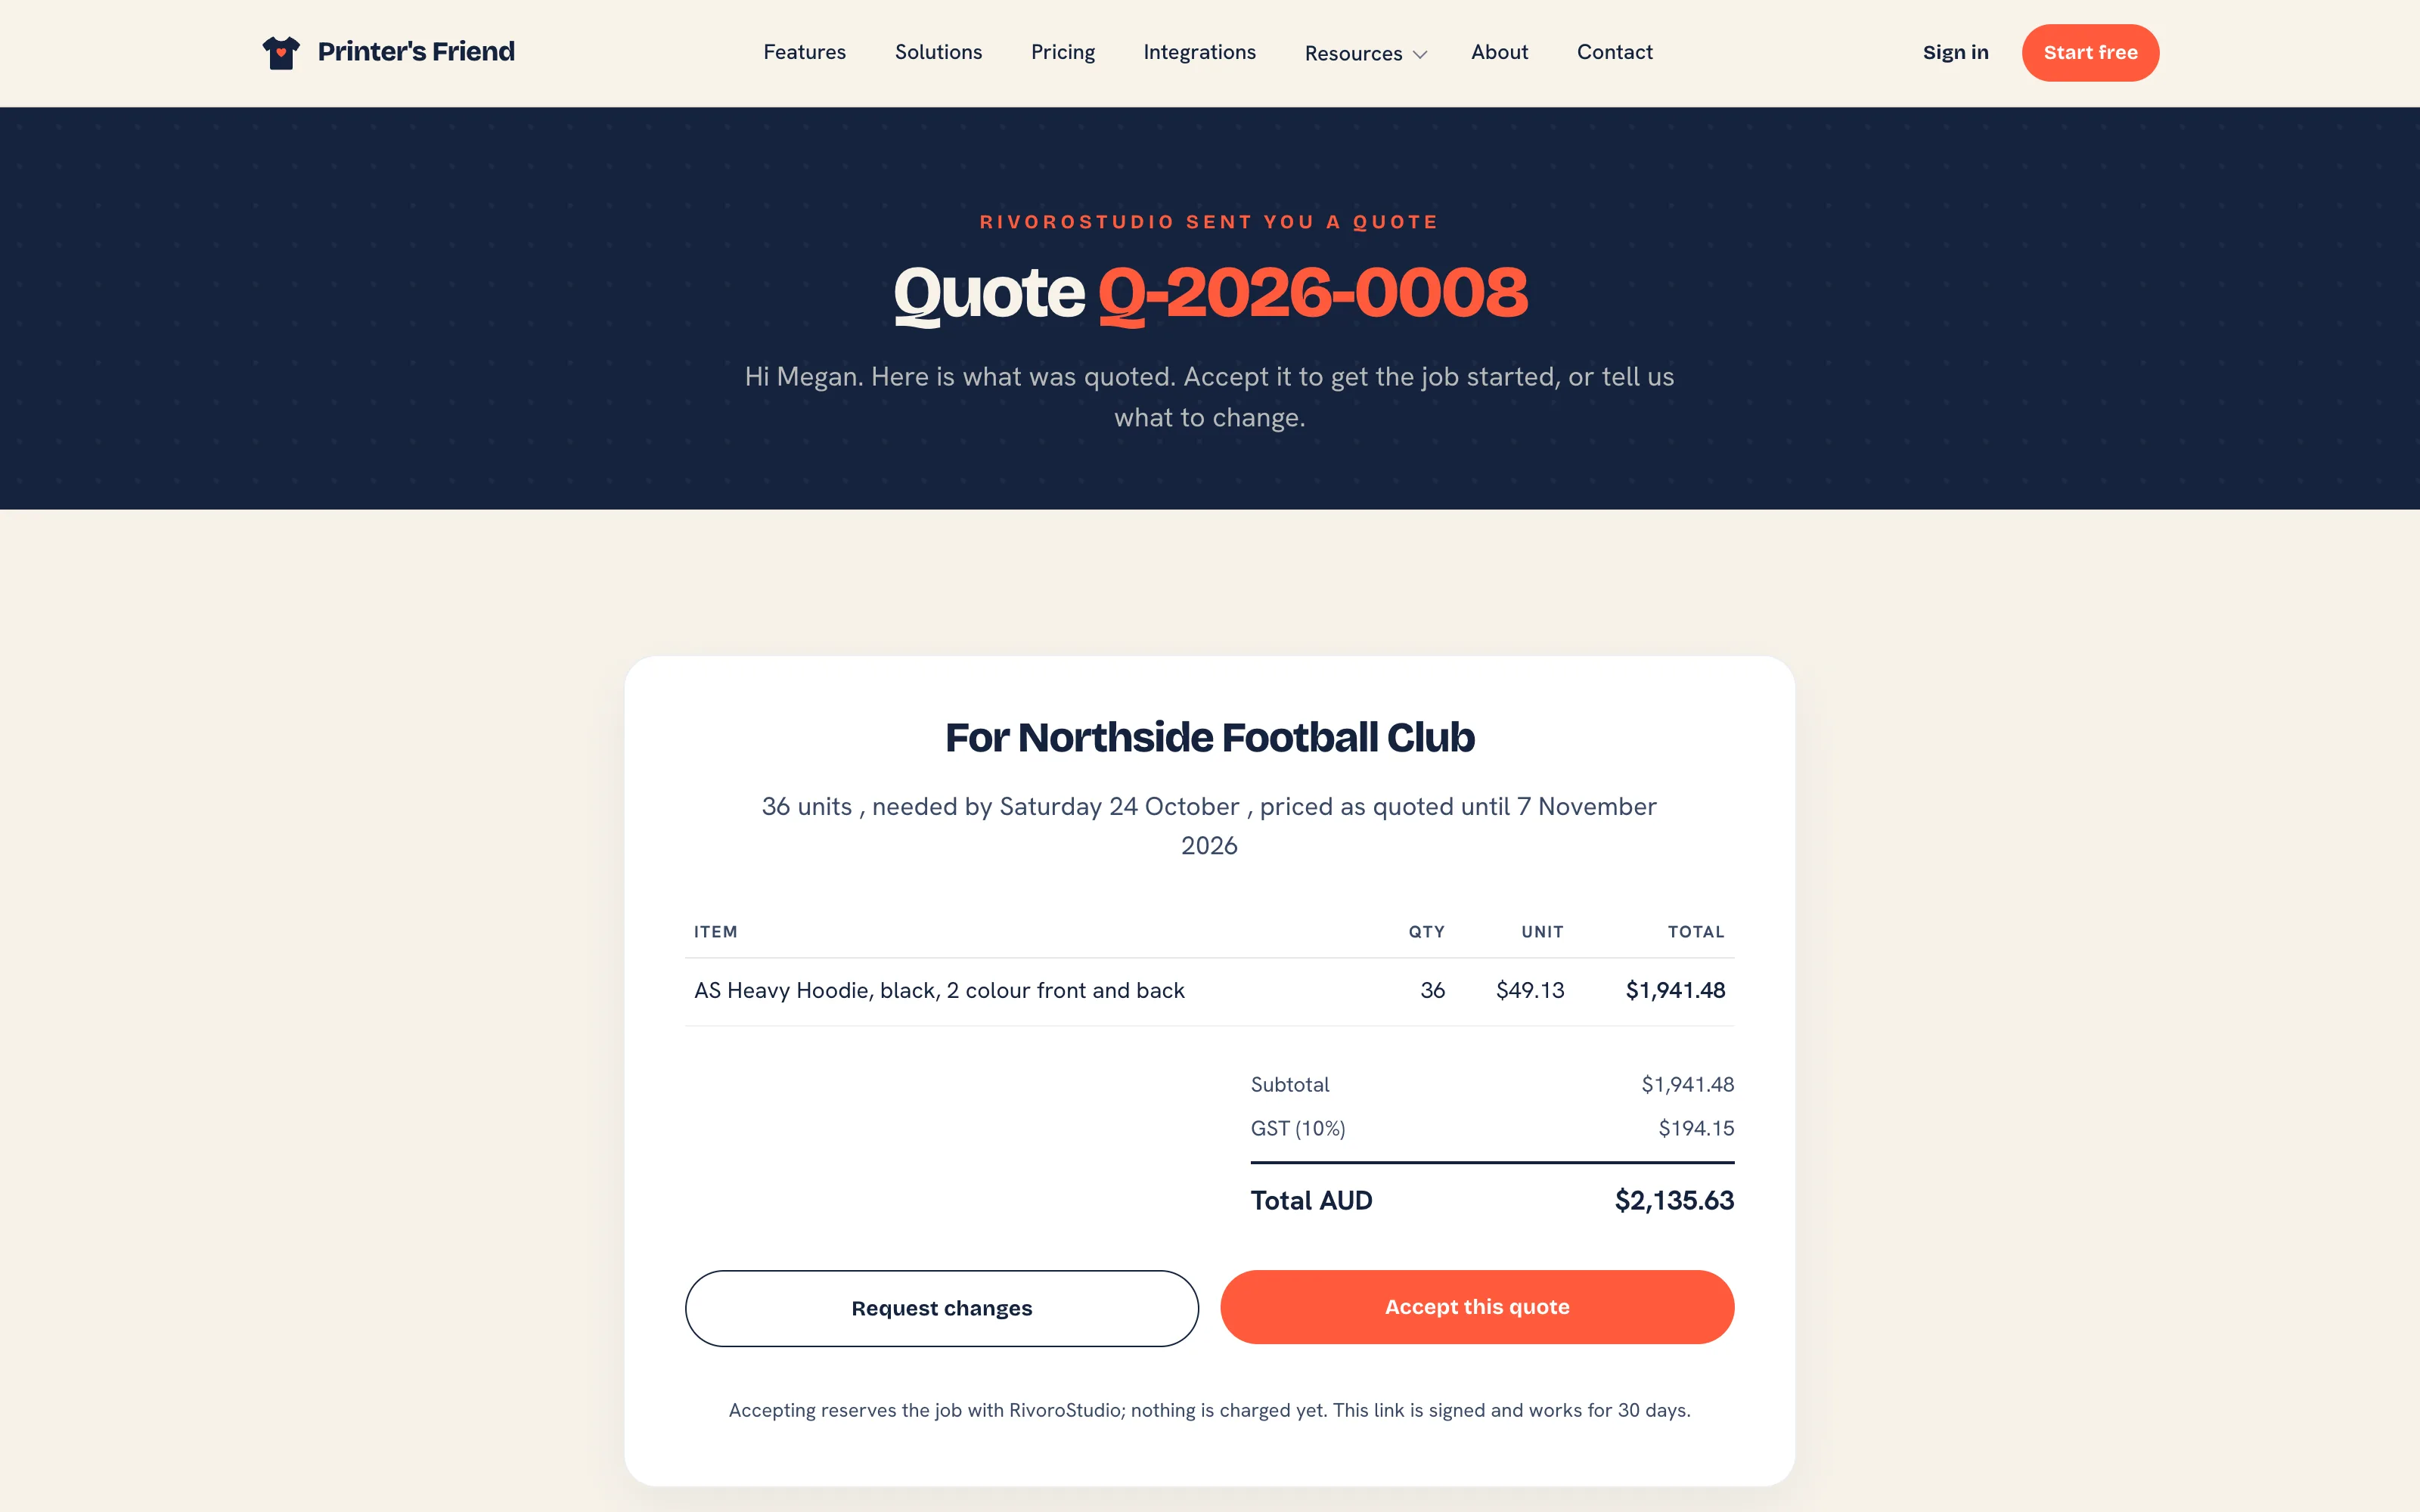 What the customer sees from the link in the quote email.
4. Accept It
Either the customer presses Accept this quote in their email, or you press Accept & convert to order on the quote and confirm. Both do the same things:
- An order is created in the Artwork stage with the quote's lines and totals, and the required by date as its due date.
- Stock is reserved for every line with a SKU.
- The customer's default billing and shipping addresses are copied onto the order.
- The order thank-you email goes to the contact.
- The quote is marked Converted and links to the order.
Accepting counts against your plan's open order limit. At the limit the action is refused with a message naming the plan that lifts it. Decline and Mark expired close a quote that will not convert.
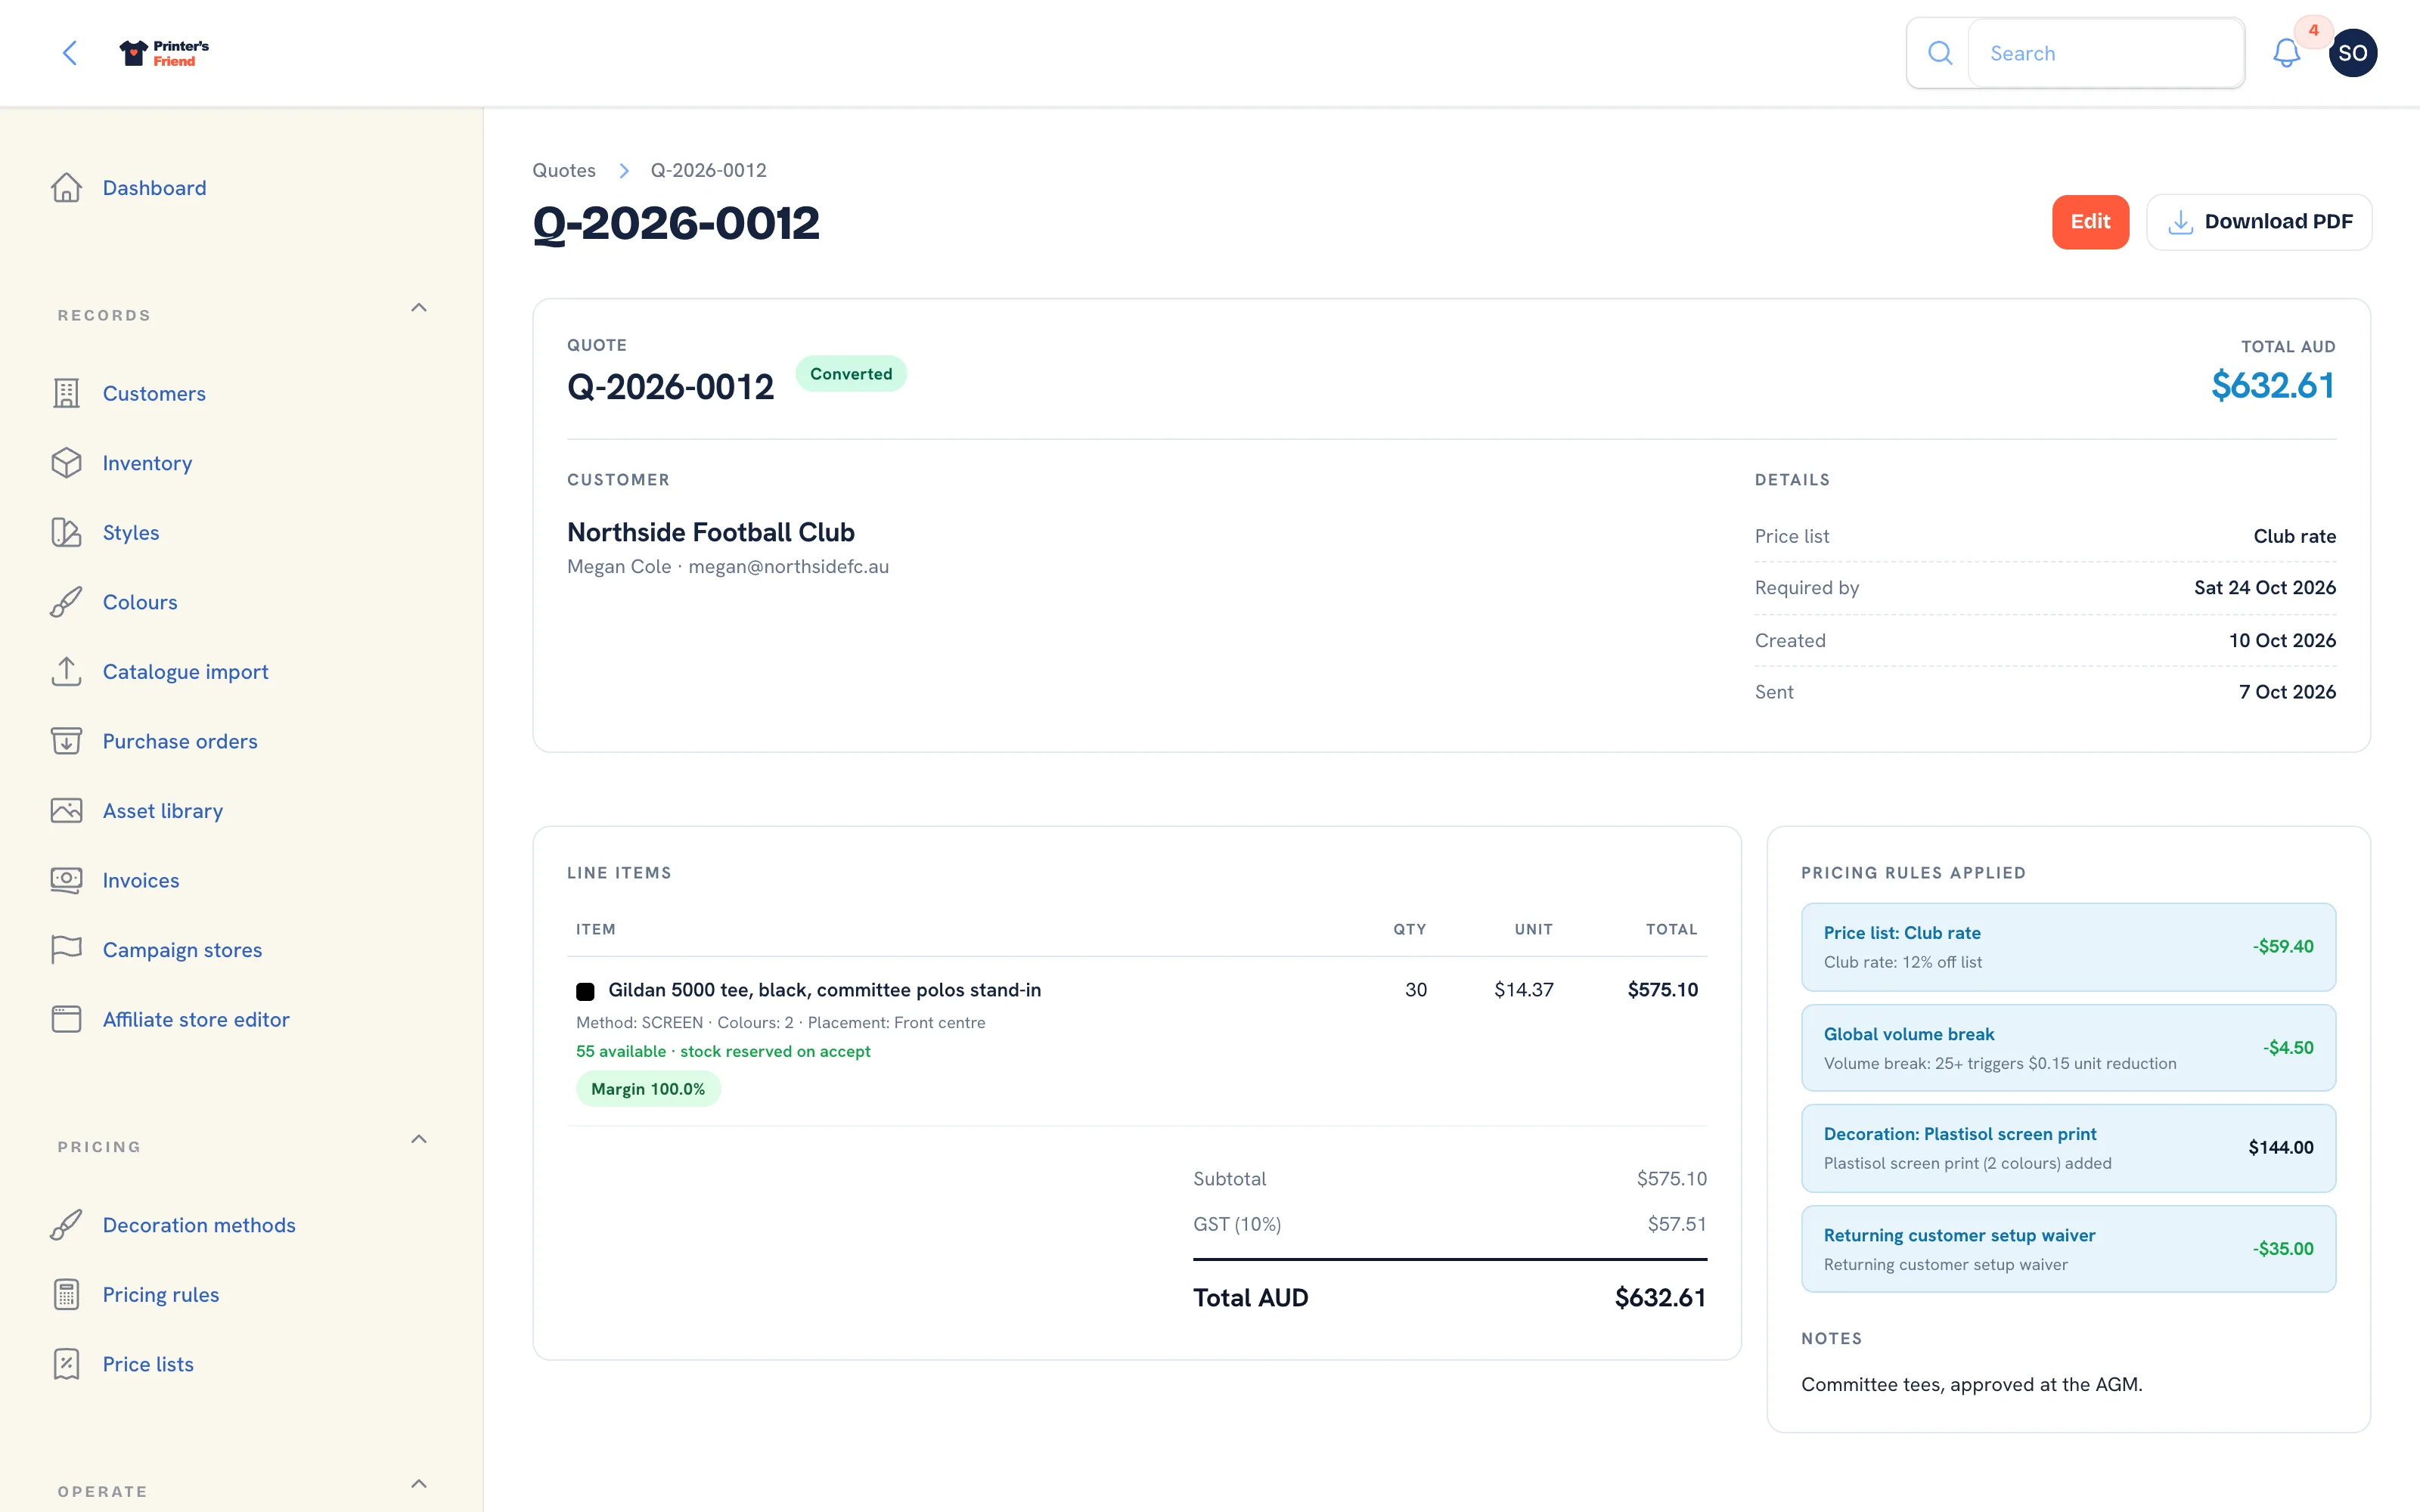 A converted quote. It links to the order it became.
5. Get the Artwork Approved
- On the order, press Upload artwork version. Choose the Proof file (AI, EPS, PDF, SVG, PNG or JPG up to 50 MB), fill in Size (mm), Print colours and a Designer note if the customer needs one. The preview renders on its own.
- Press Send for approval and confirm. The customer is emailed a signed one-click approval link valid for 7 days, and texted the same link when the contact has a phone, your Twilio account is connected and your plan includes SMS. The notice shows the link so you can share it by hand if the email failed.
- The customer opens the link on any device and presses Approve, or Request a change with a note. Approval moves the order to Print queue while it is still in Artwork. A change request lands on the order; you upload the next version and send again.
If nothing happens, the artwork chaser emails the customer 3 days after the proof went out and again 3 days after that, with a fresh link each time, then stops and raises a task for your staff.
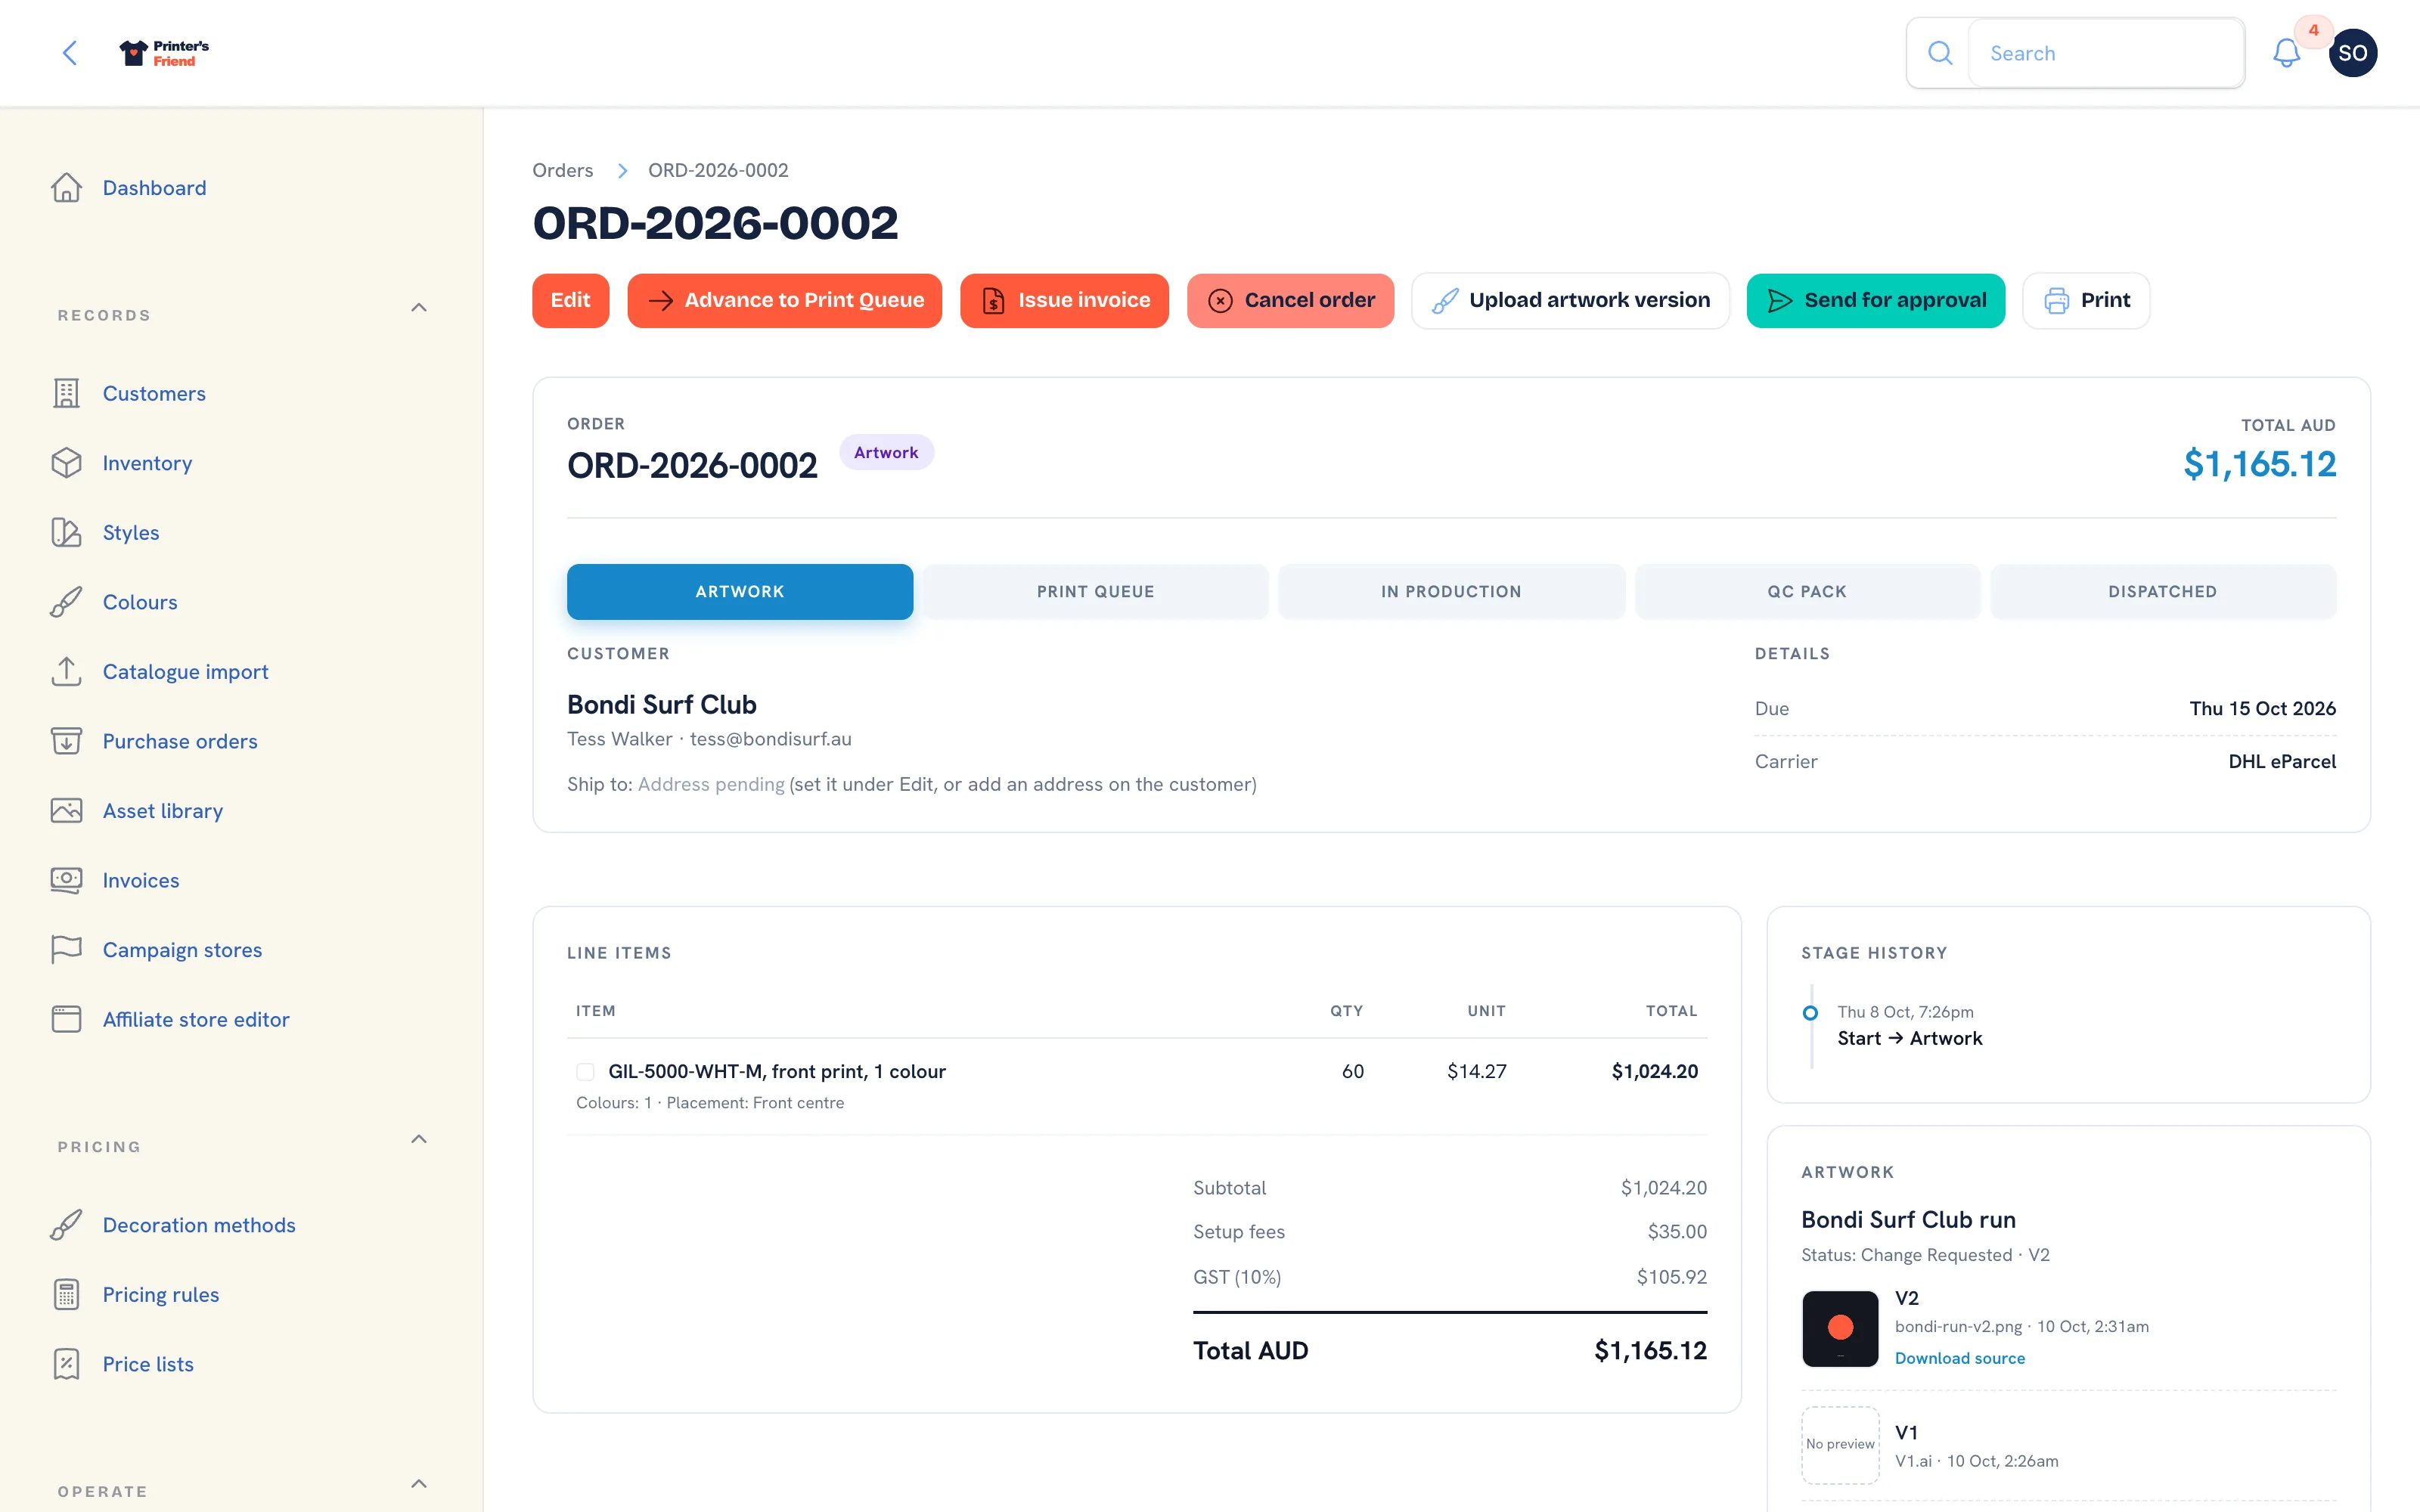 An order in Artwork. The approval link is minted from here.
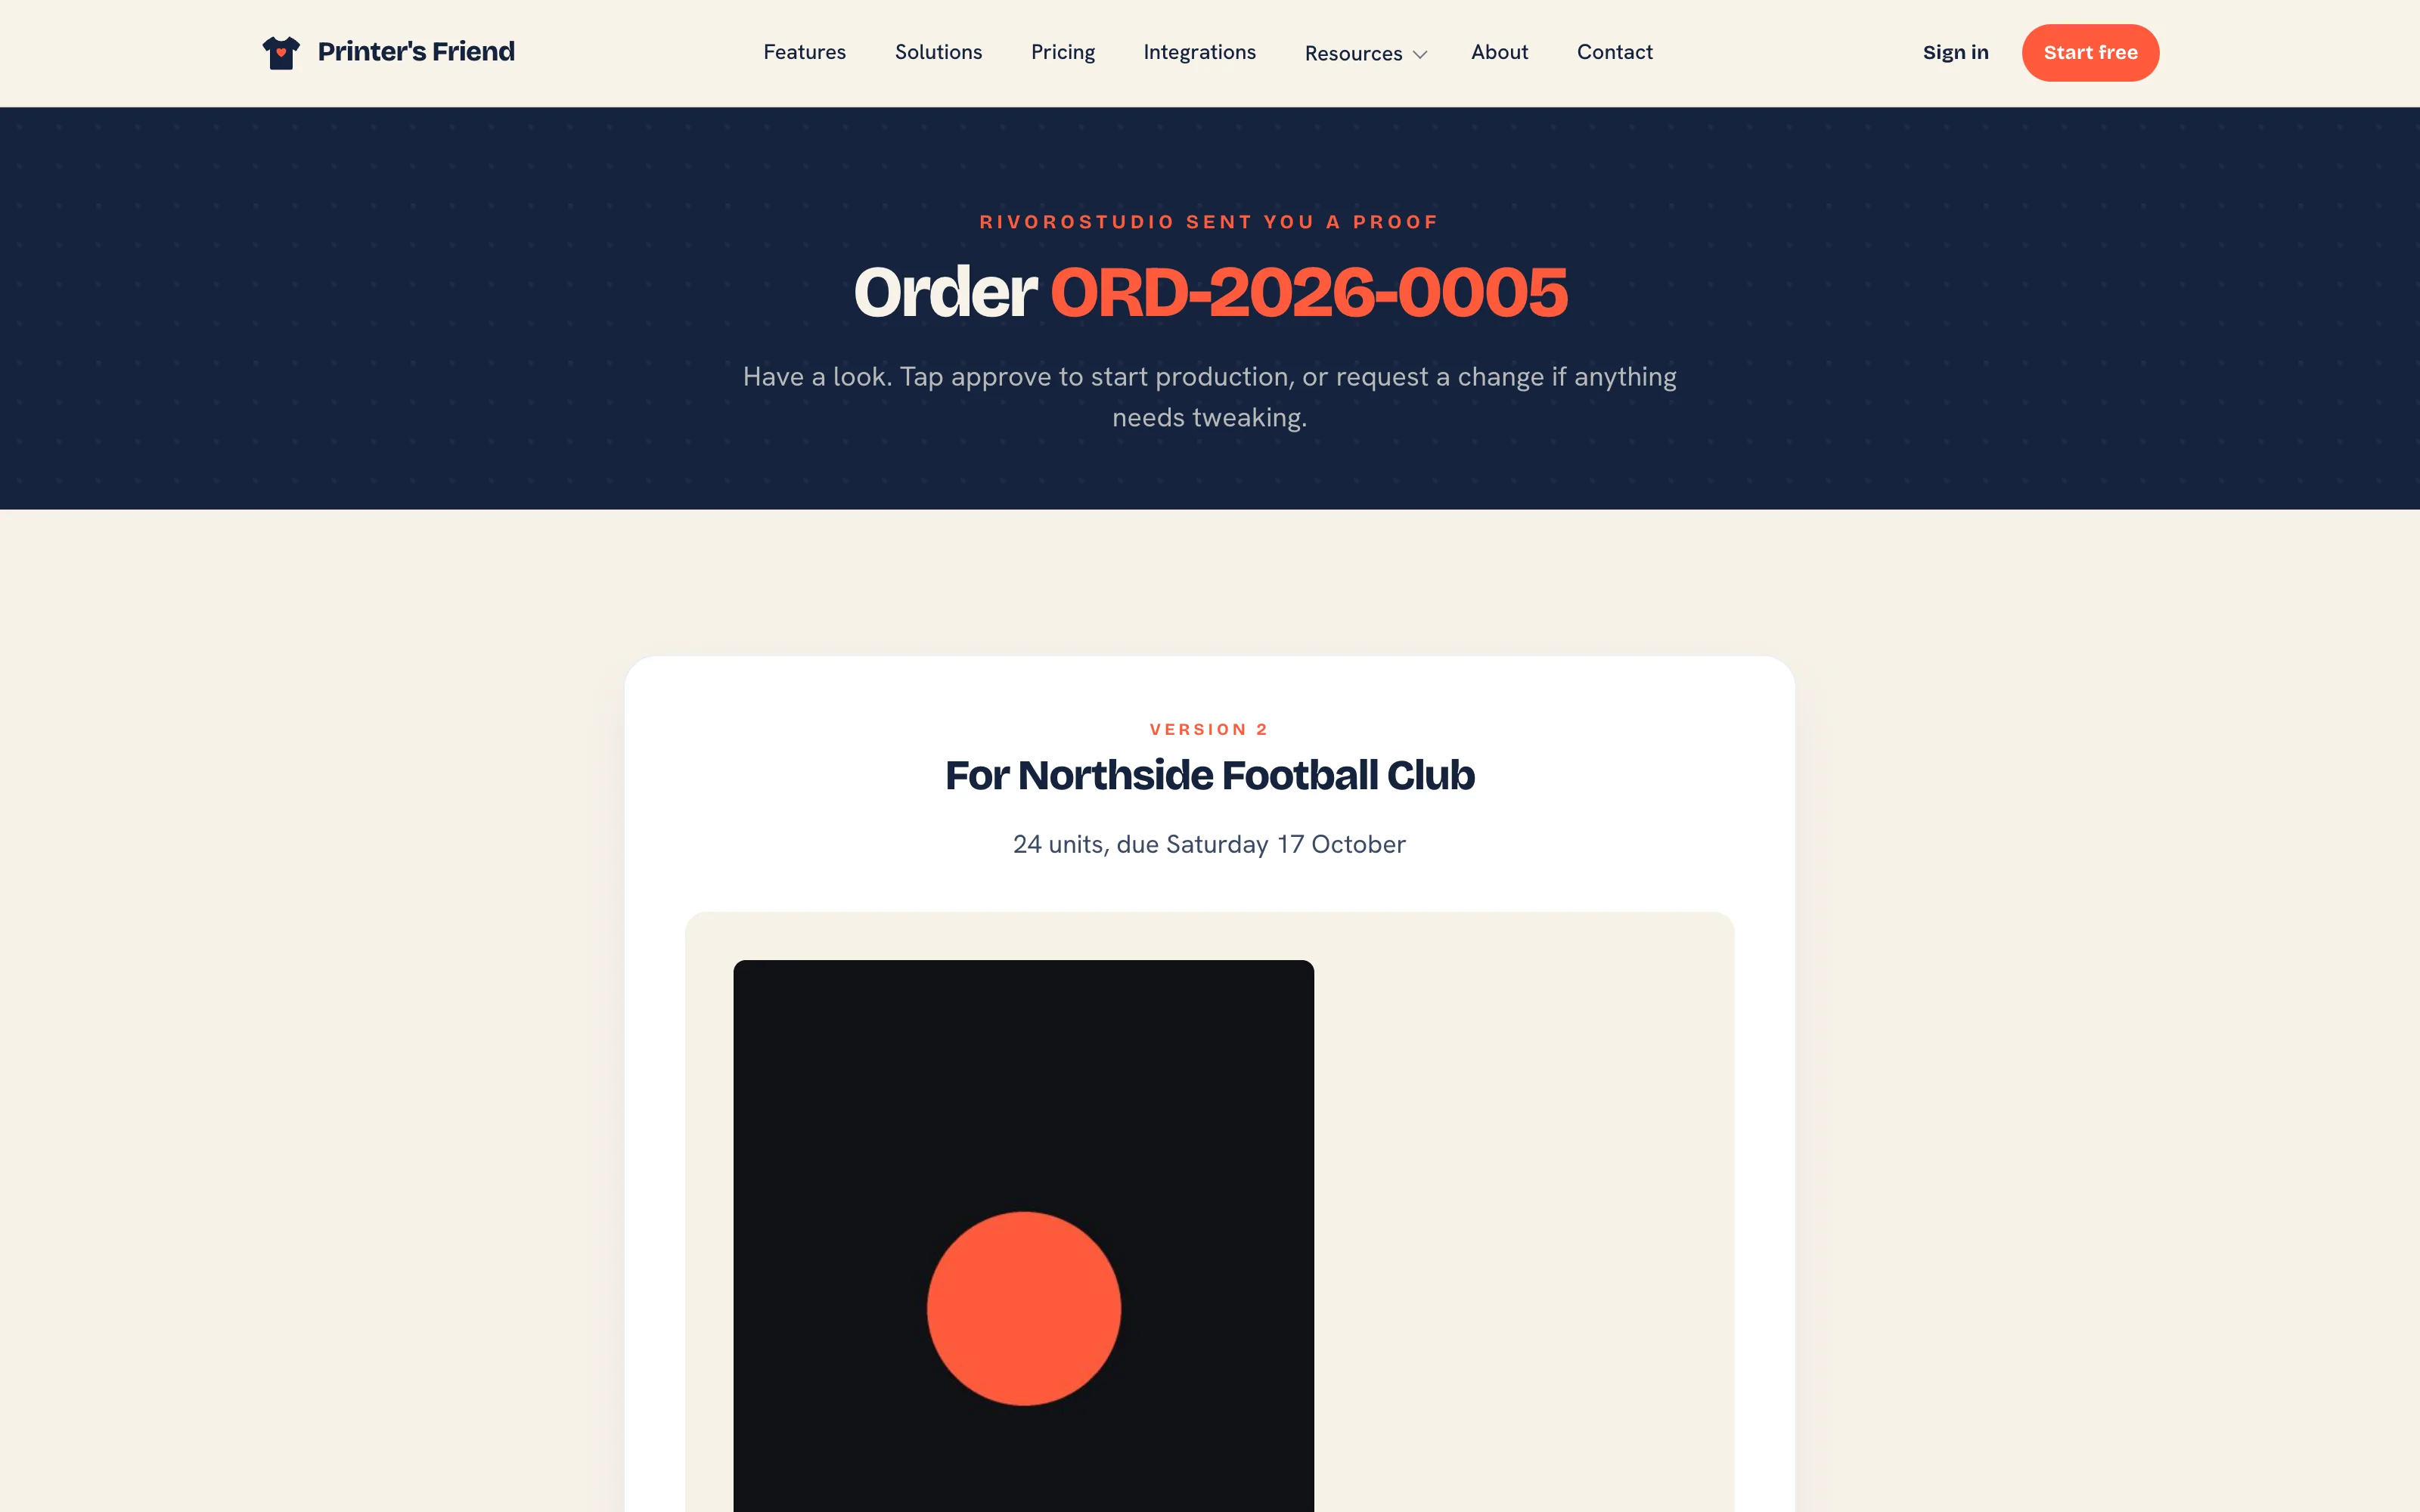 The approval page. No portal login is needed.
6. Print It
- From the order's Print menu choose Worksheet. It carries the order barcode.
- Move the order to In production in any of three ways: Advance to In Production on the order, Move on its card on the production board (or drag the card), or scan the worksheet barcode at
/workspace/scan. Entering production consumes the reserved stock and writes the movement to the ledger. - Whoever runs the job opens
/workspace/timeclock, types the order number and presses Clock on, then Clock off when the run is done. The hours cost at that person's labour rate and land on the job.
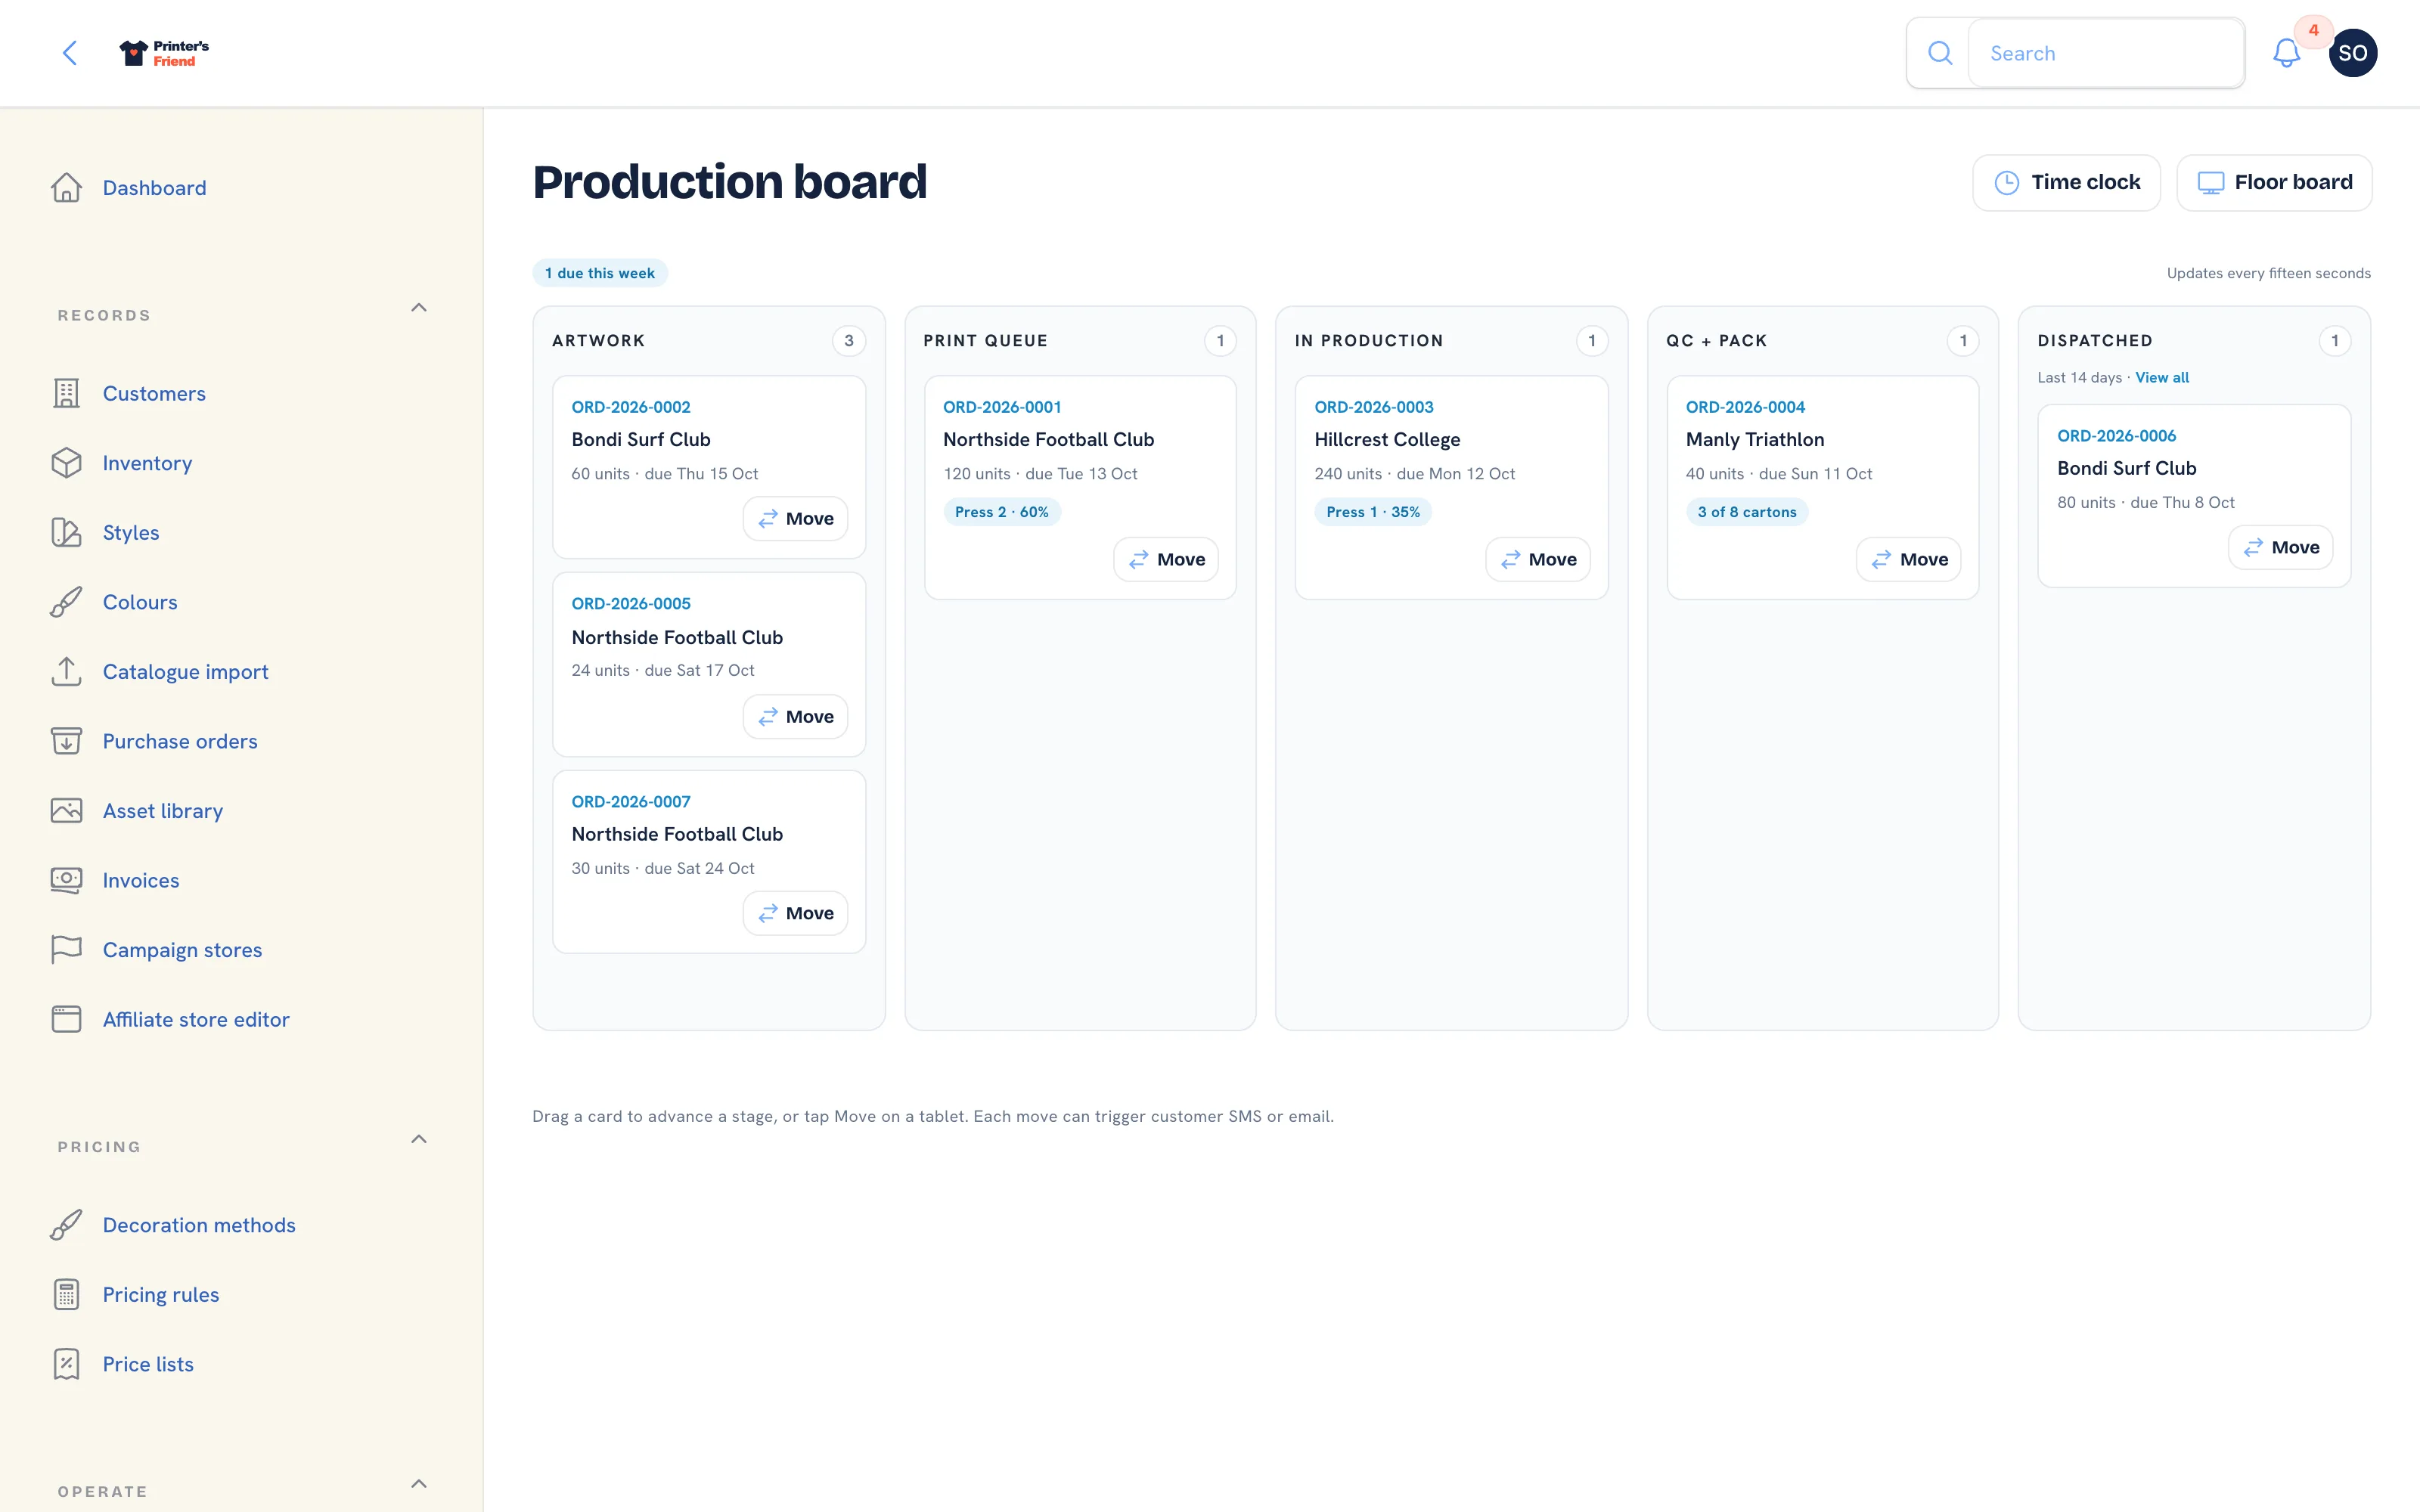 The production board. It refreshes every fifteen seconds.
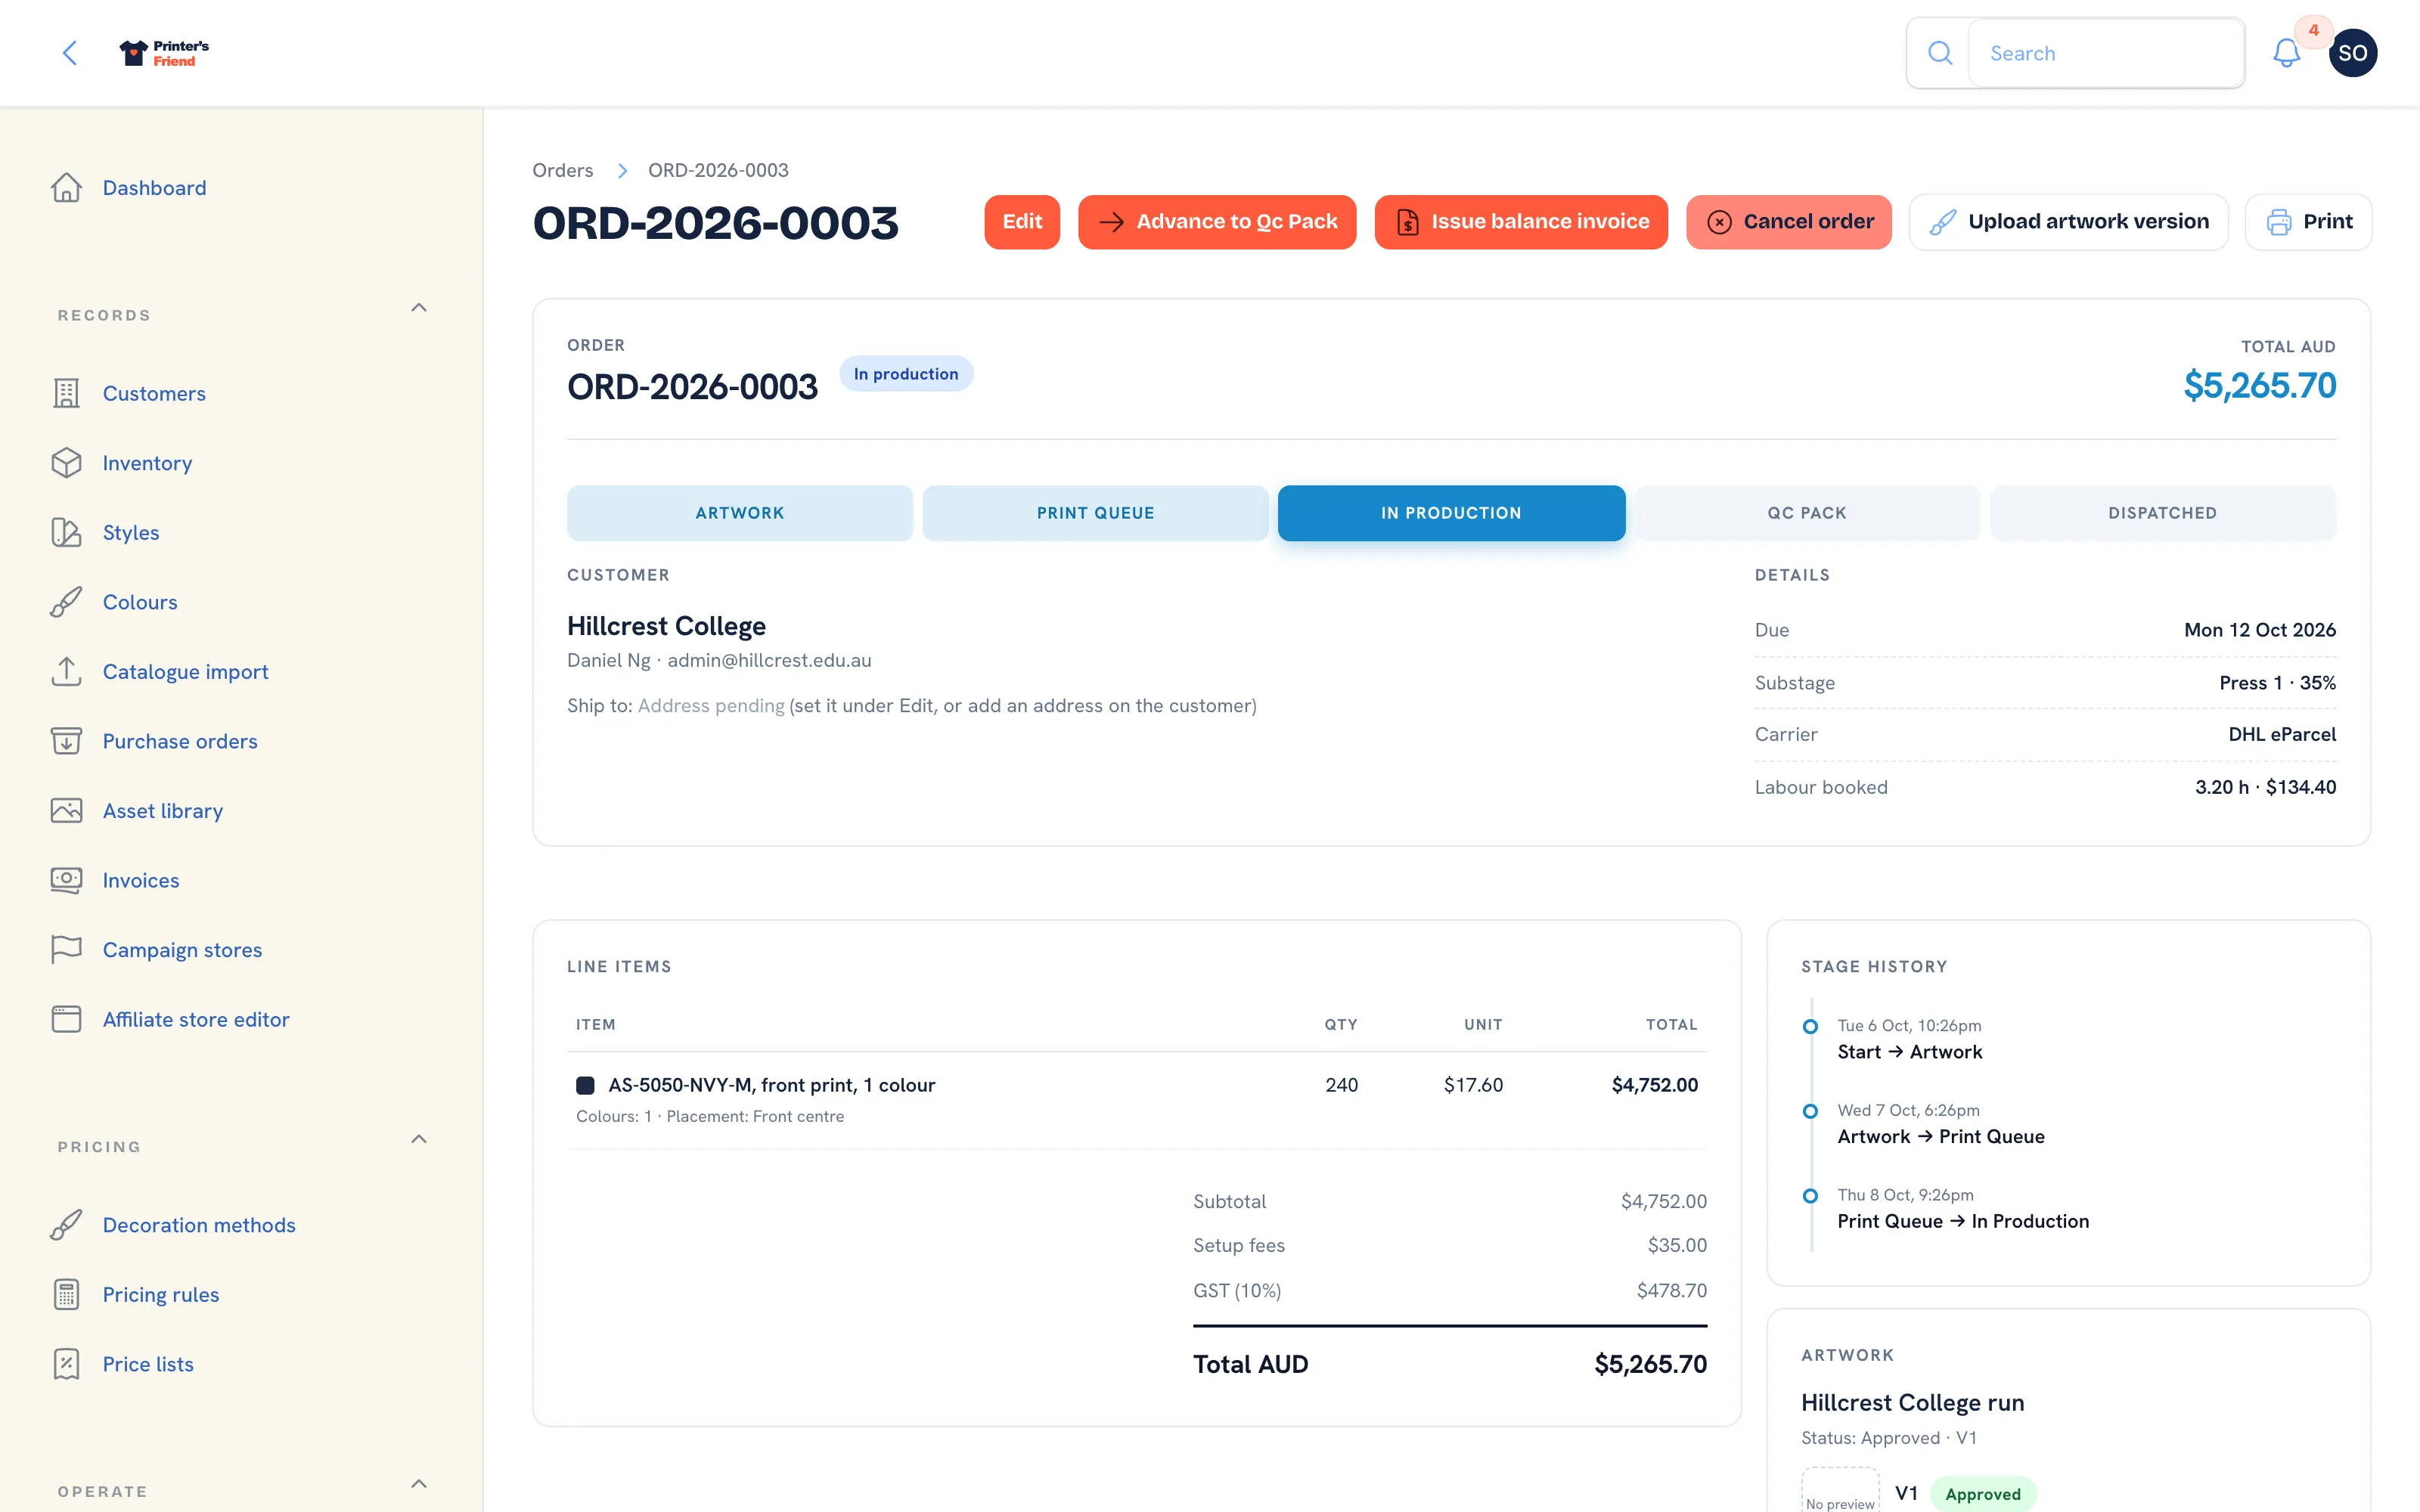 An order in production, with time on the job.
7. Check and Pack
Press Advance to Qc Pack. From Print, choose Packing Slip; it reads the order's shipping address. Generate shipping label books an Australia Post label when your eParcel account is connected under Integrations, and is refused with a message otherwise.
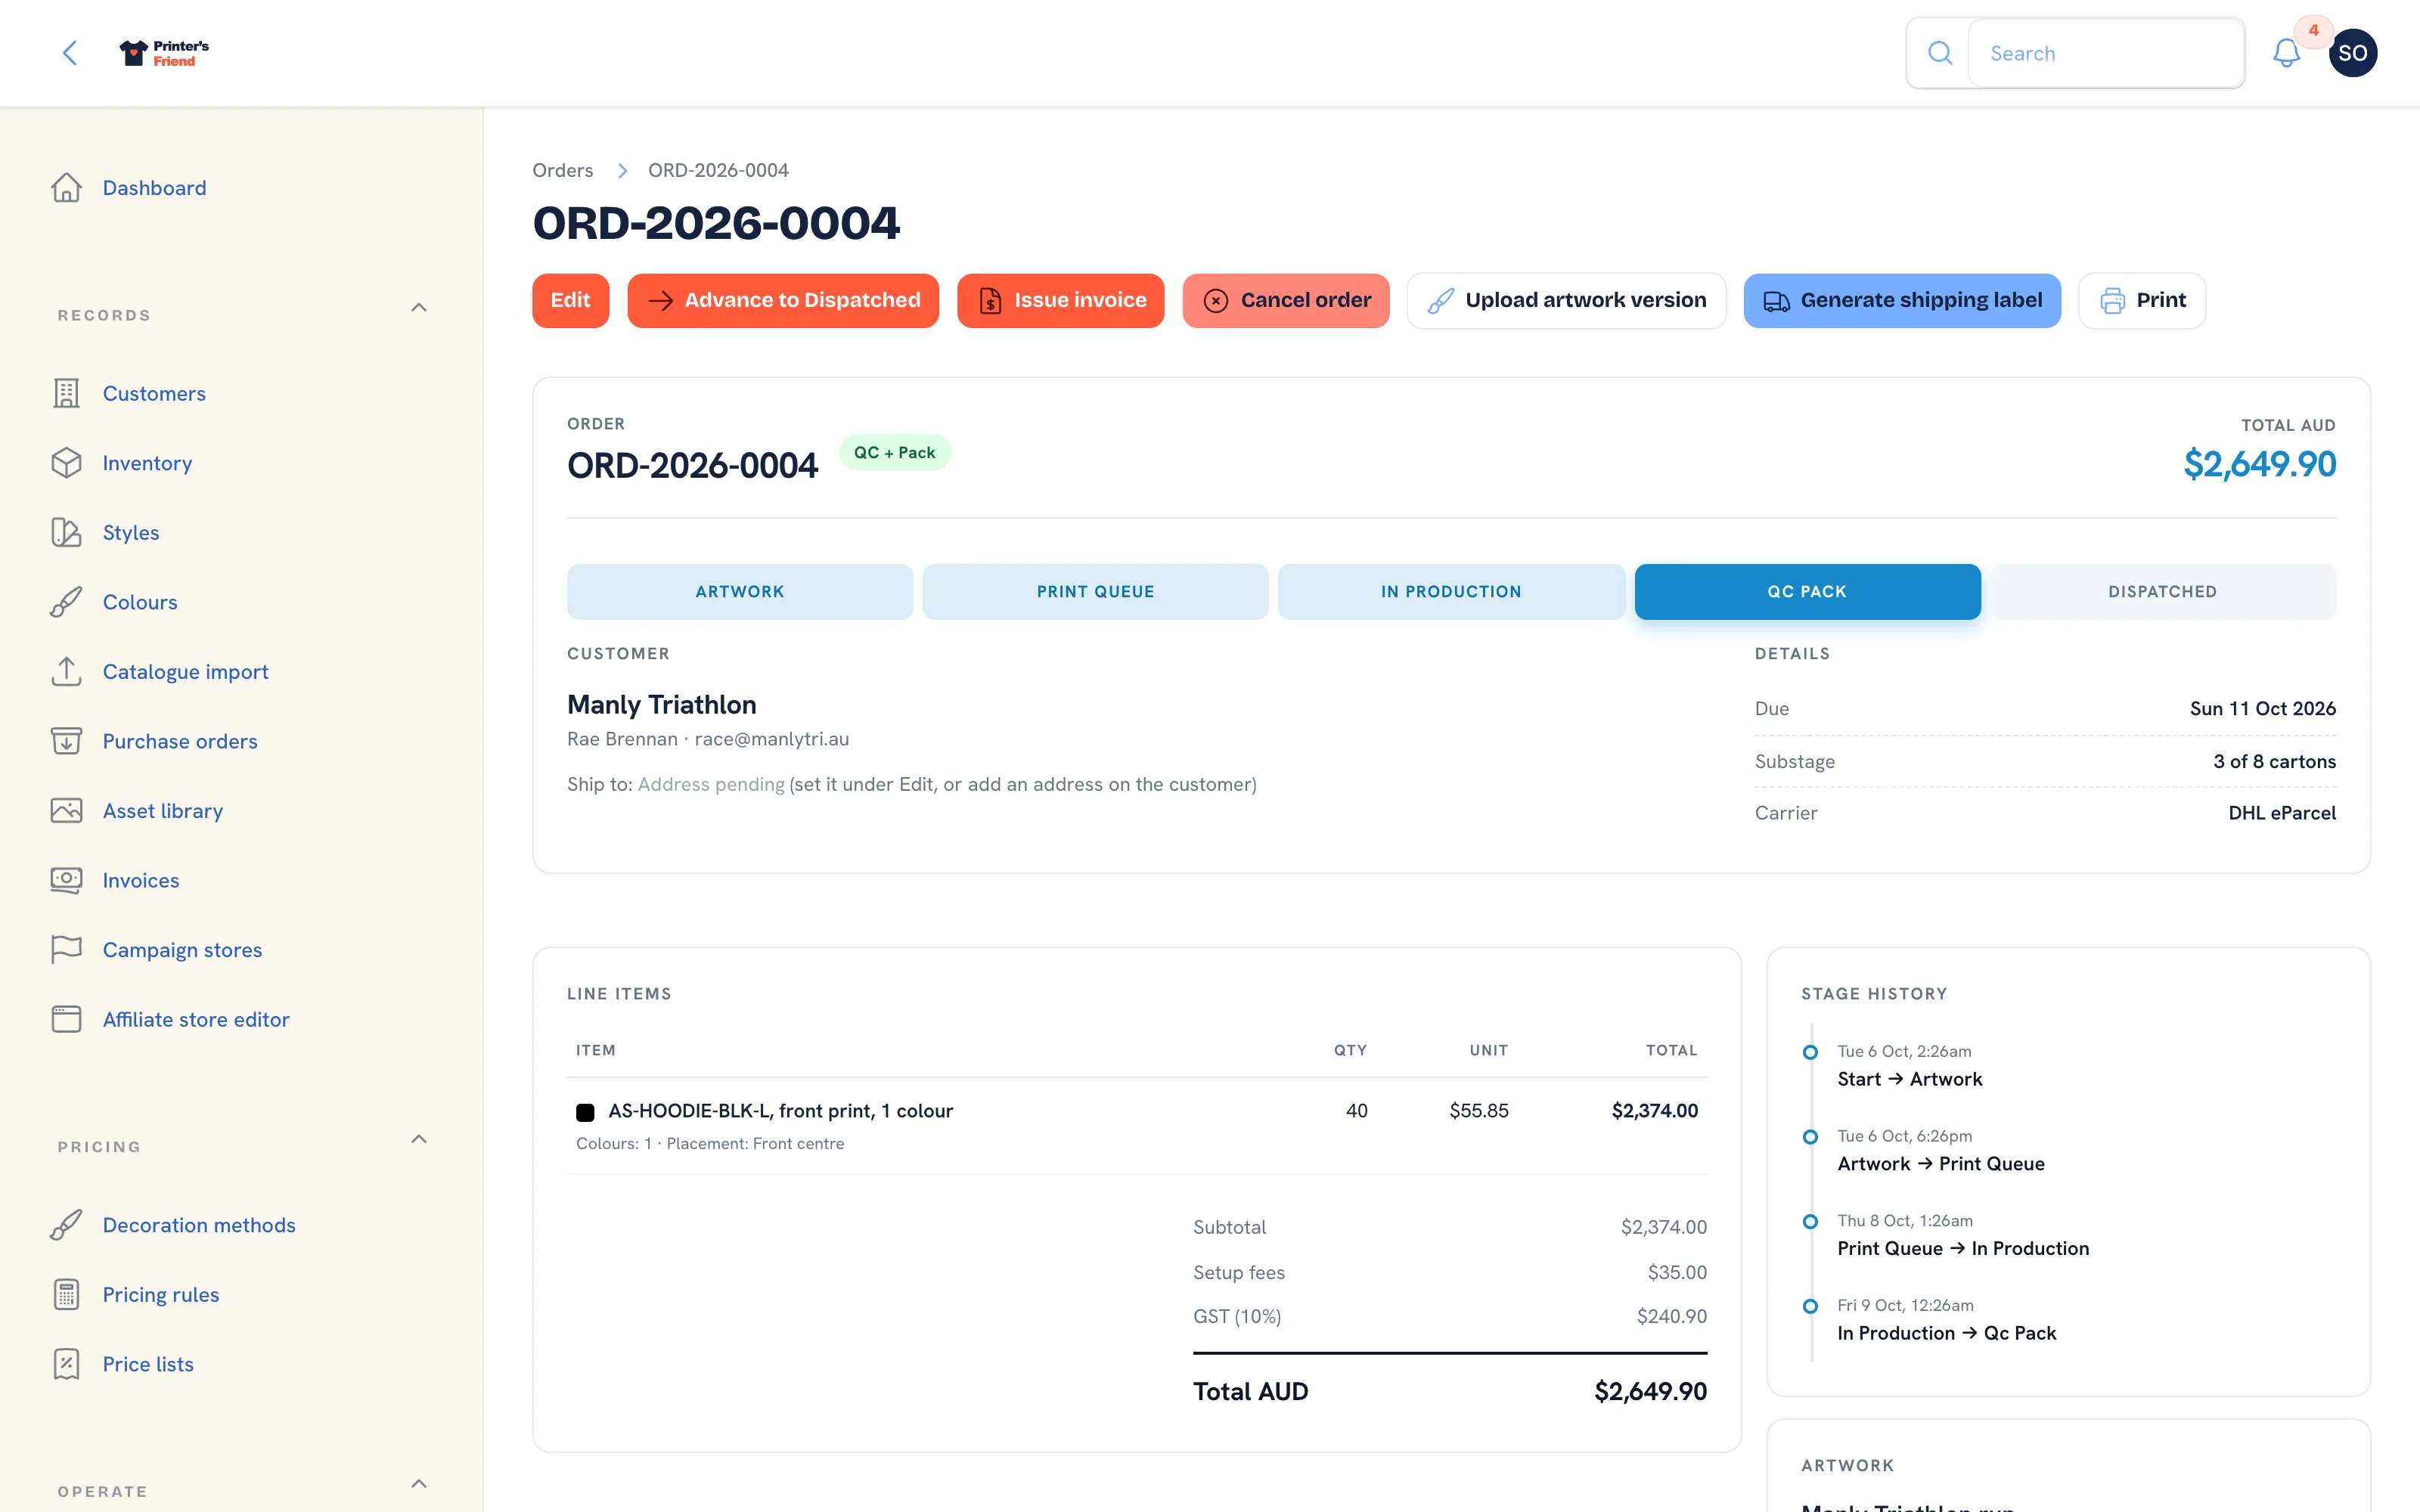 QC and pack, with the packing slip ready to print.
8. Dispatch It
Advance to Dispatched does several things in one move:
- The dispatch email goes to the contact with the tracking number, and an SMS when the shop can text.
- The invoice for whatever the order still owes is issued and emailed, with a pay link when Stripe is connected. If you raised a deposit or full invoice earlier with Issue invoice, dispatch issues only the balance, or nothing.
- The order stops counting against your open order limit.
- Any webhook subscriber is told.
Advance to Dispatched issues the invoice
Dispatch is the move that raises and emails the invoice for whatever the order still owes. Dispatching a job that has not left the building creates an invoice you then have to credit, and dragging the card back to QC + Pack does not cancel it. Advance when the parcel has gone.
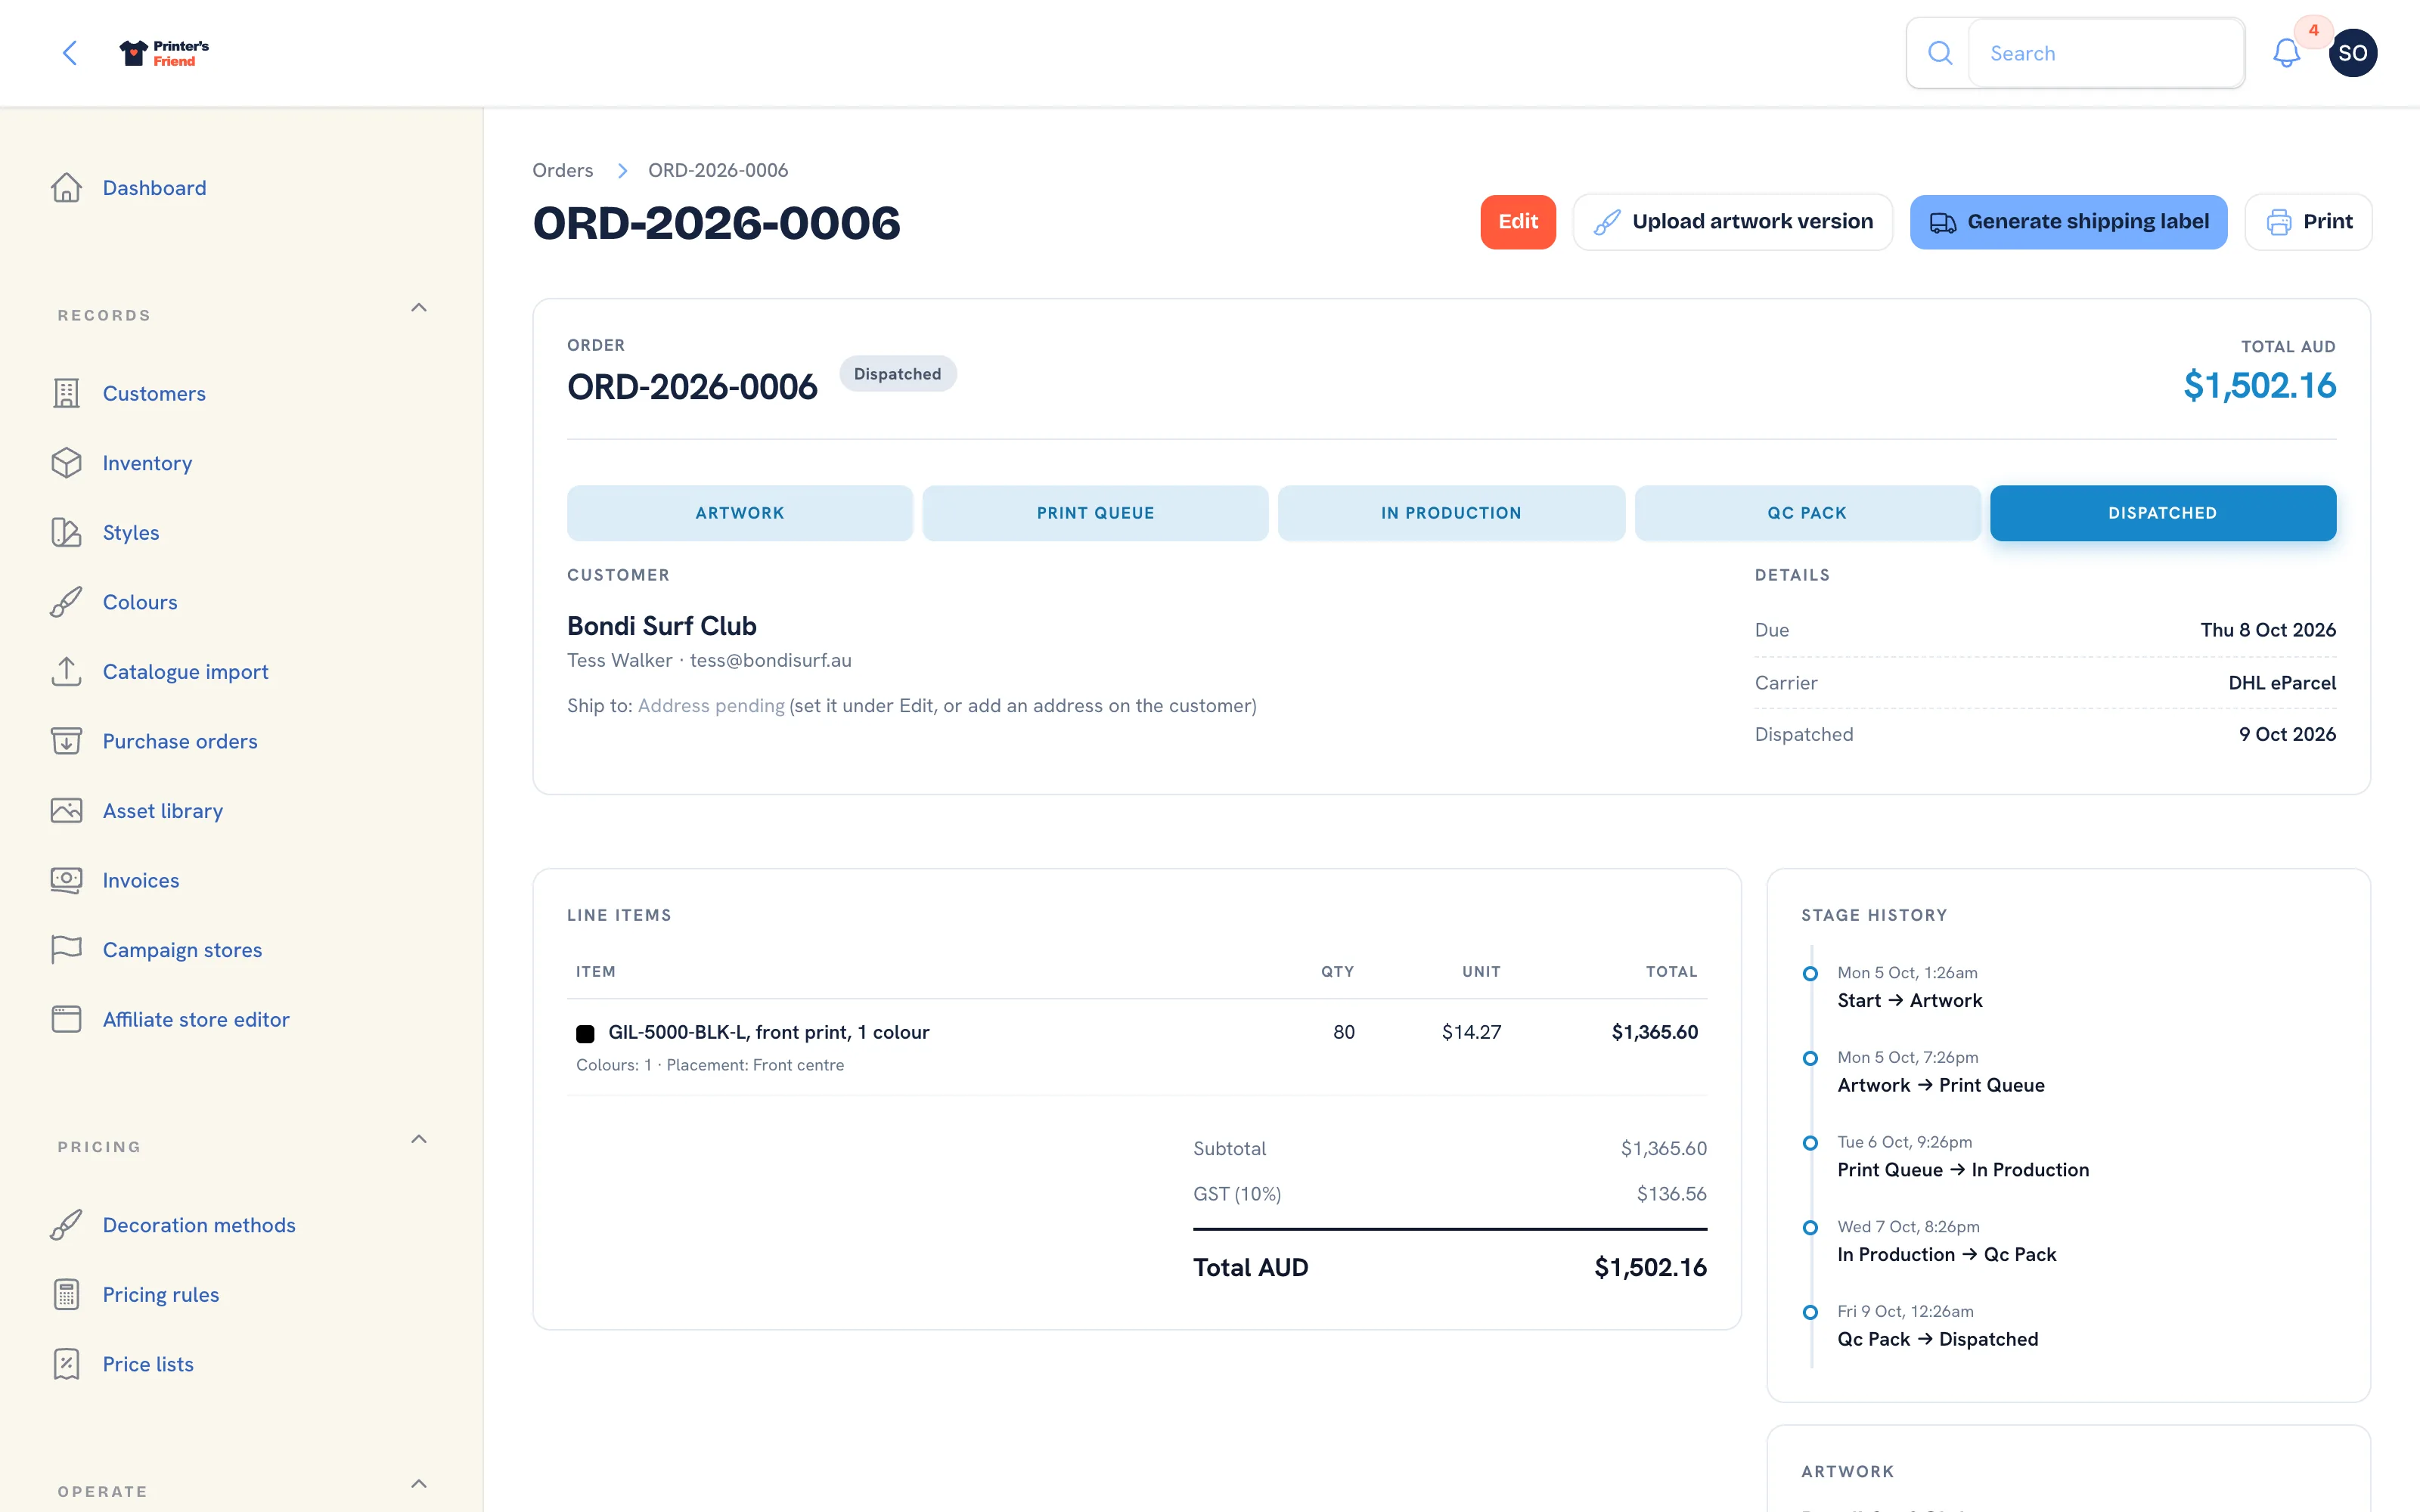 A dispatched order. The invoice is issued on the same move.
9. Get Paid
Records, then Invoices, then open the invoice. A card payment through the pay link is recorded by Stripe's webhook and the invoice flips to Paid on its own. For a bank transfer, press Record manual payment and fill in Amount, the method, Reference / receipt and Received on.
Reminders go out by themselves: three days before the due date, on the due date, and seven and fourteen days after, at 09:00 in your shop's time zone, and never once the invoice is covered.
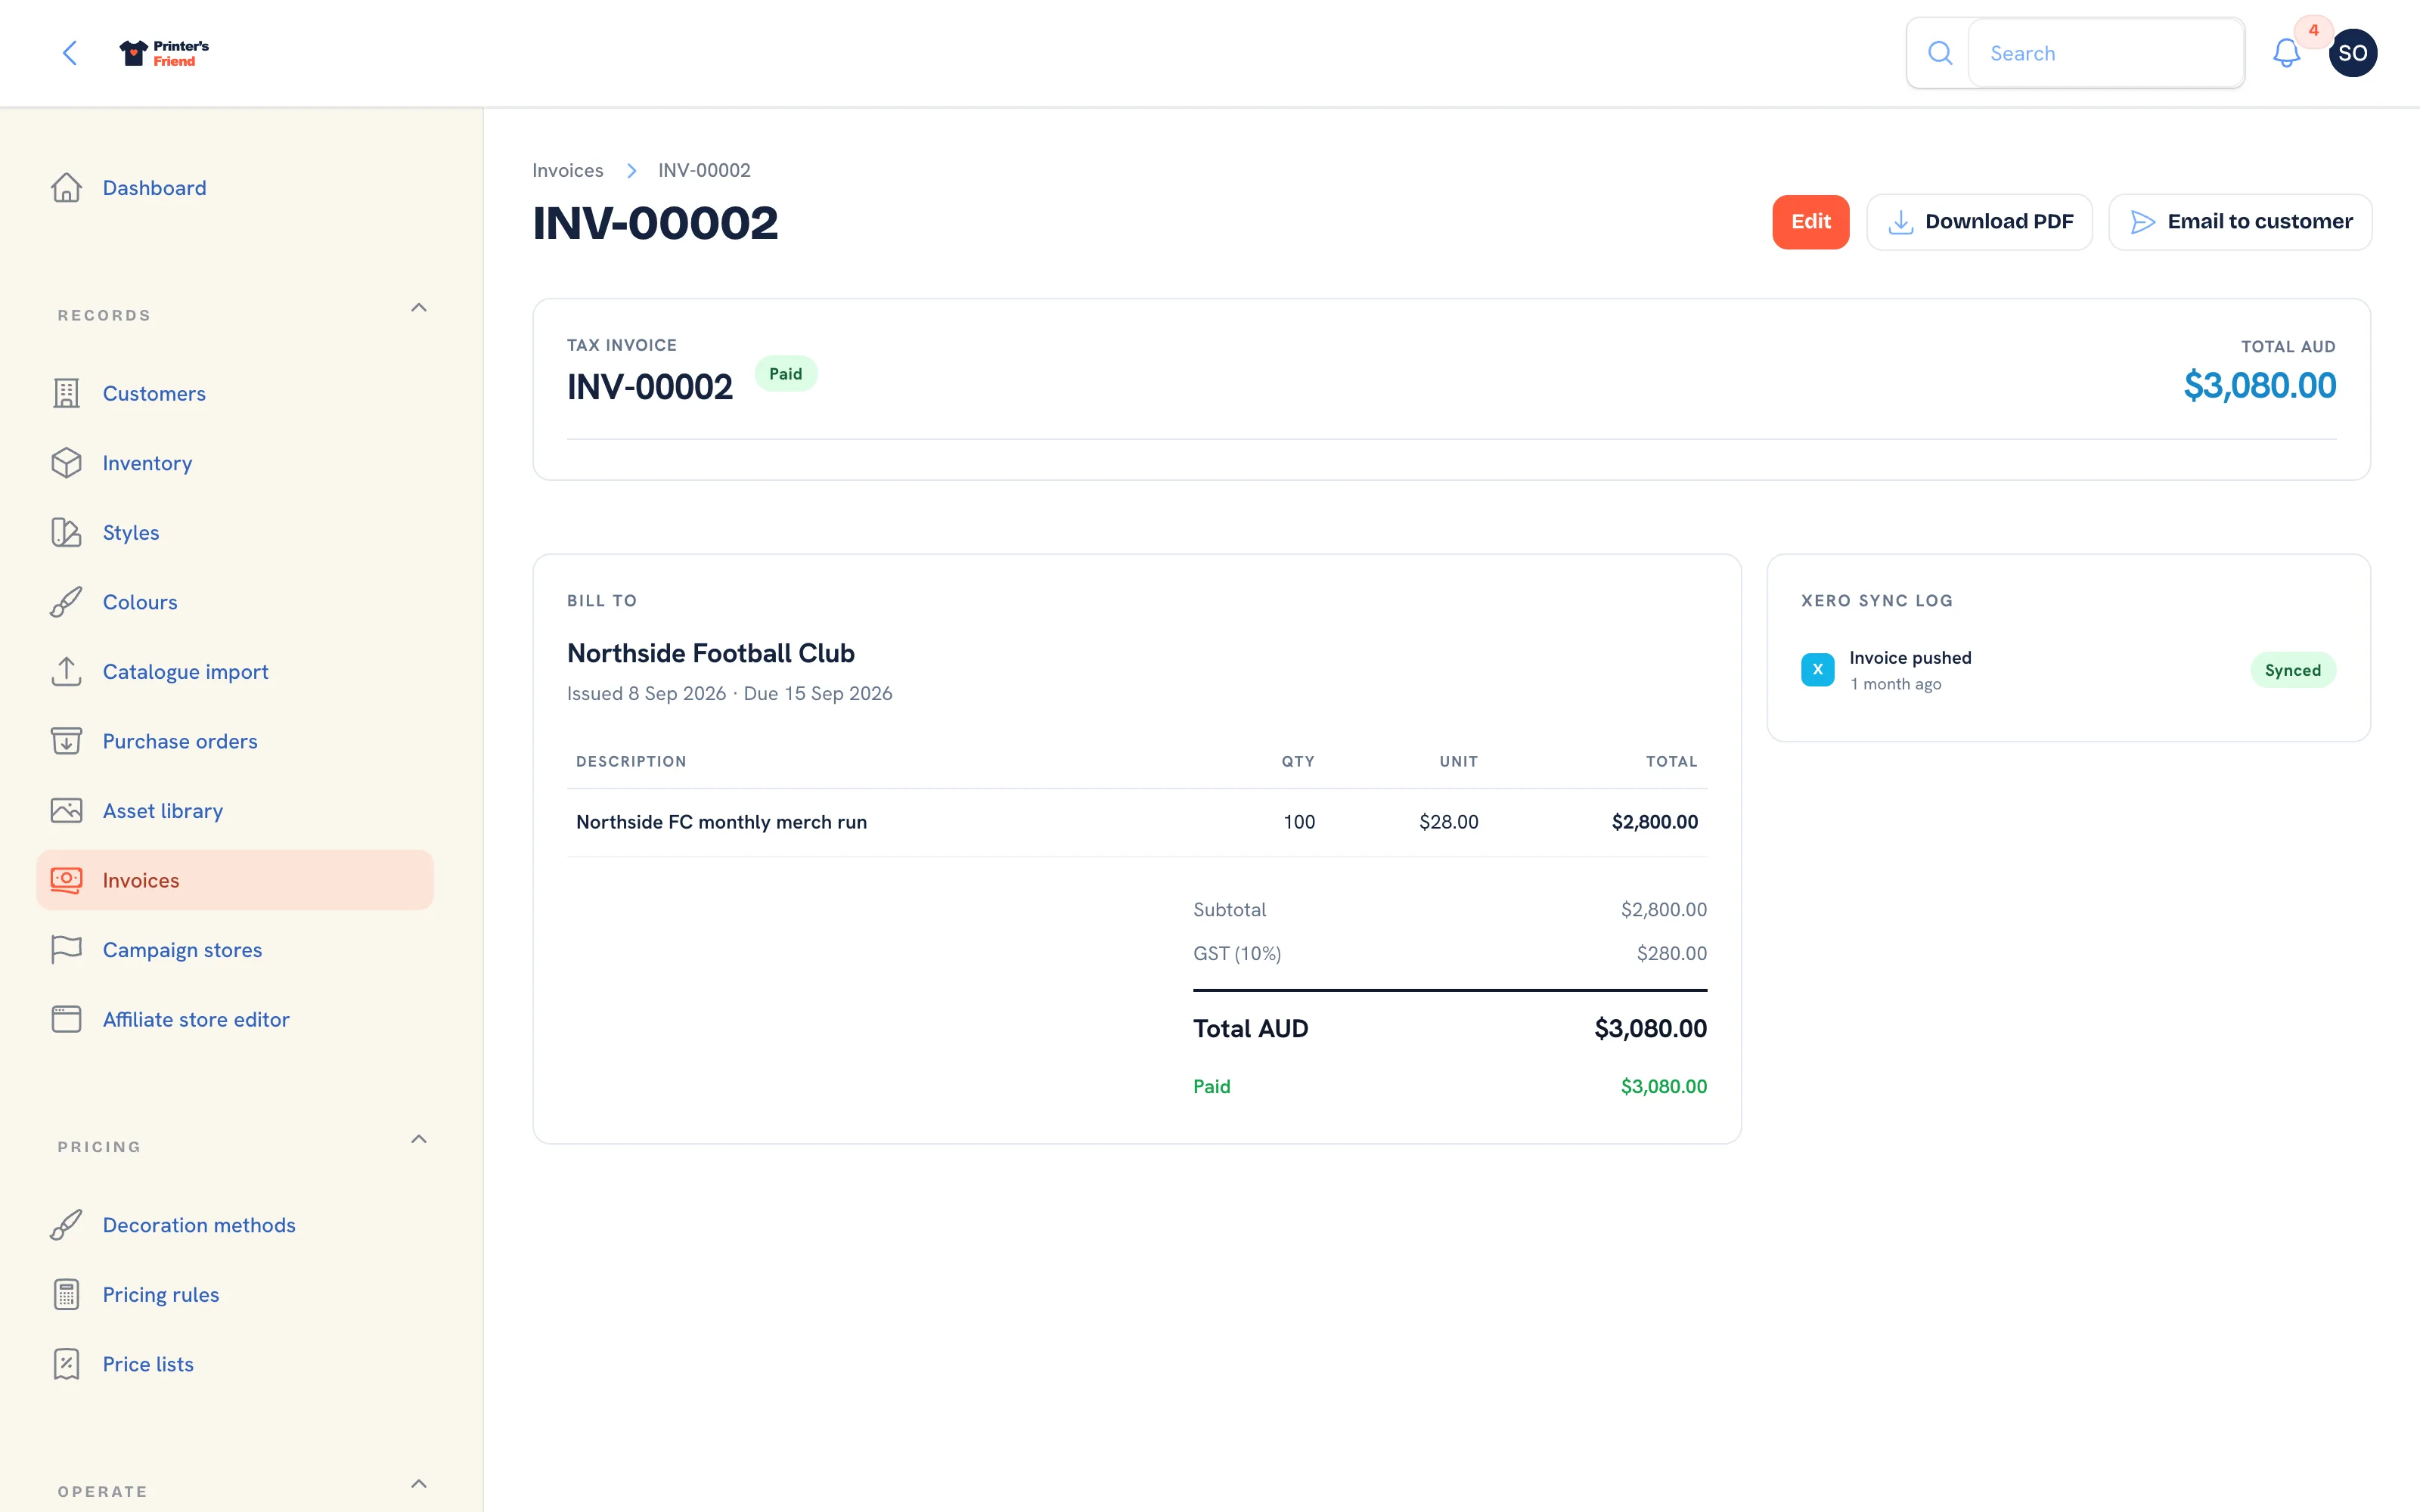 A paid invoice. Card payments arrive through the webhook; transfers are recorded by hand.
10. See What It Earned
Insight, then Reports. The job appears in revenue, decoration mix, margin and labour on jobs, and in sales commission if a rep was on the order.
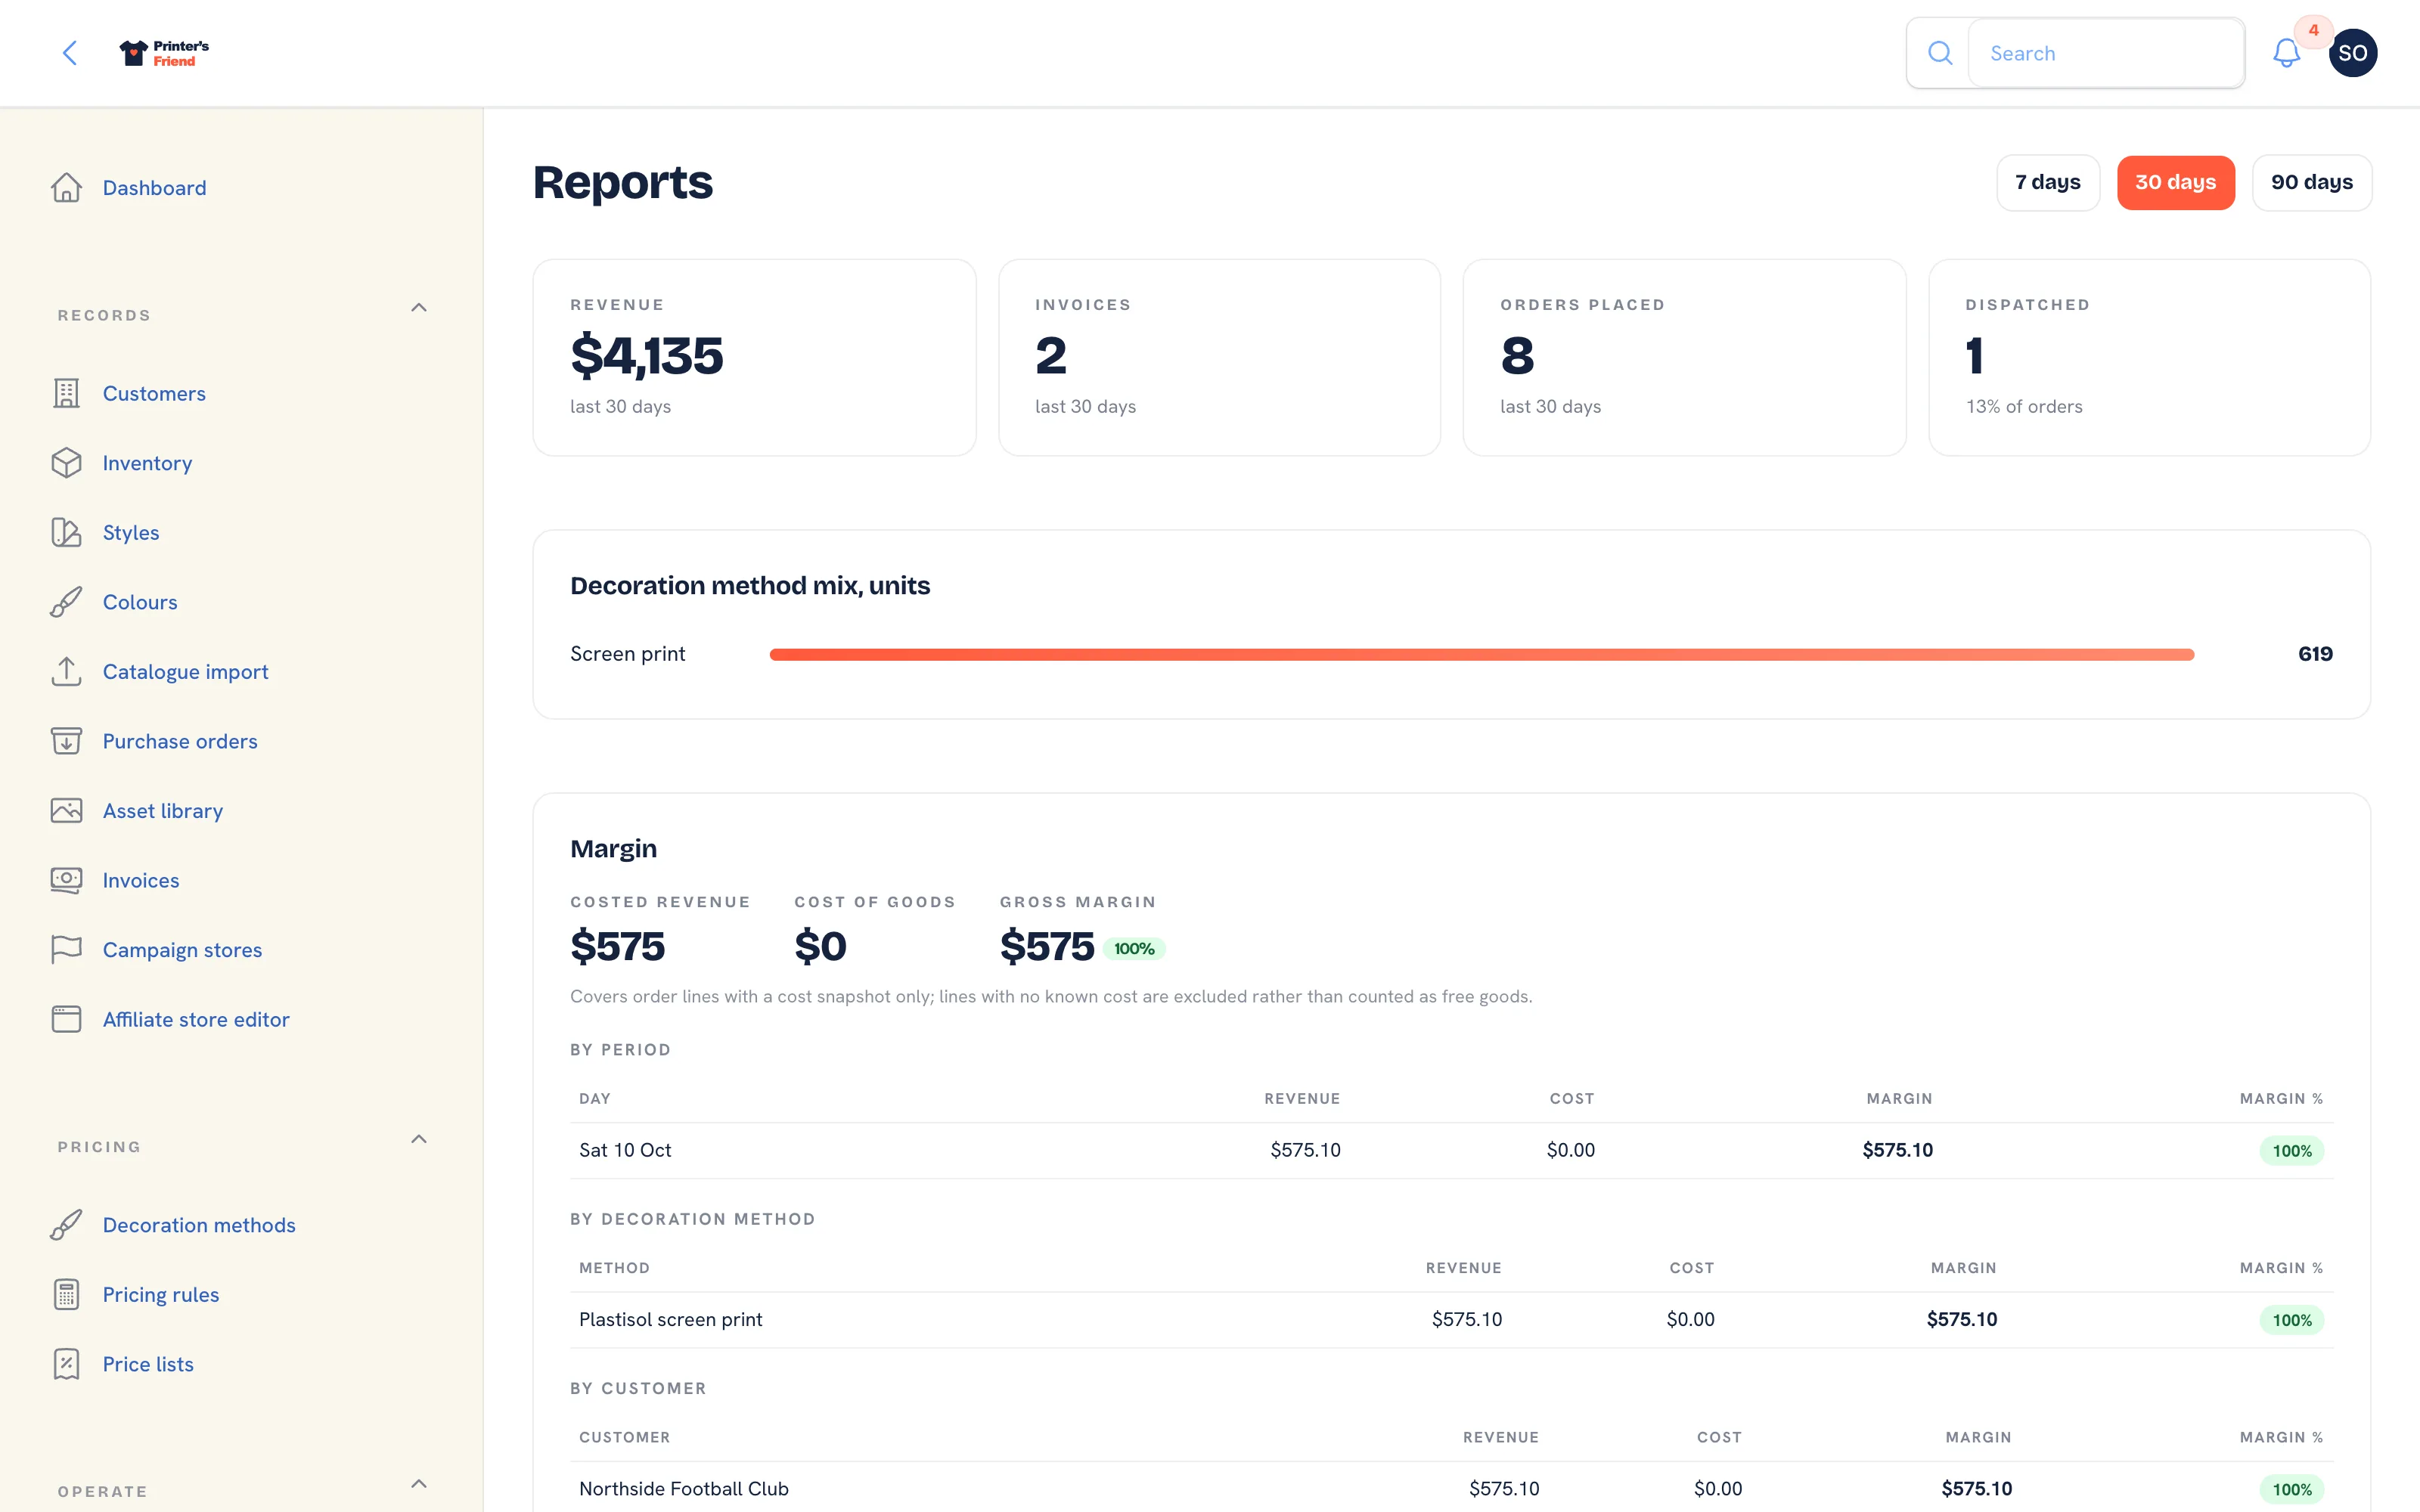 Reports. Margin is measured against the cost snapshots on the order lines.
11. The Reorder
Next season the customer signs in to the portal, opens the order and presses Reorder. That creates a quote in your workspace at today's prices, with the design on file. The portal tells them it is with your team for review and that it becomes an order once you confirm it.
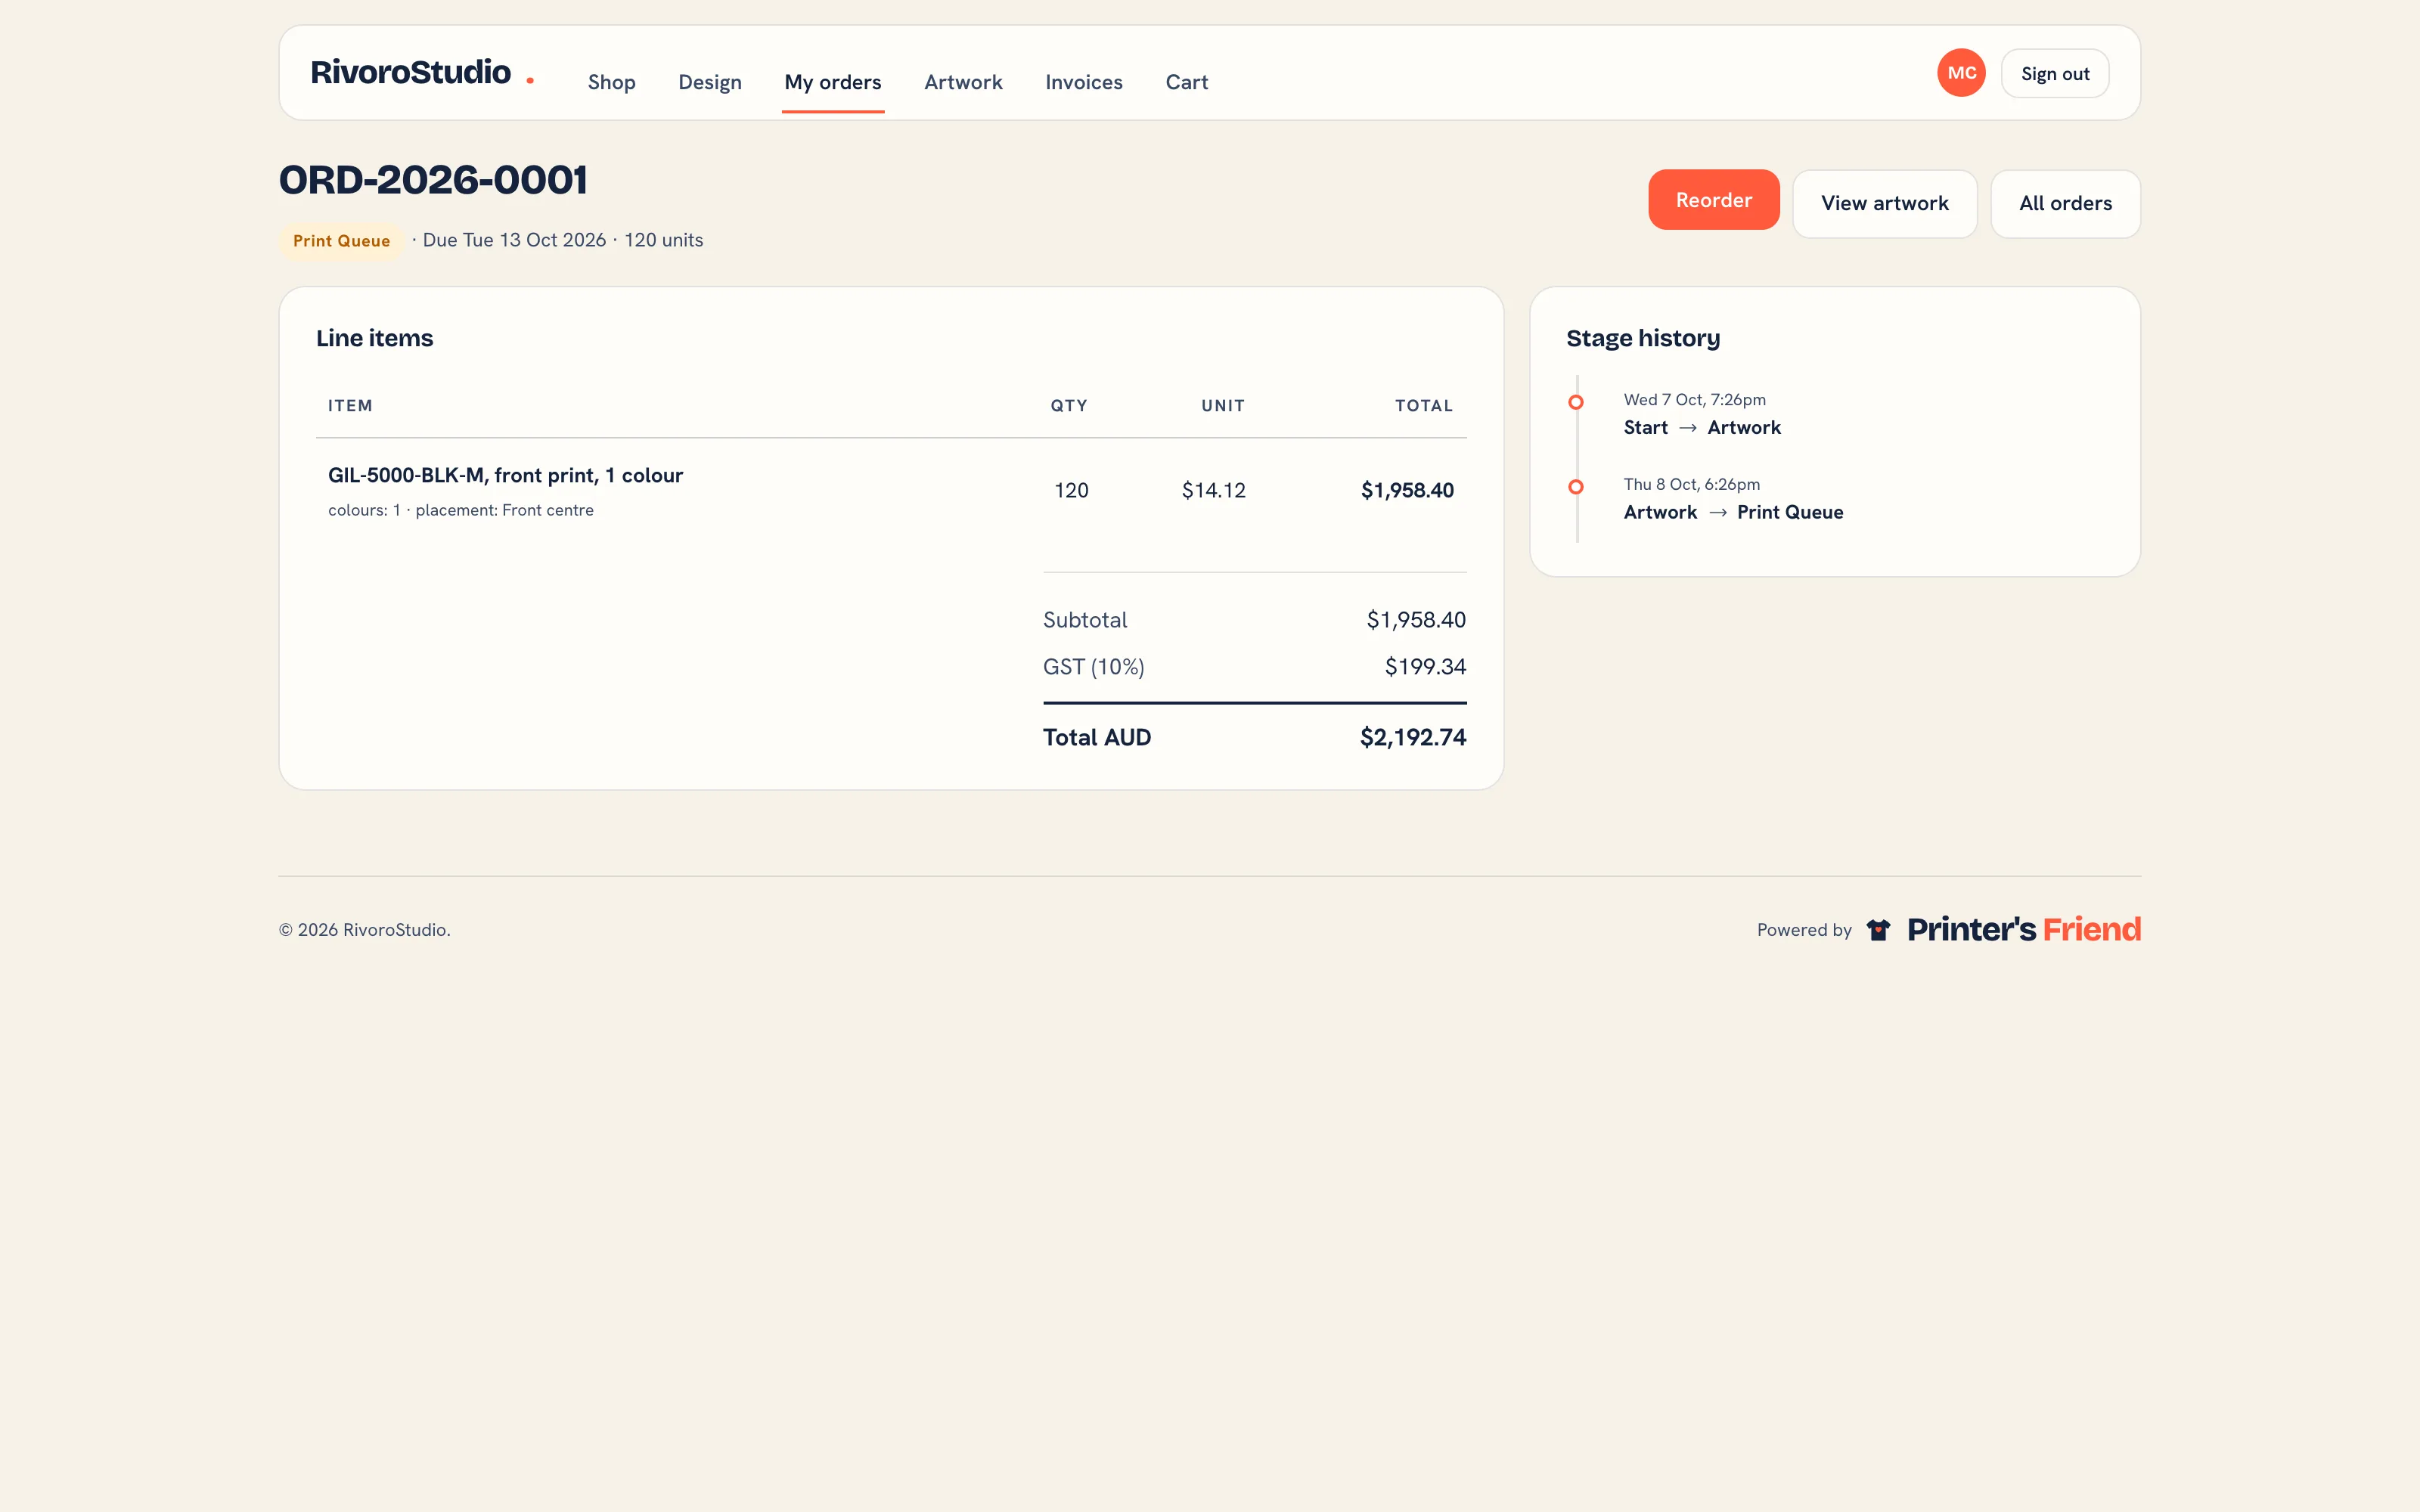 An order in the portal. The reorder lands with you as a quote.
Now Do It for Real
Run one real job through before you switch your process over, then work through the installation guide so your prices, workflow and team match how your shop operates.
Related Pages
- The Setup Wizard: the setup wizard that runs on the first sign-in
- Quotes: build, price, send, chase and convert quotes
- Orders: the order page, stage moves and what each one triggers
- Artwork and Approvals: upload proofs, send approval links and handle change requests
- Invoices: invoices, reminders, payments, refunds and credit notes
- Setup Overview and Checklist: the fifteen step installation guide