

Appearance
9. Customers and Contacts
Records, then Customers. A customer is an organisation with one or more contacts and addresses attached. Even a walk-in becomes an organisation, which is what keeps their history, reorders and invoices together.
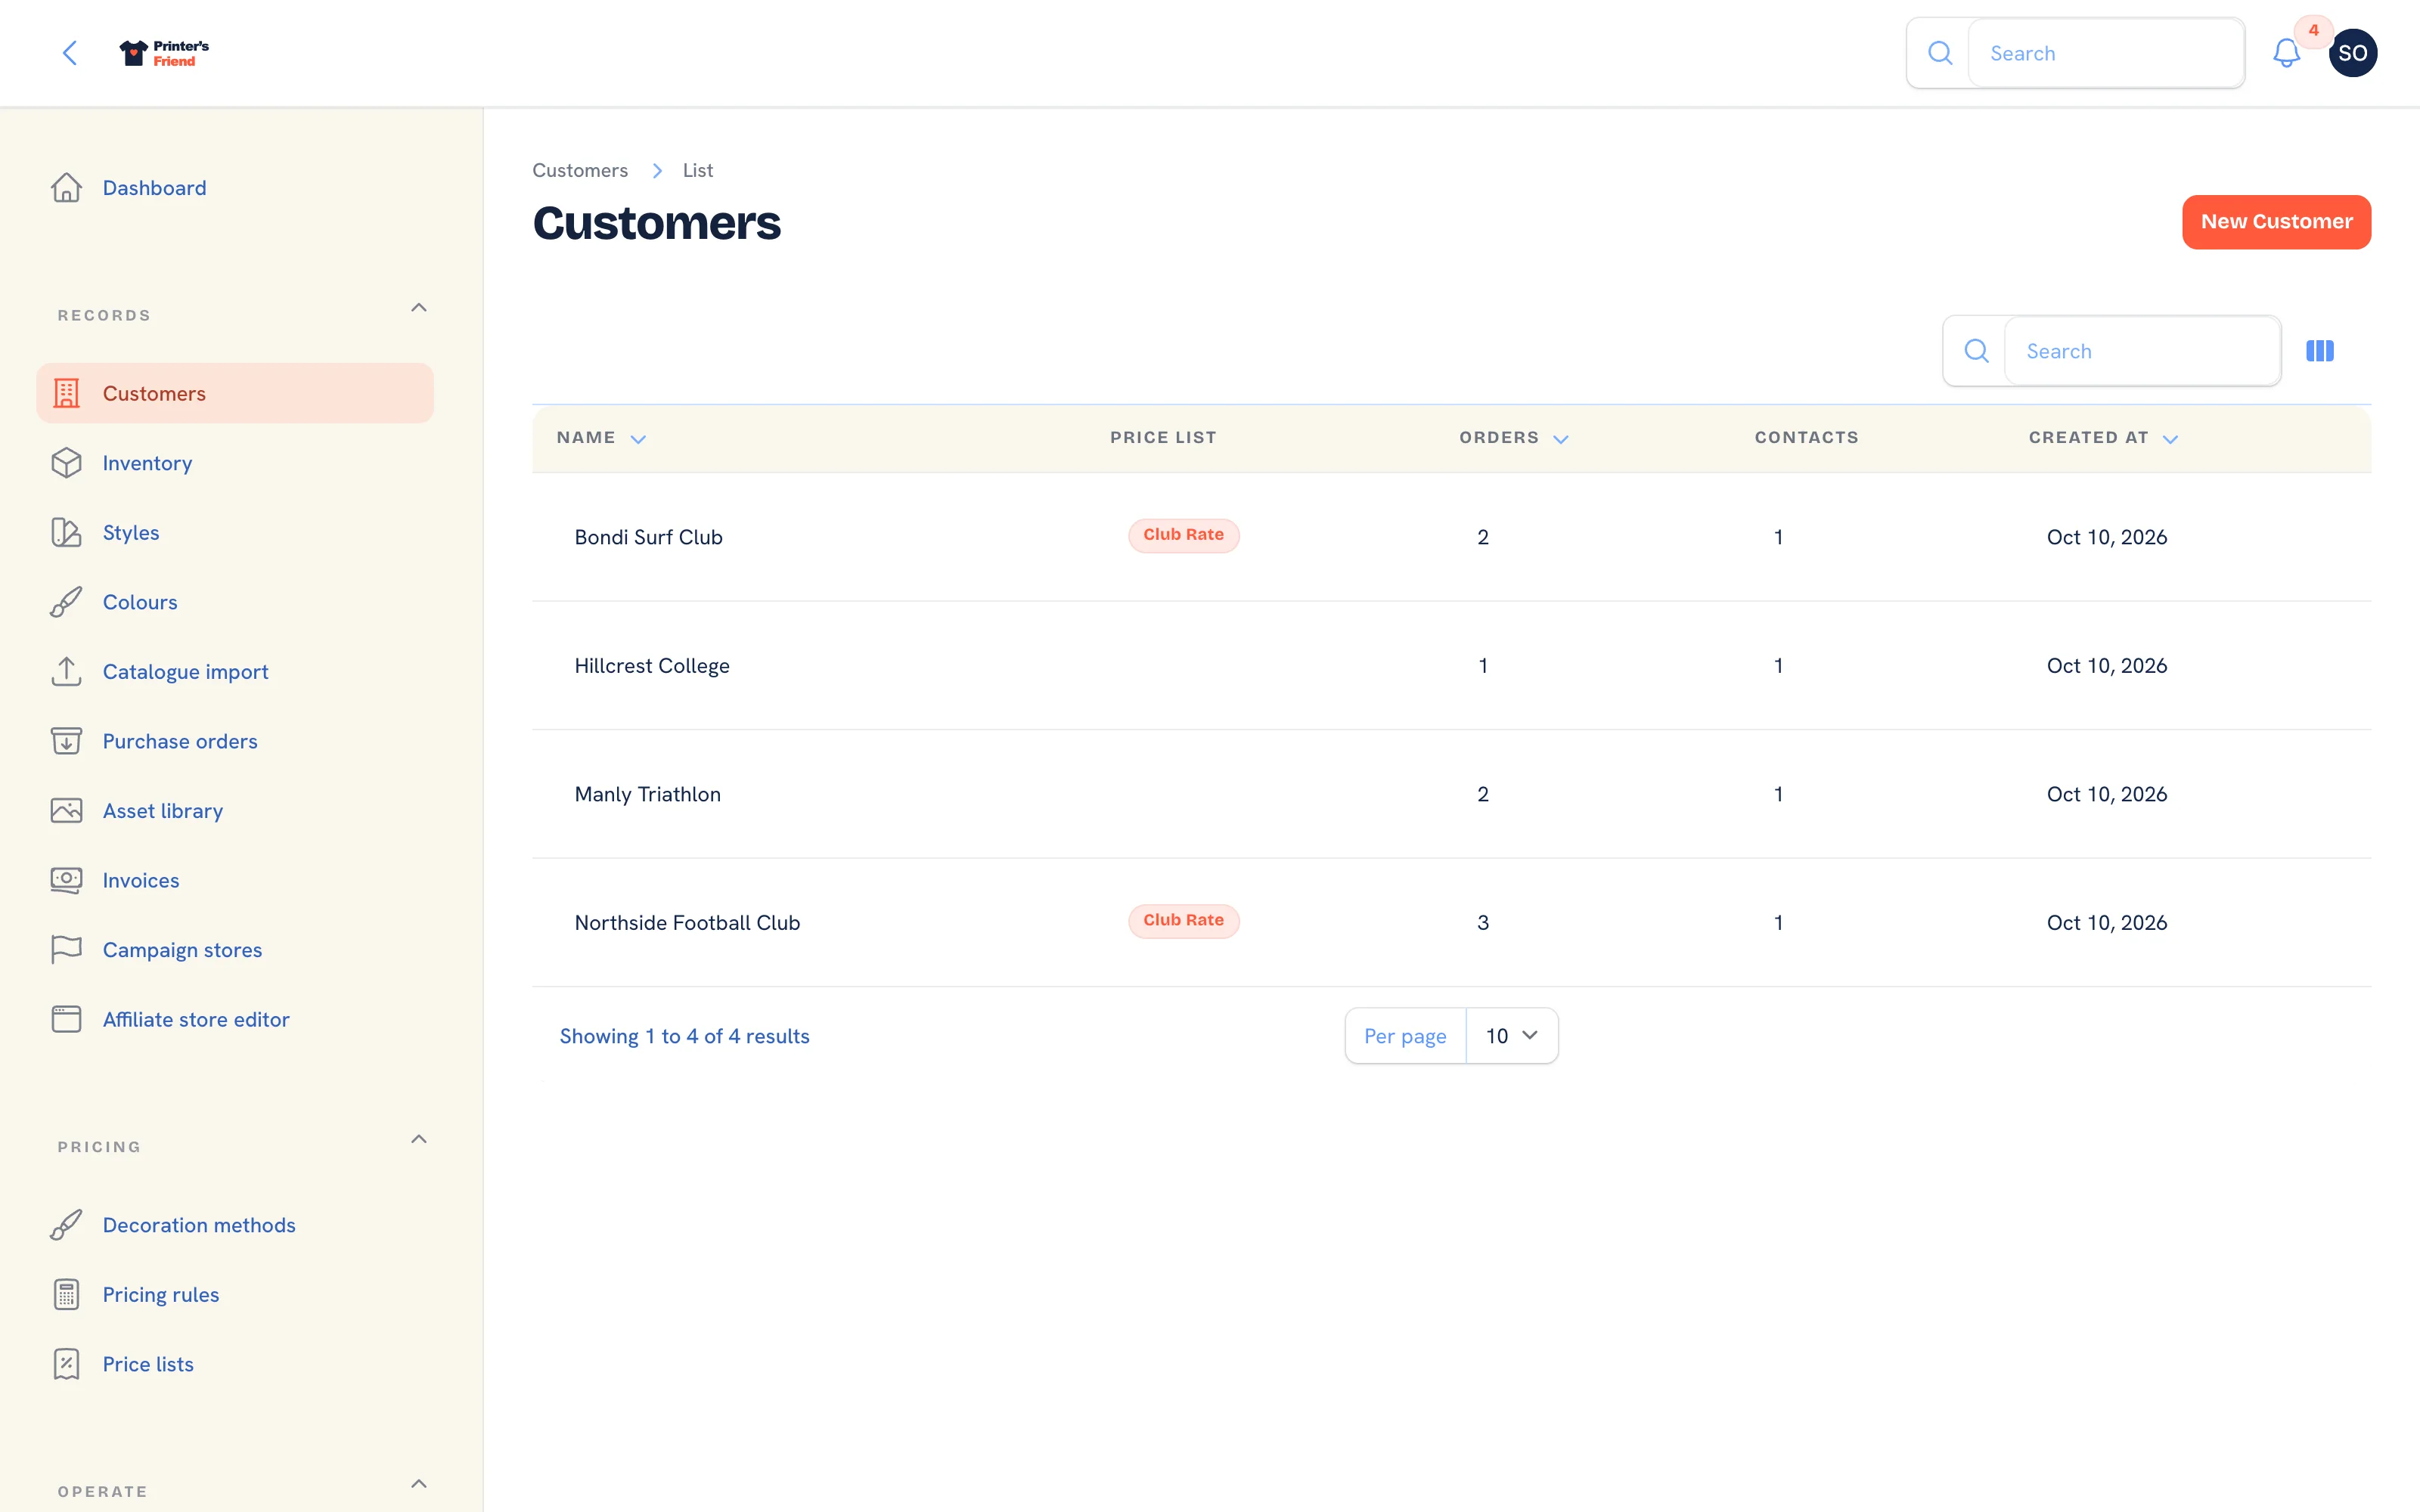 Customers. The price list badge shows which band each is on.
Where It Lives
| Page | What it's for |
|---|---|
| Records, then Customers | The list |
| New customer | The organisation itself: name, price list, payment terms, carrier, notes |
| The customer page | Lifetime value and history, with the Contacts, Addresses and Portal users sections |
| Edit | Change the organisation's fields or its addresses |
Getting Your List In
| Route | When to use it |
|---|---|
| The setup wizard's CSV import | Bulk-loading an existing list, once |
| New customer | One at a time, as new business arrives |
| Automatically | An order from the kiosk, a team store or a campaign creates the customer for you |
Do the bulk import first, so the automatic routes do not create duplicates of customers you were going to import anyway.
Adding a Customer
- Press New customer.
- Type the Name.
- Pick a Price list, or leave it blank for list price. See Price lists.
- Pick Payment terms: Net 7 (the default), Net 14, Net 30, Net 60, End of month or Cash on delivery. The due date on every invoice for this customer is computed from it.
- Optionally type a Default carrier.
- Stripe ID and Xero/QB ID are read-only; they are filled in when the matching integration first handles this customer.
- Add Internal notes. Customers never see them.
- Press Create.
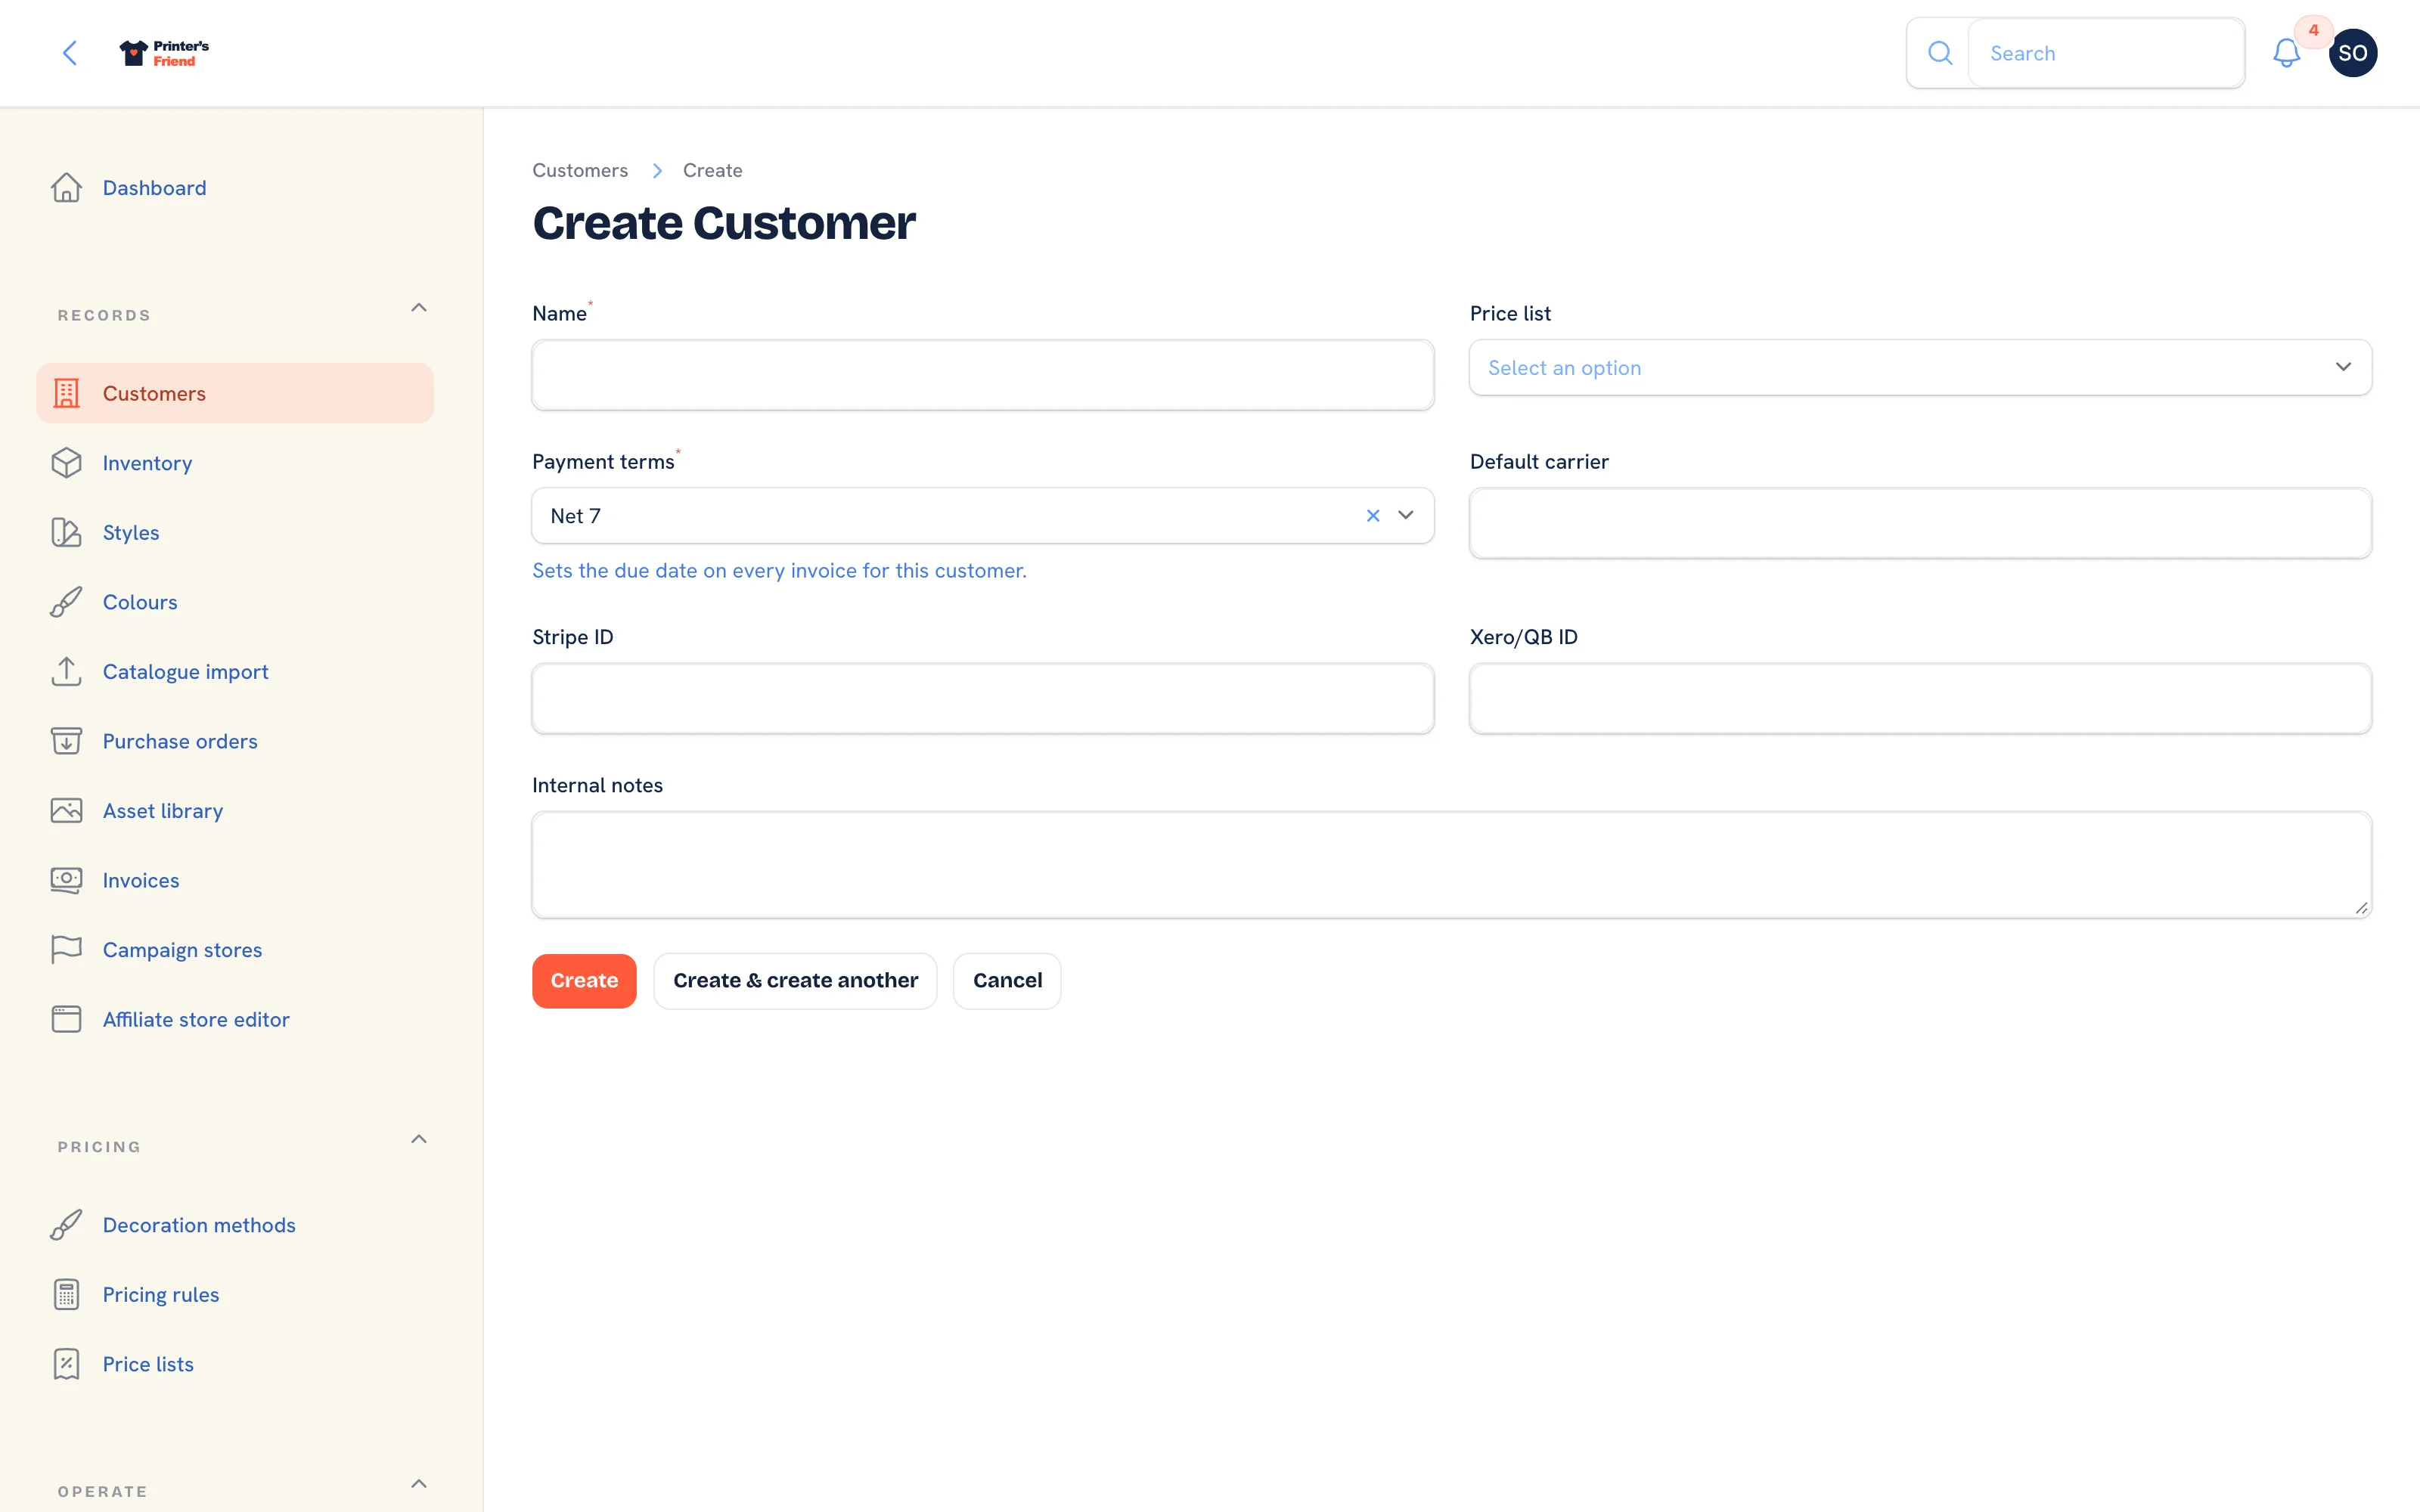 Adding a customer. Payment terms are a fixed set.
Contacts
A contact is a person at the customer. Quotes, proofs and invoices are emailed to the contact named on the quote or order, and to the primary contact when nobody is named. A contact needs an email address before a quote can be sent or a portal login created.
- On the customer page, under Contacts, press Add contact.
- Type Name, Email and Phone.
- Tick Primary contact for the person documents go to by default. Marking one primary clears the previous one.
- Leave Marketing consent blank unless the person has agreed to marketing email; job emails are not marketing and always send. When you record a source, a Consent note field appears for where and when they agreed.
- Press Create.
The row actions are Edit, Invite to portal, Make primary and Delete. The Portal column shows No email, Not invited, Invited or Deactivated.
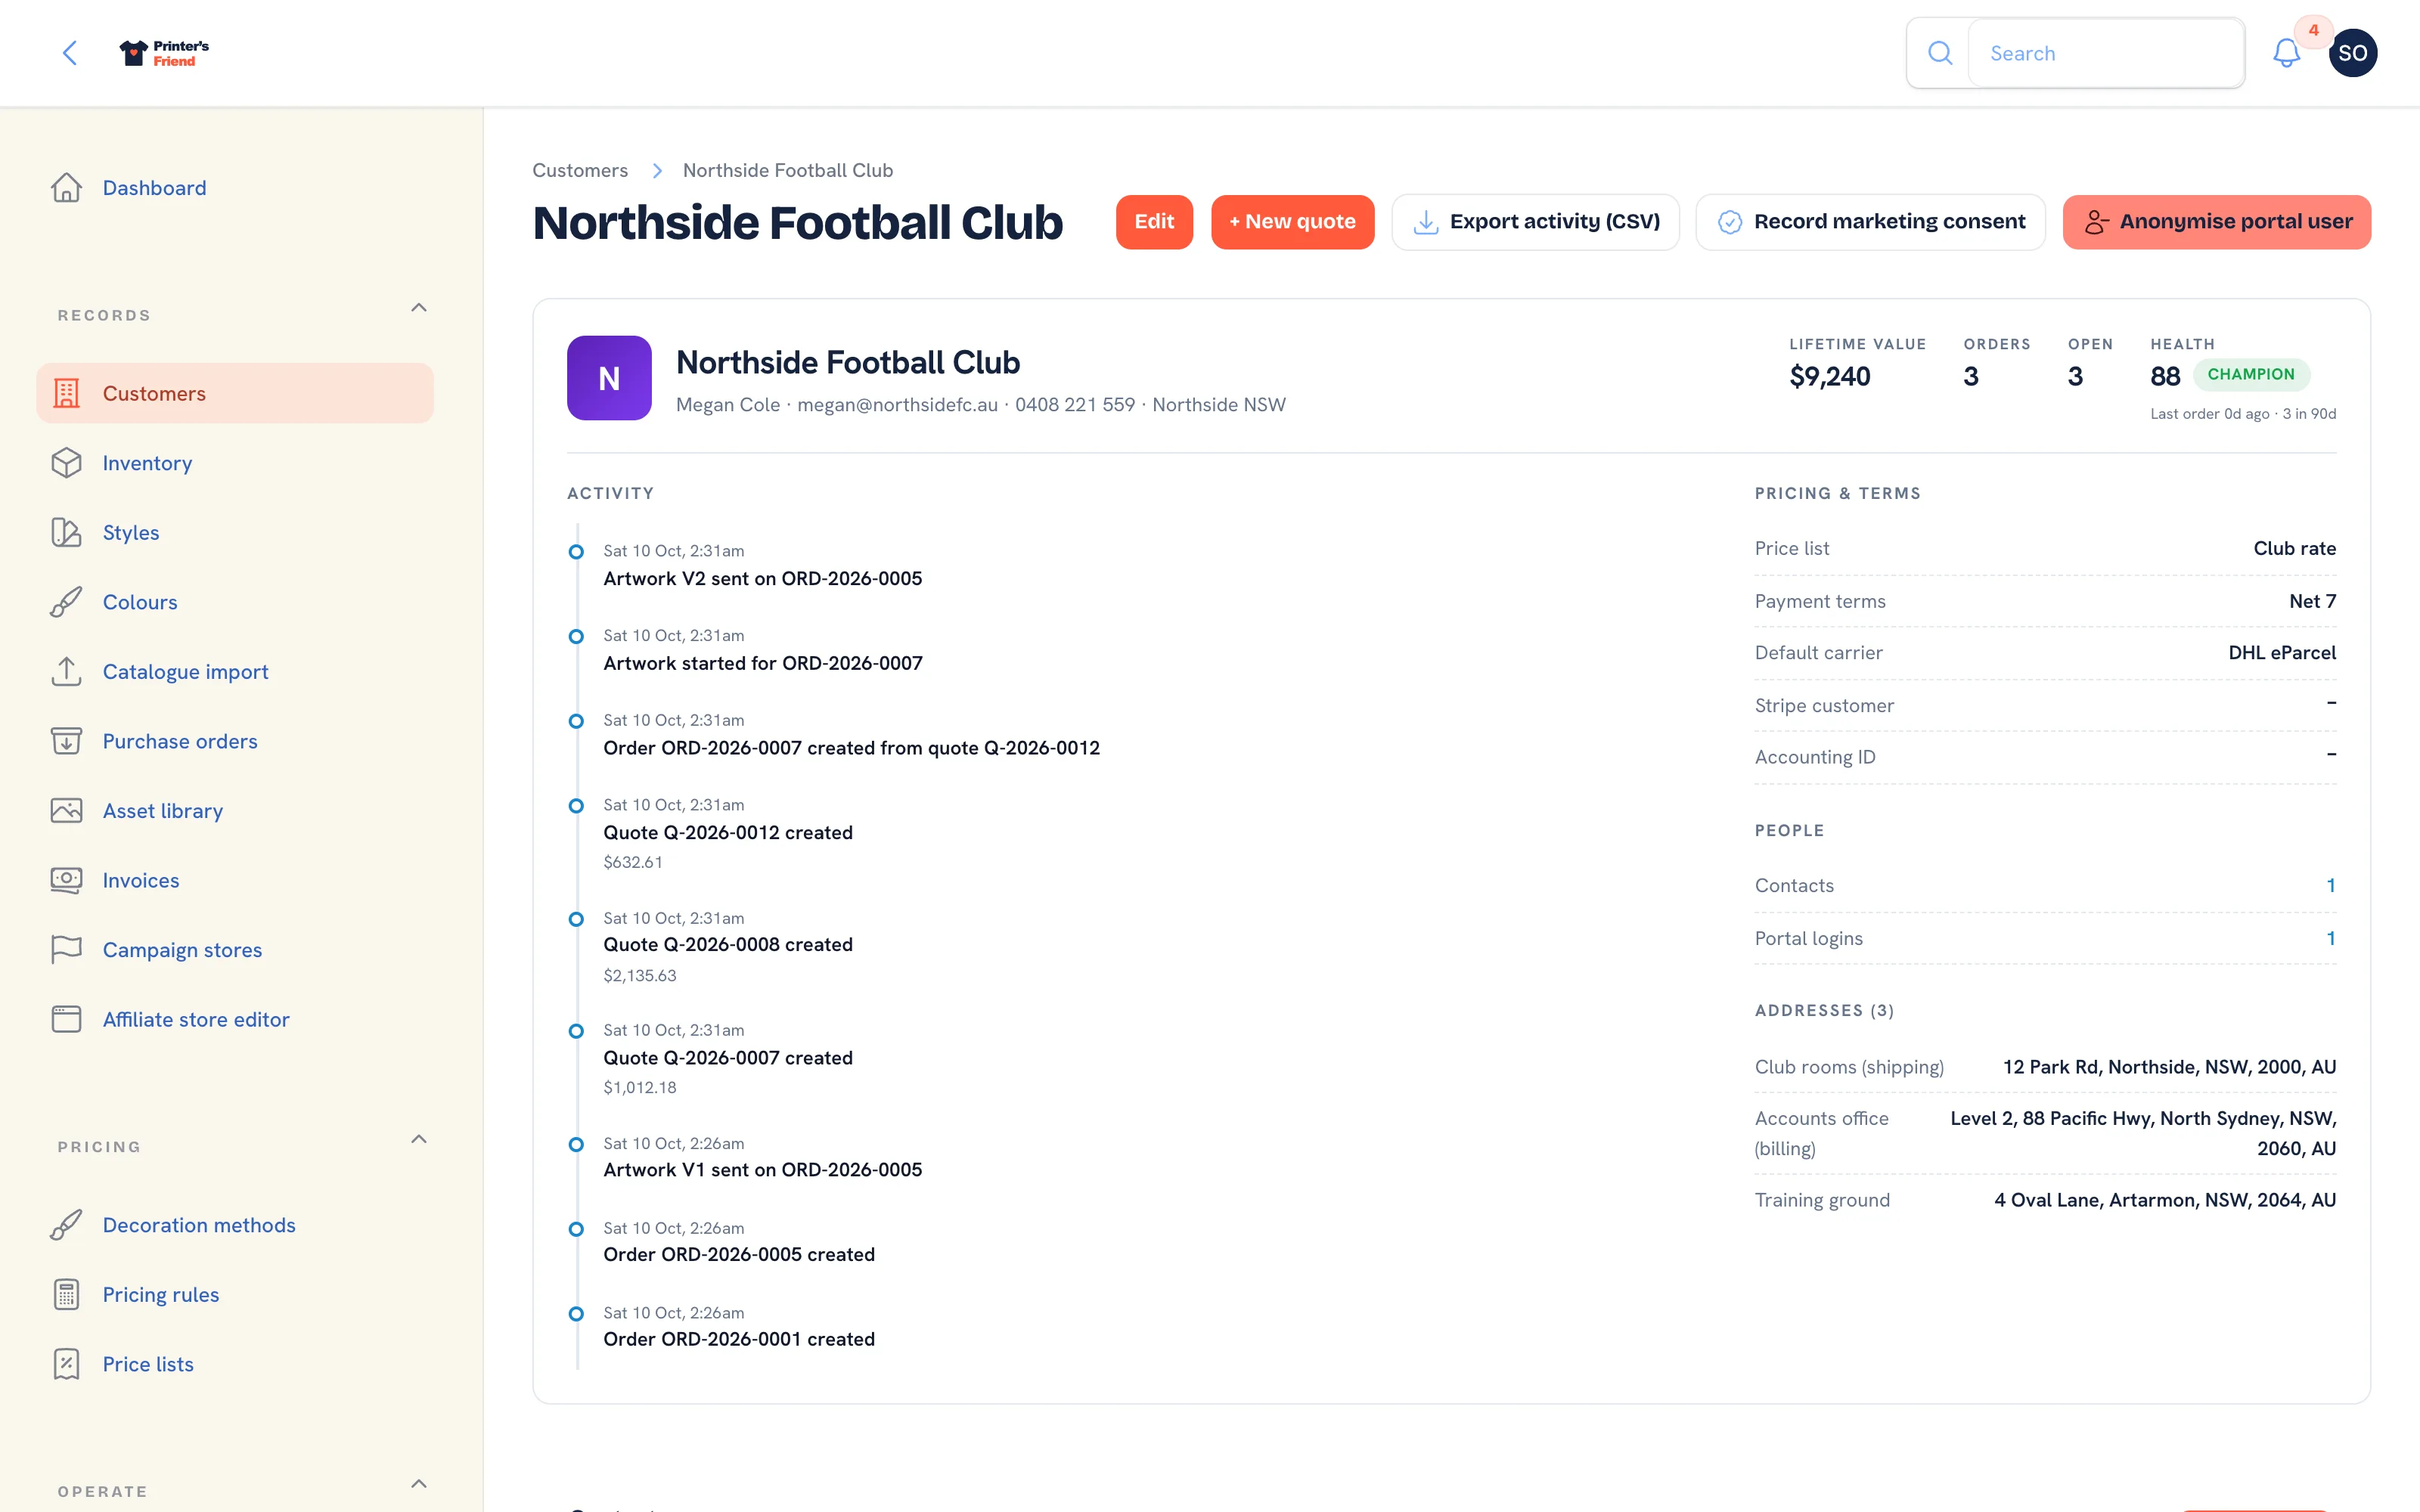 The customer page. Contacts, addresses and portal logins sit under the summary.
A quote that will not send points you here
Mark sent on a quote for a customer with no email address is refused, and the notice carries an Add a contact button that opens this section.
Addresses
Under Addresses, press Add address: a Label such as Club rooms, the address lines, Suburb or city, State or region, Postcode and the two letter Country code, which defaults from your region. Tick Default billing address and Default shipping address as appropriate; one address can be each default, and saving a new default clears the old one.
When a quote is accepted the defaults are copied onto the order, and the packing slip and the shipping label read the order's addresses. An order with no address shows "Address pending".
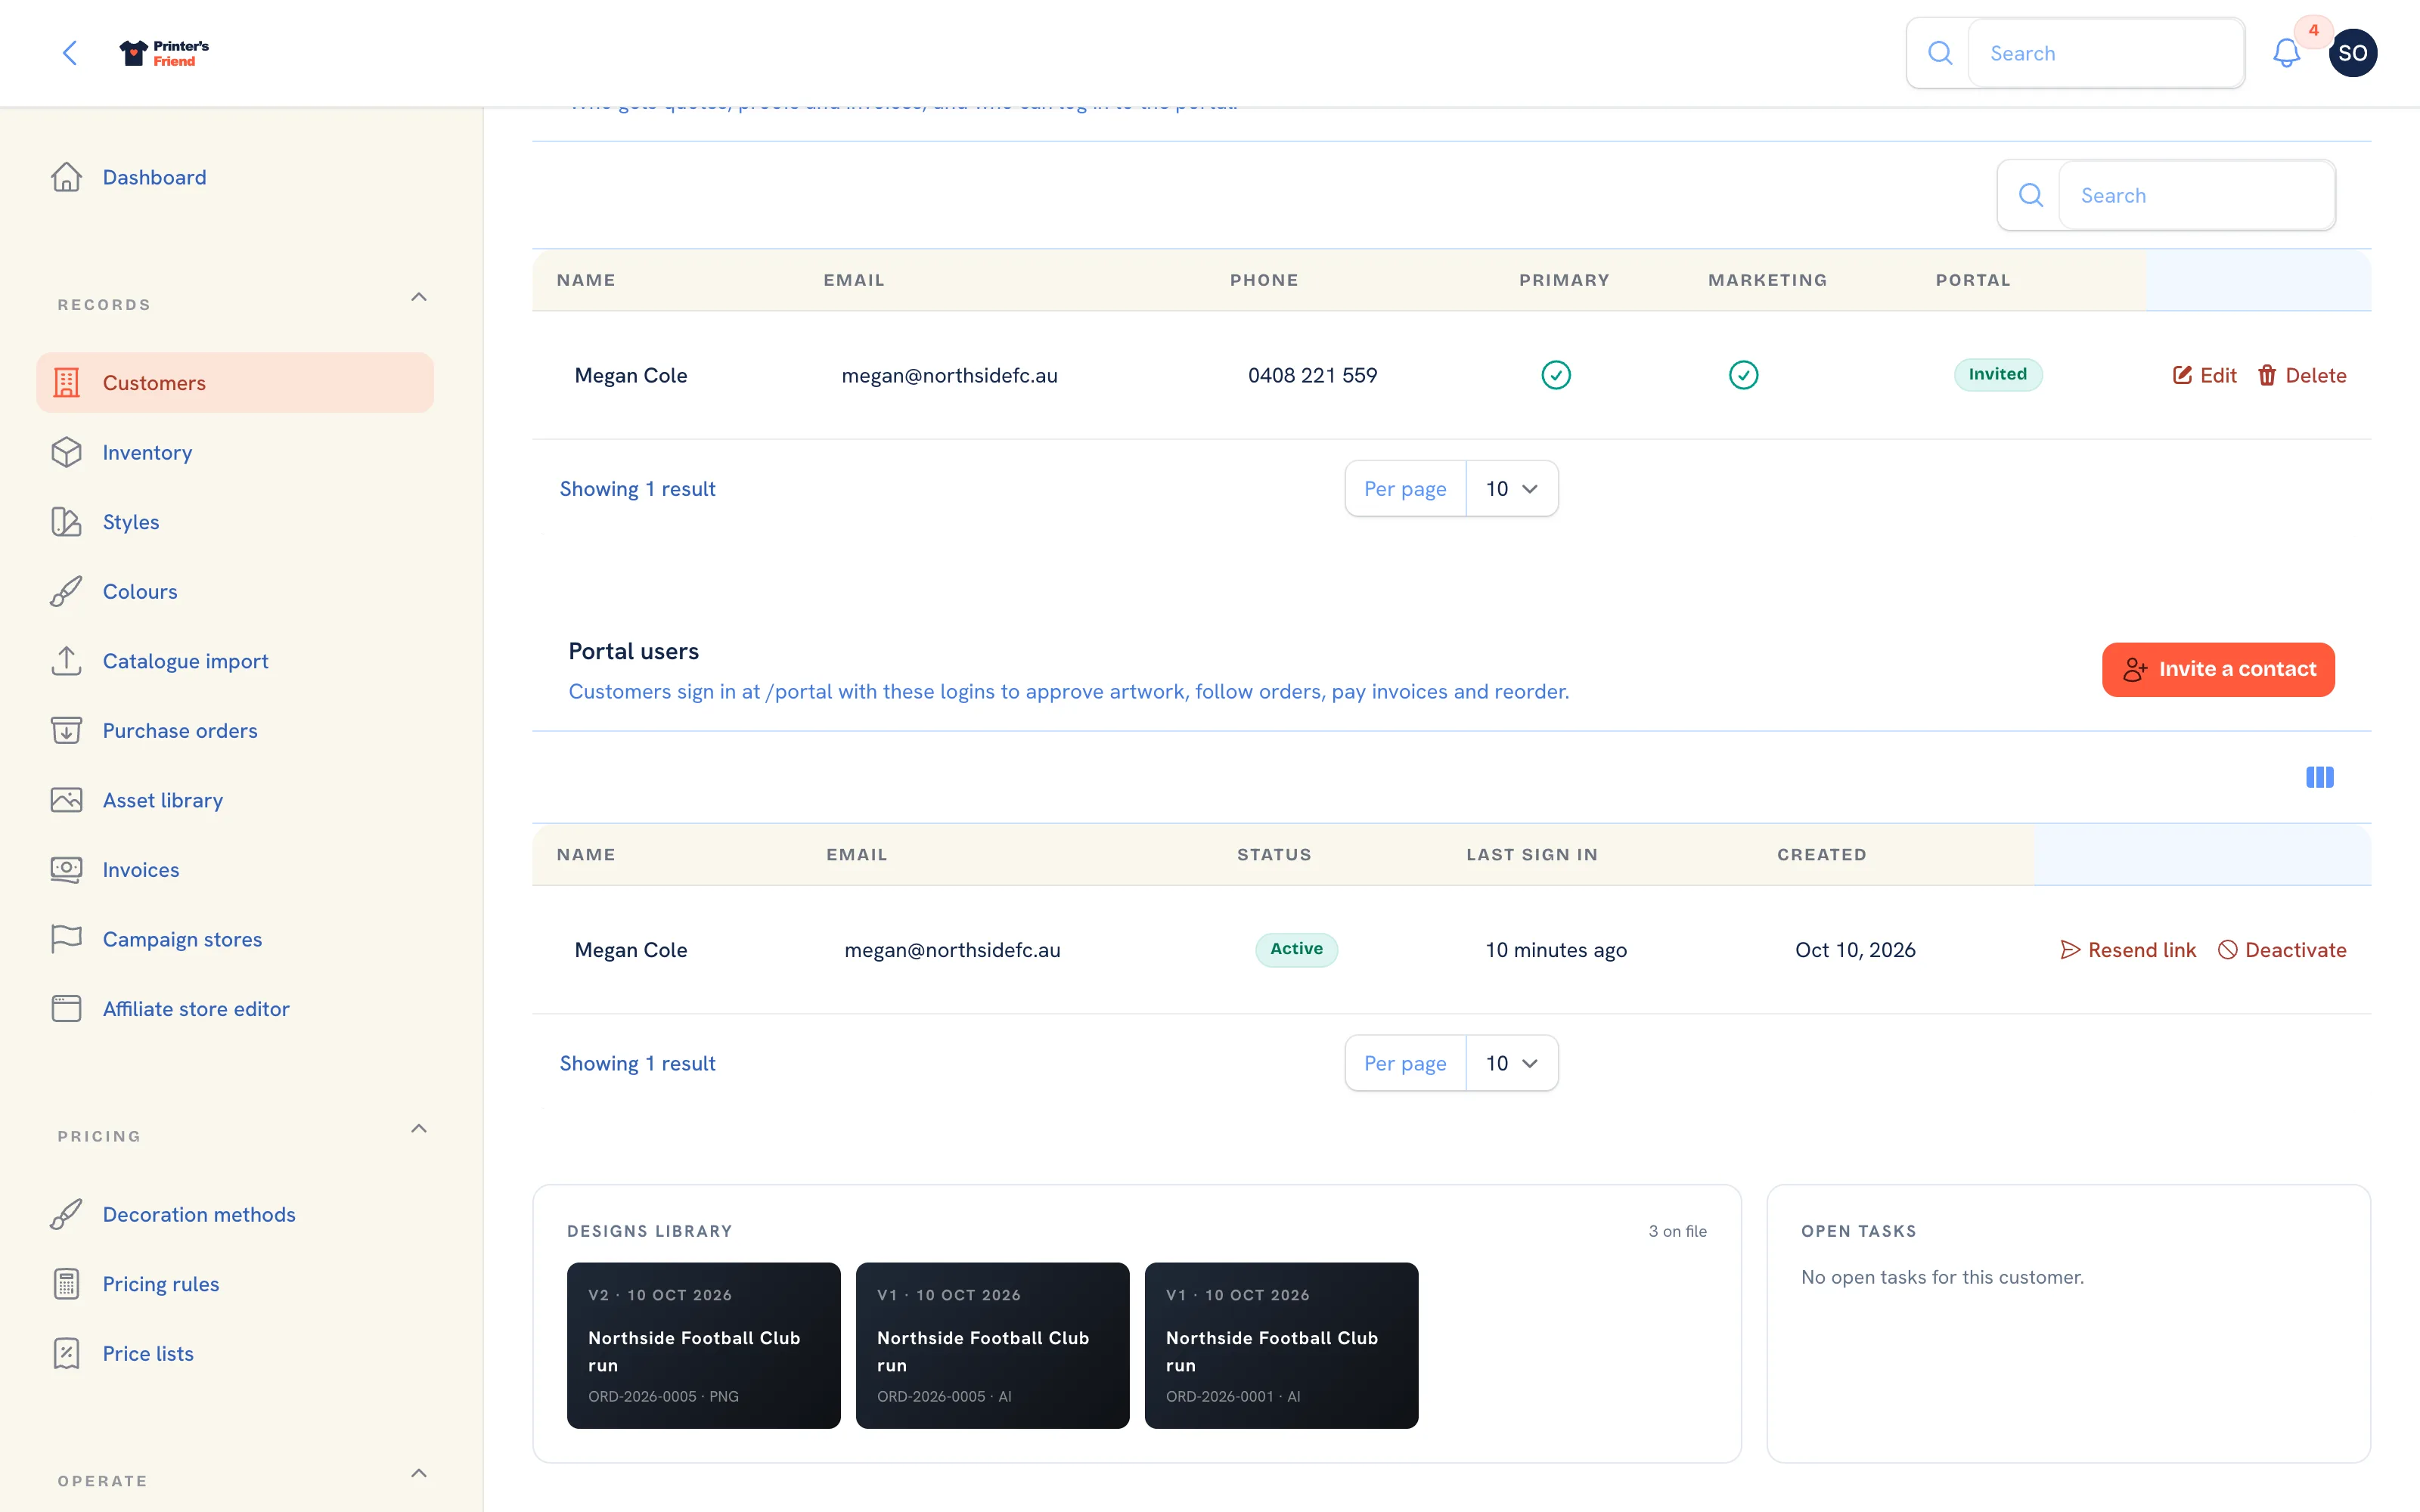 Contacts, addresses and portal users on the customer page.
Portal Logins
Invite to portal on a contact creates their portal login and emails them a link to set a password. The Portal users section lists every login with its status and last sign-in, and lets you resend the link, deactivate or reactivate. The full steps are on The customer portal.
Editing a Customer
Edit on the customer page changes the organisation's fields and manages its addresses. Contacts and portal users are managed on the customer page itself.
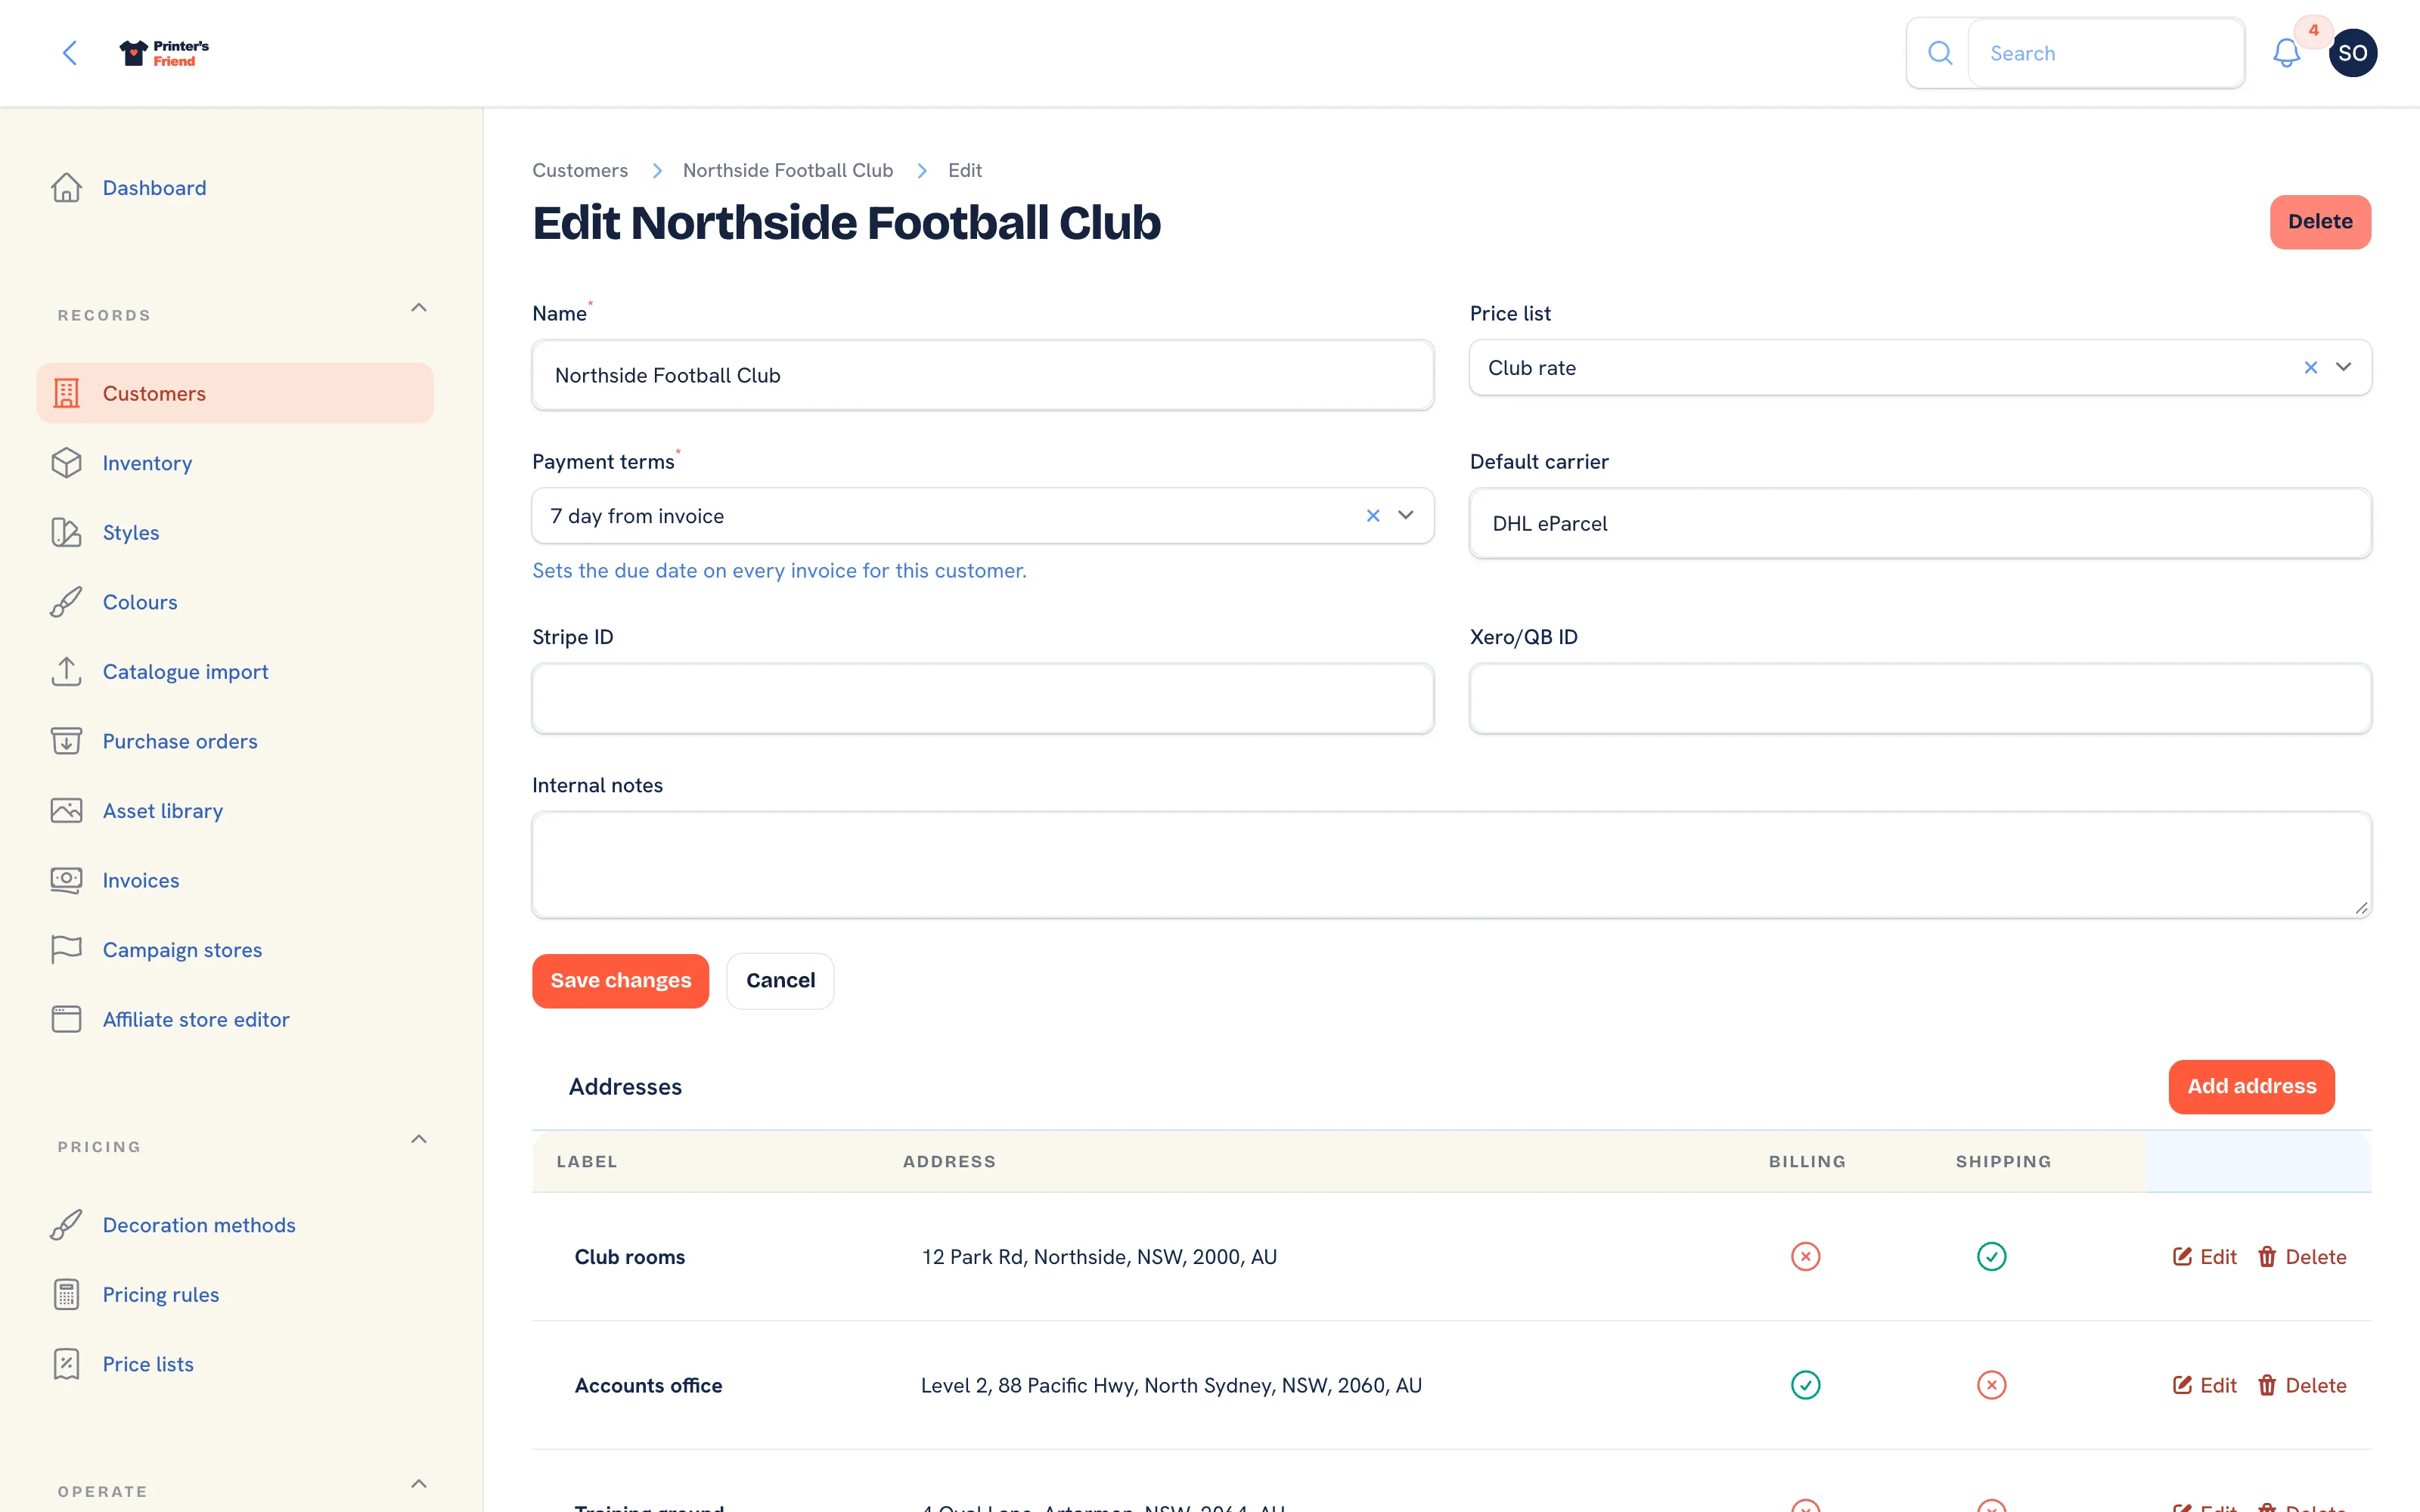 Editing a customer.
Housekeeping Worth Doing at Setup
- Put every imported customer on the right price list. A club quoted retail is the most common post-import miss.
- Set payment terms on trade accounts, so due dates and reminders are right.
- Give each customer's primary contact an email address, or quotes to them cannot be sent.
- Merge duplicates before you invite anyone to the portal.